

 by
by We will view the requests between “Burp Suite” and the client/server and make the necessary changes to the requests. As soon as Burp Suite starts working, the proxy server in our local (127.0.0.1) gets up. We also listen to this proxy server from the browser. Now, requests from the browser to the server will go through this proxy server. Through Burp Suite, requests can be viewed without going to the server.
There is a working logic provided by the server responding to the requests made by the web applications using the client browser, that is, by the communication between the client’s browser and the server. That’s why HTTP requests are a cornerstone of web applications. We will also examine HTTP requests, manipulate them and try to exploit vulnerabilities if any.

Burp Suite is also available in a pro version and is paid. In this article, we will use Burp Suite Community Edition. For the operations we will describe, this free version will be sufficient. Now we will use the Burp Suite program on Kali Linux. Burp Suite works on Windows, Linux or MacOS operating systems.
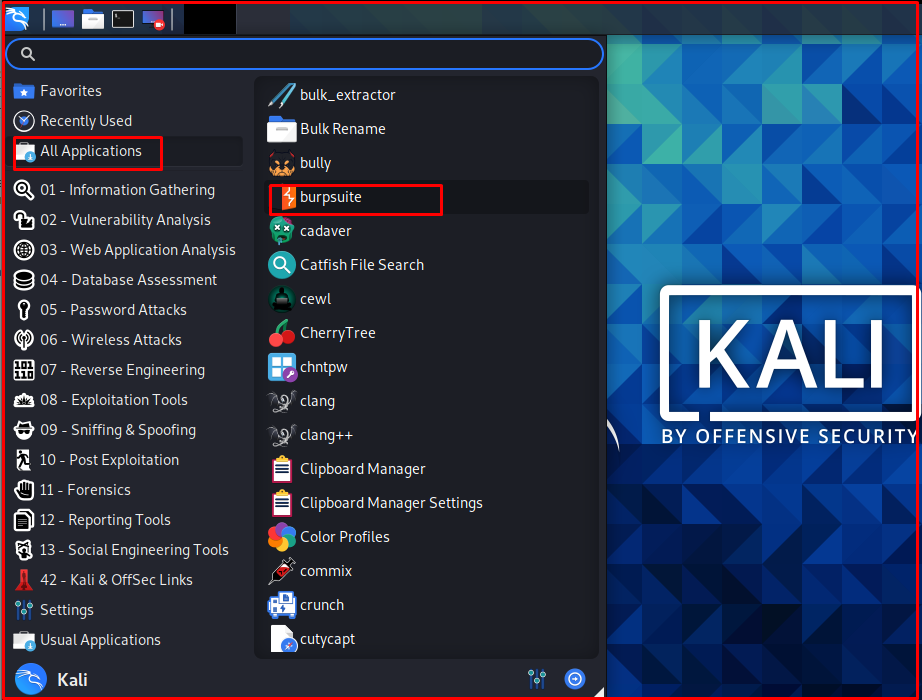
Burp is installed by default in Kali Linux. Run the Burp Suite program on Kali Linux as follows.
The main screen of the program opens as follows. The parts we will use most often here will be “Proxy”, “Intruder” and “Repeater“. We will examine these parts in detail.

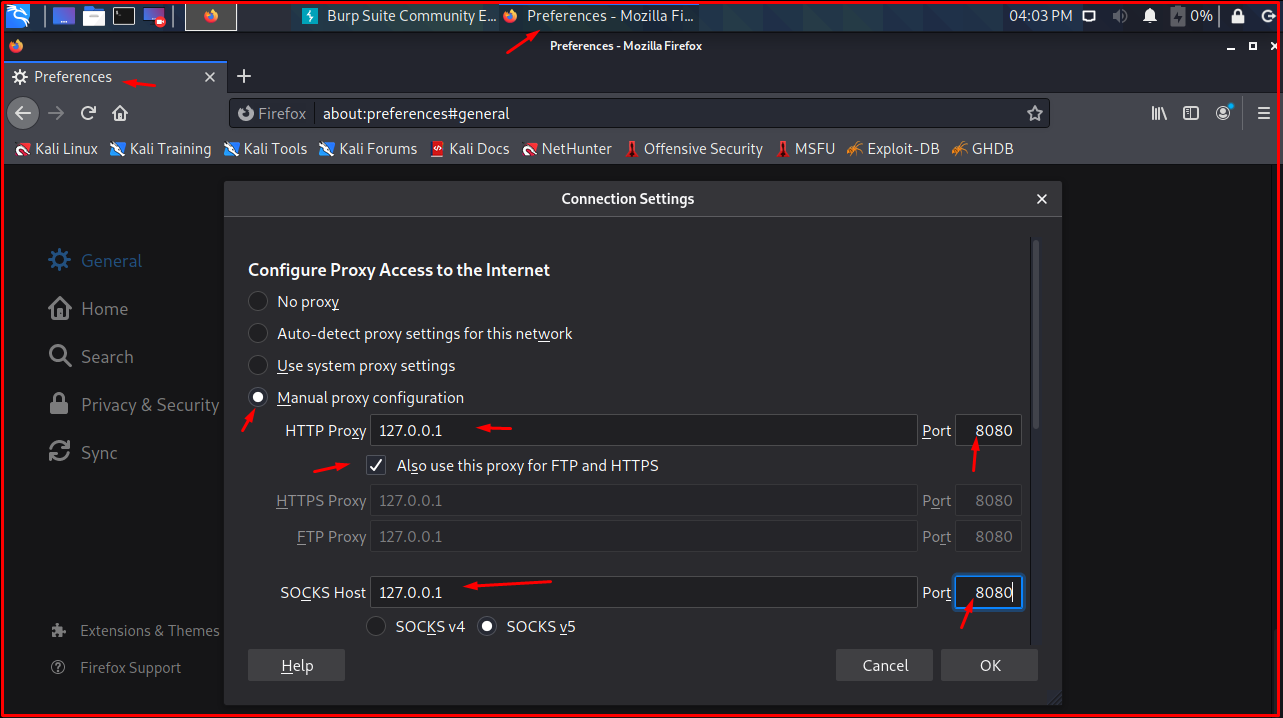
As the next step, we will listen to the proxy server raised by Burp in the browser. Open “Mozilla Firefox” to open “Proxy server settings“. Click the button with three lines in the right corner. Click the “Preferences -> General -> Settings…” button.

We open the proxy server settings from the browser and make the settings as follows.
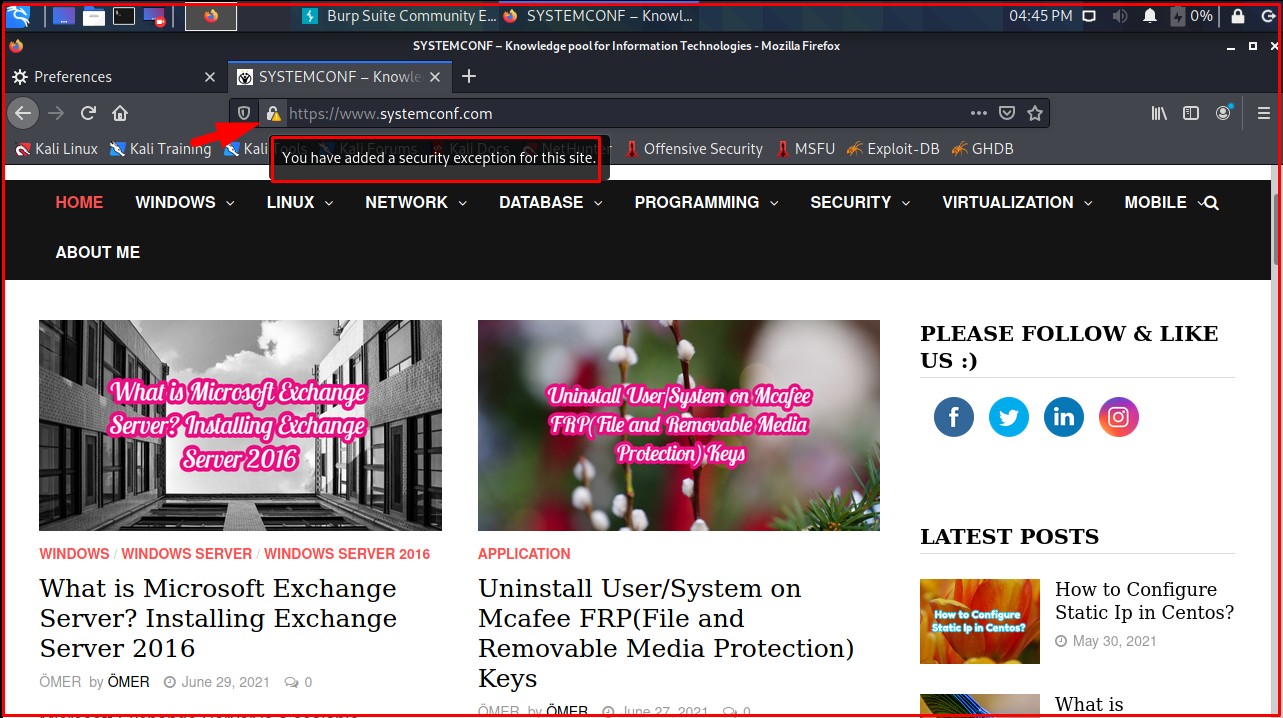
Now we open our browser and click on systemconf.com. The page will not load because the stop HTTP requests setting is selected by default in Burp Suite. We need to ‘off‘ this setting from the “Intercept is on” tab.

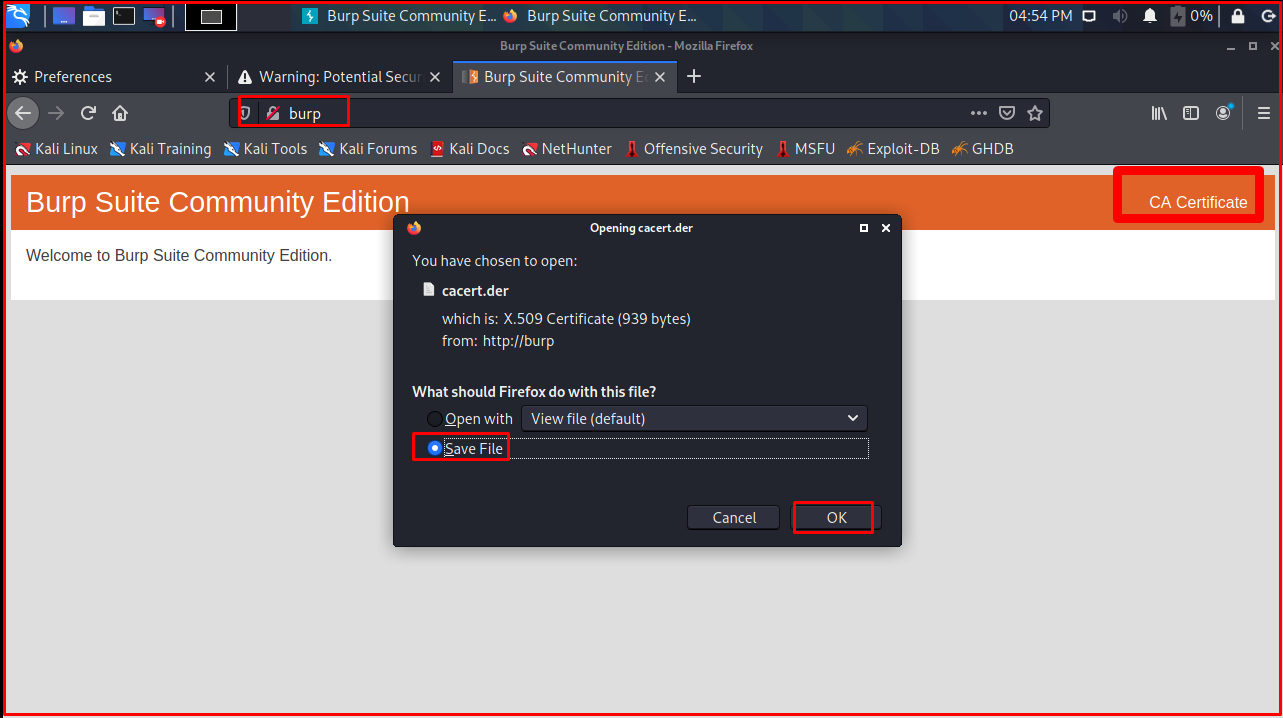
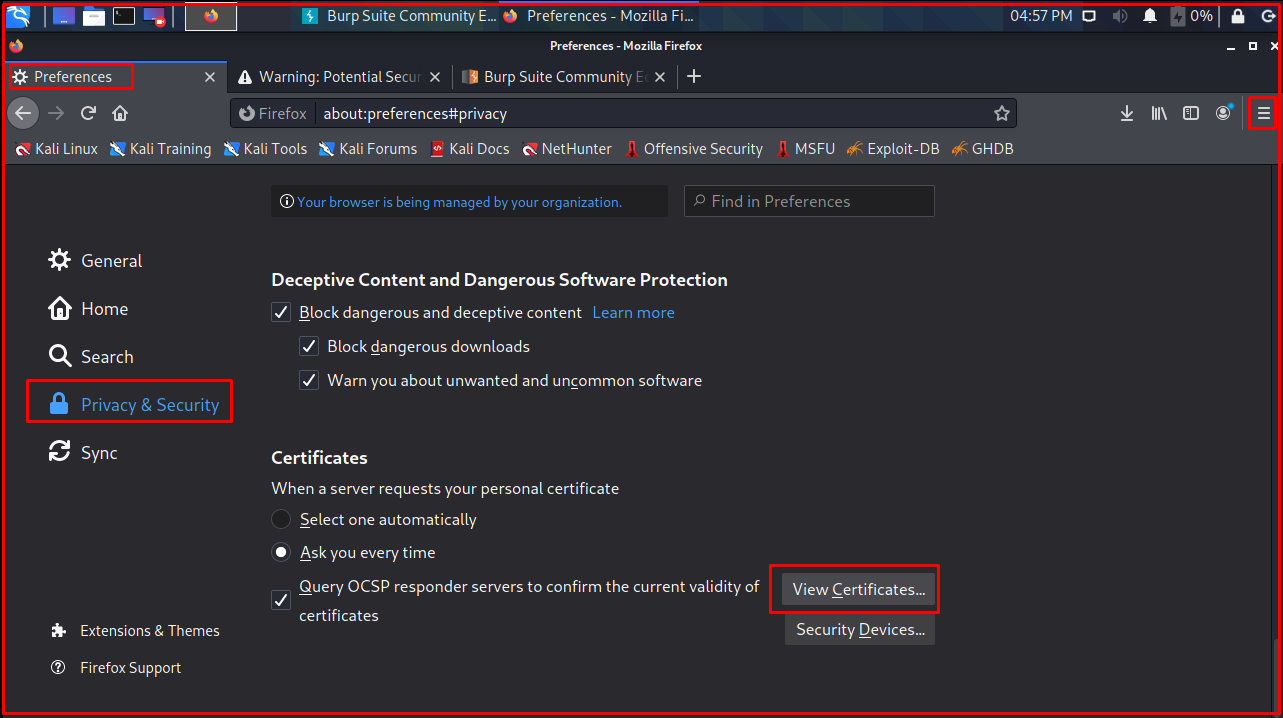
When we come to the browser again, we get the privacy error. This is because our browser does not recognize Burp Suite’s certificate. To solve this problem, we need to introduce the Burp Suit certificate to the browser.
We type “http://burp” in the browser address bar. Burp certificate screen will appear. Download Burp’s certificate from the “CA Certificate” section on the top right.
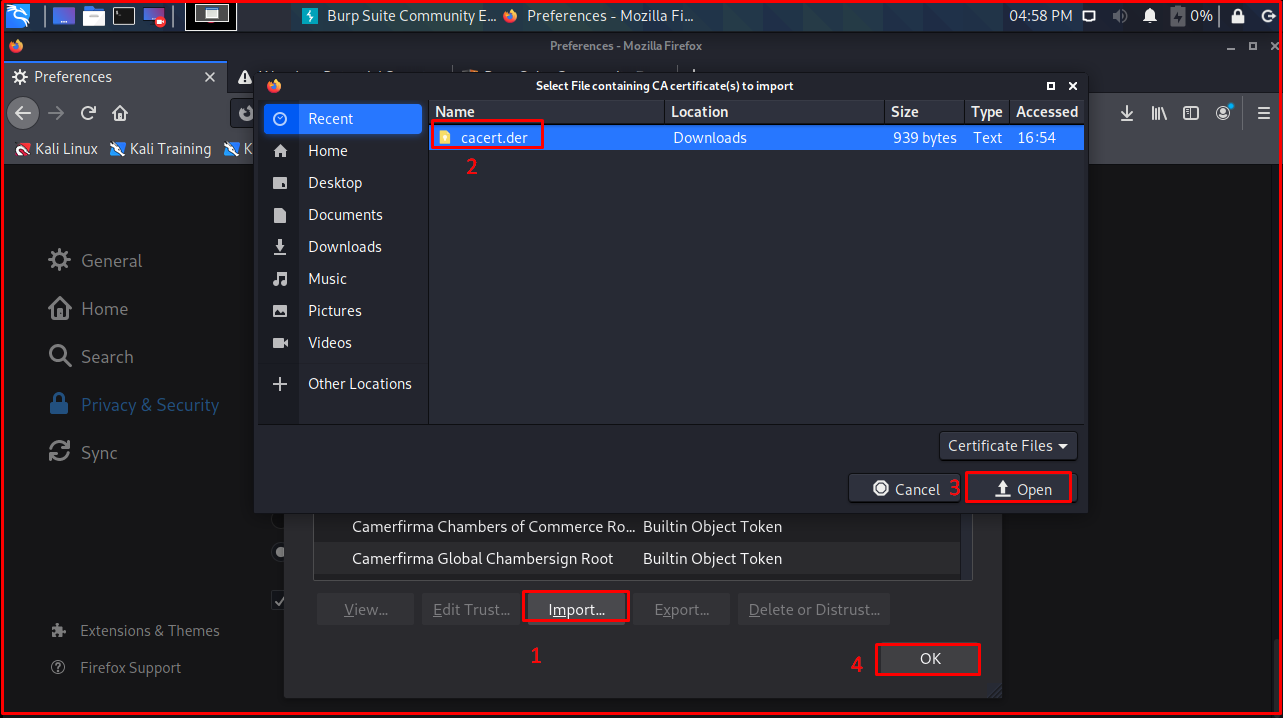
As the next step, we add the downloaded certificate among the certificates that the browser trusts.
On this page, we click on the “Import…” button. Then we select the downloaded certificate and click the “Open” button.
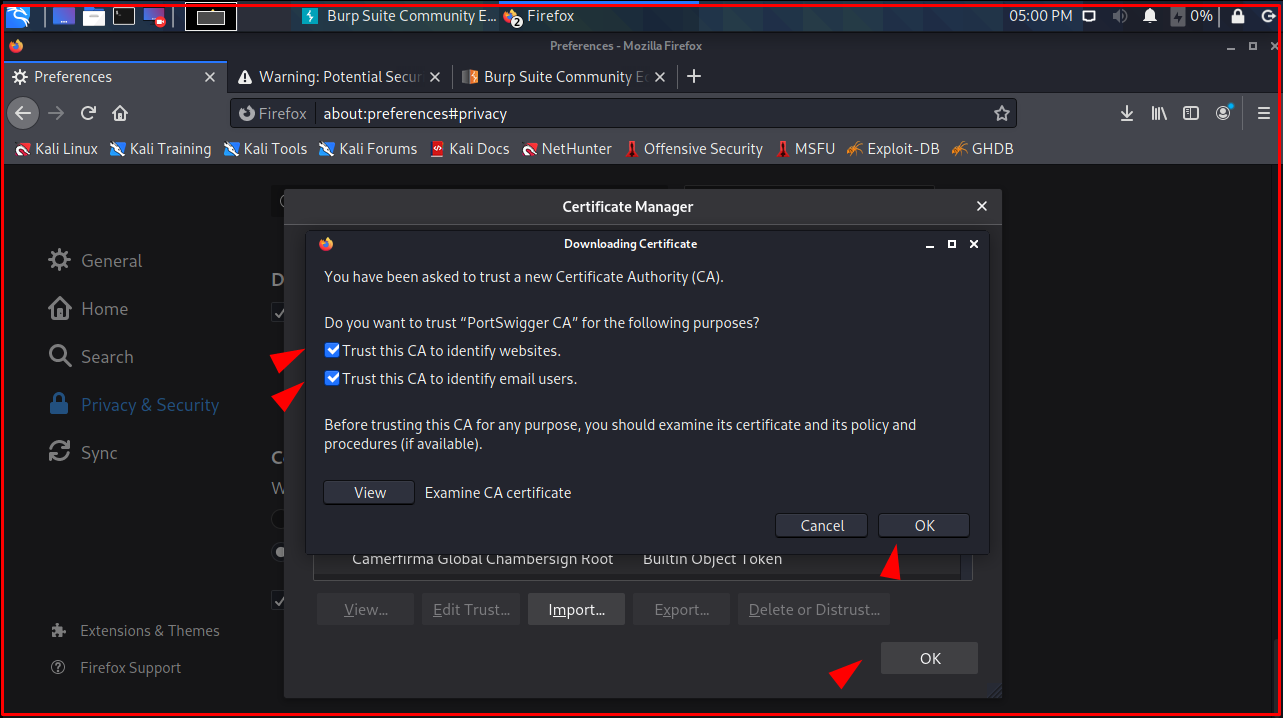
On the “Certificate Manager” page, we mark the “Trust this CA to identify websites” and “Trust this CA to identify email users” tabs and click the “OK” button.
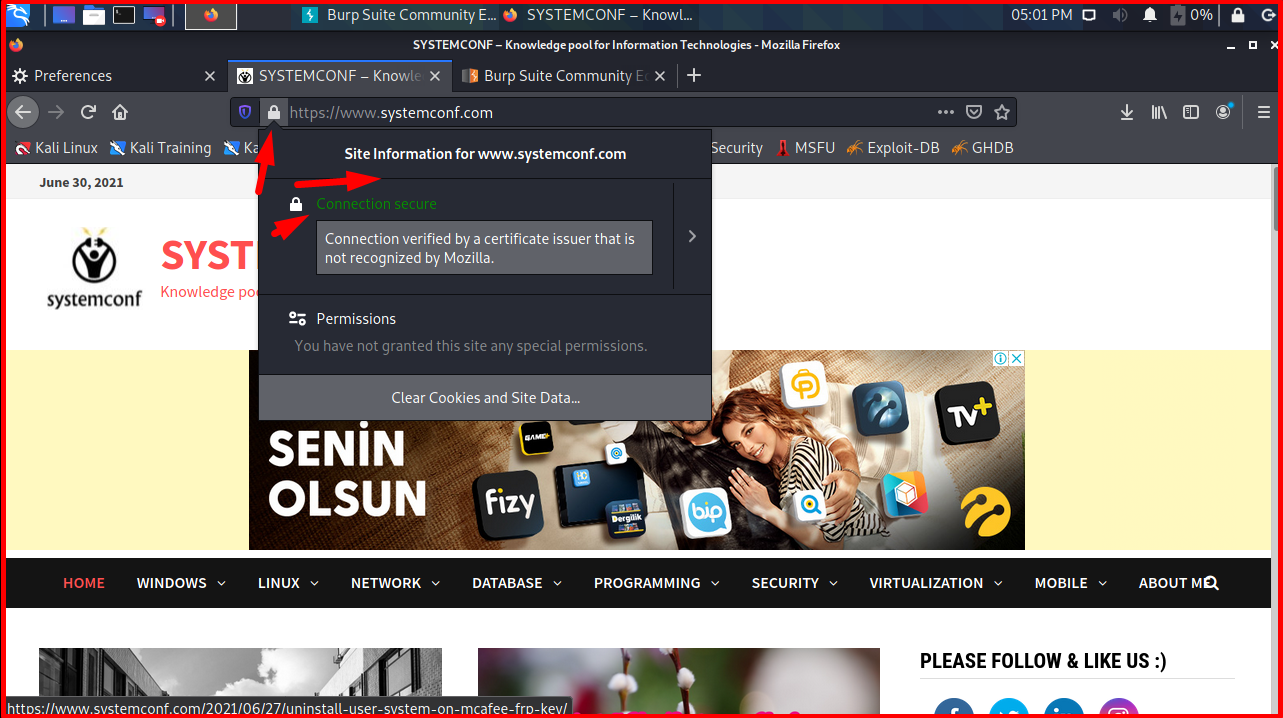
As you can see on the screen, the browser no longer gives SSL errors.
Note: If you are using Kali Linux and you have updated your operating system, the pages may give an “SSL_ERROR_RX_RECORD_TOO_LONG” error. This problem is caused by the Java version. For this, you can run the following command in the terminal. Among the options, we choose the option that says Java 8-jre. The error will be fixed.
update-alternatives --config java

As a result of the above steps, we have successfully installed Burp Suite. We will now examine its contents.
The “Target -> Site map” tab shows the sites that our browser sent requests.
Even though we have only made requests to systemconf.com and google.com, many sites appear to be made by the browser. This is due to many requests made by browsers in the background. Before reaching Google, requests are sent to many sources such as advertising services, statistics & analysis services. In addition, CDN libraries may be used on the site we access.
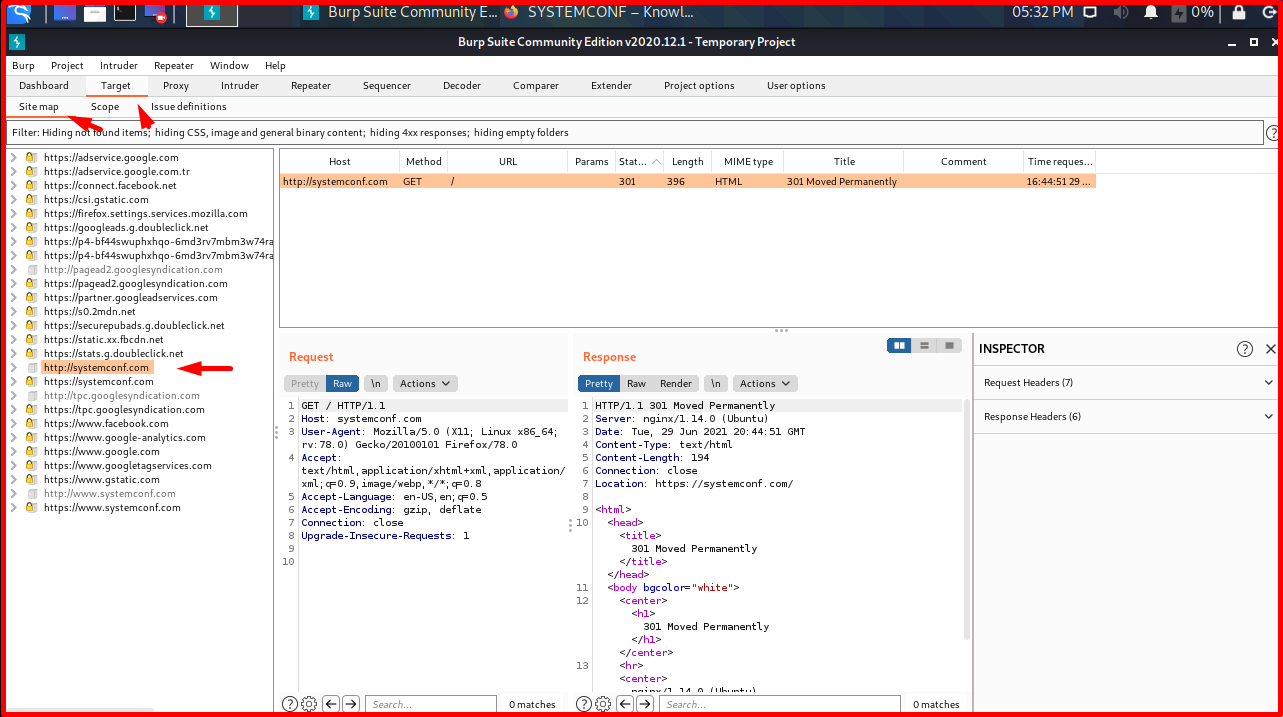
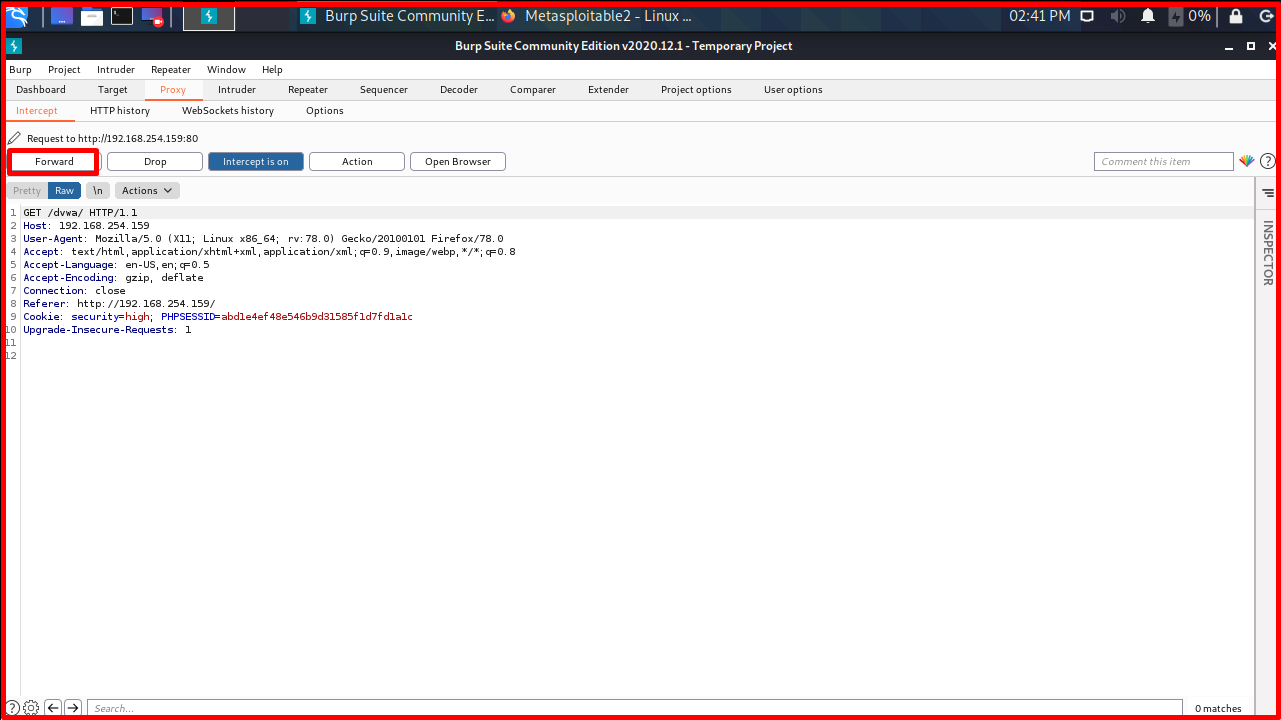
The “Proxy -> Intercept” option is the part where we can stop and see the requests going to the servers. With “Forward” the package is sent, with “Drop” it is dropped. “Intercept on” must be selected so that outgoing requests can be stopped.

We will stop and examine the request we made to systemconf.com. In the “Raw” tab, we see the “HTTP GET” request made to the Systemconf server, the outgoing parameters in the request body, and the headers of the request.

In the “Proxy -> HTTP history” tab, we can see the request history we have made since the launch of Burp. We can also display information such as the address of the request, the type of request (POST, GET, etc.), the request status code (HTTP request status code), the length of the request, etc.

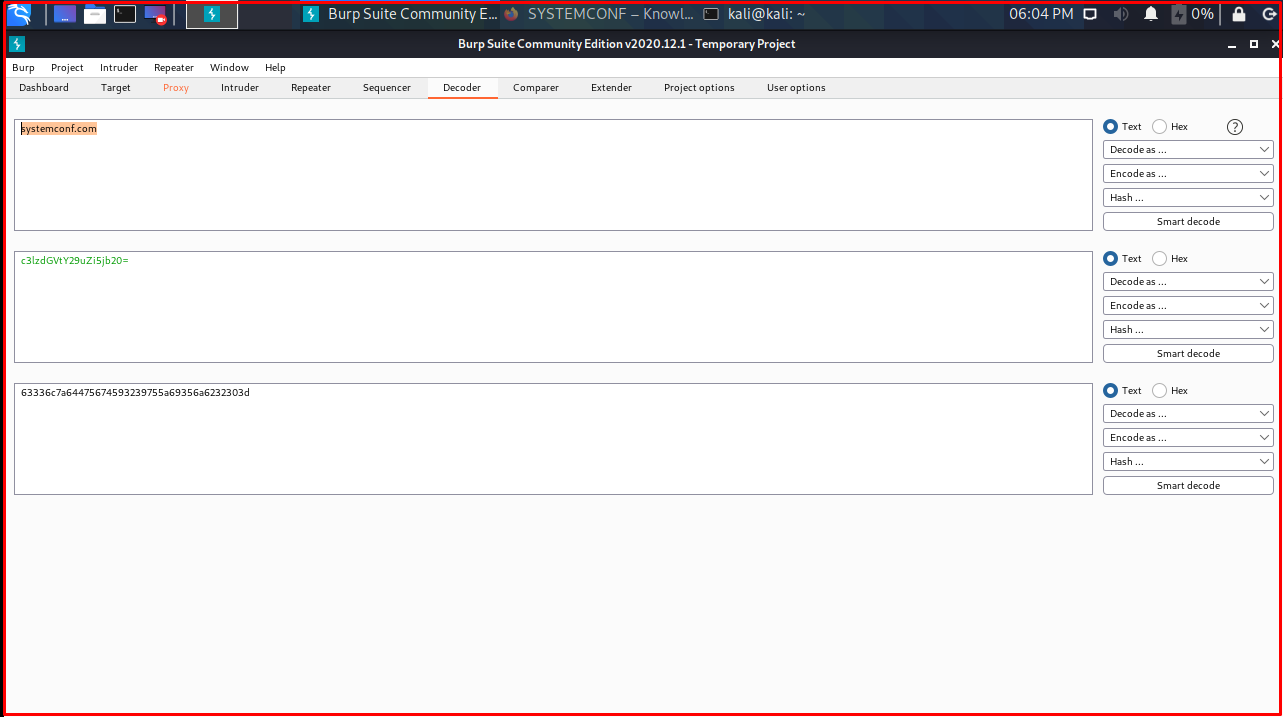
In the “Decoder” tab, you can enter the inputs you give as strings into encoding & decoding processes.
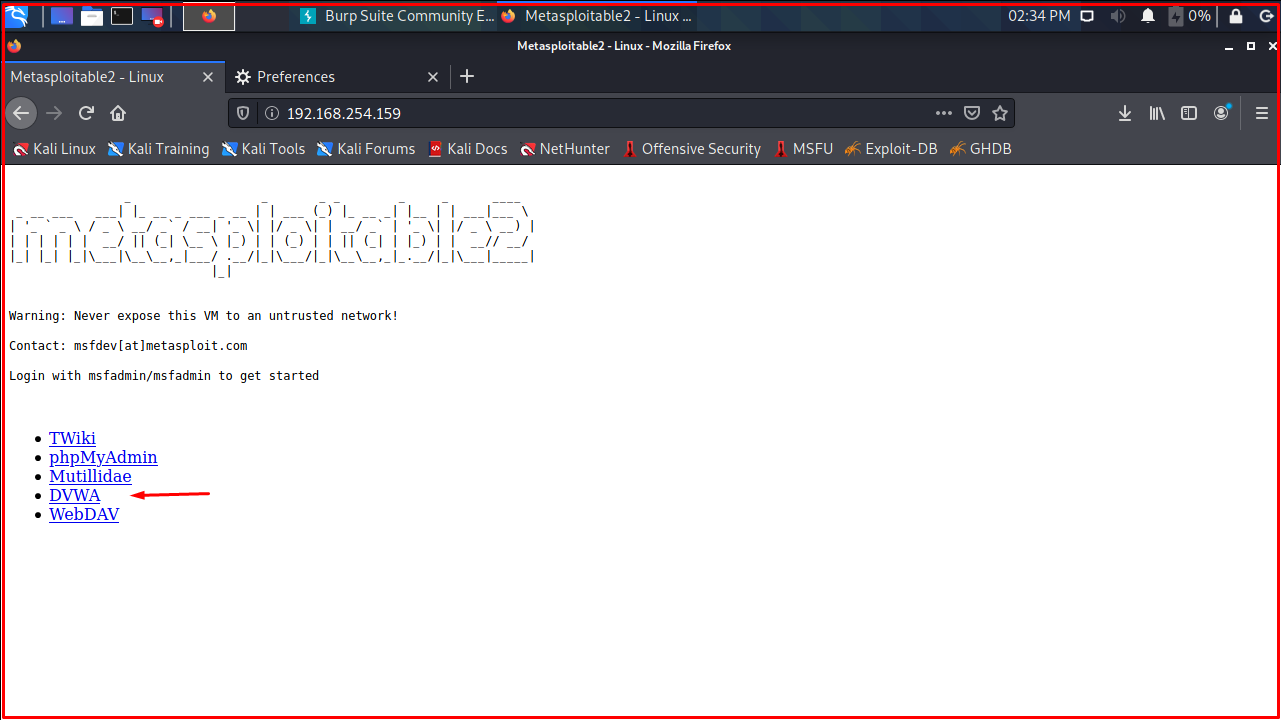
We will use the vulnerabilities in the DVWA implementation. You can find the relevant application here. You can find the installation on Kali Linux here. Or you can use the vulnerable applications on the Metasploitable 2 machine. You can download the relevant VM from here. You can open the Metasploitable 2 machine you downloaded from the VMware application. The user of the Metasploitable 2 machine is msfadmin, and the password is msfadmin.

We will try to log into the Damn Vulnerable Web Application(DVWA) application from the applications on the Metasploitable 2 machine by activating the request interception in Burp (Intercept on).
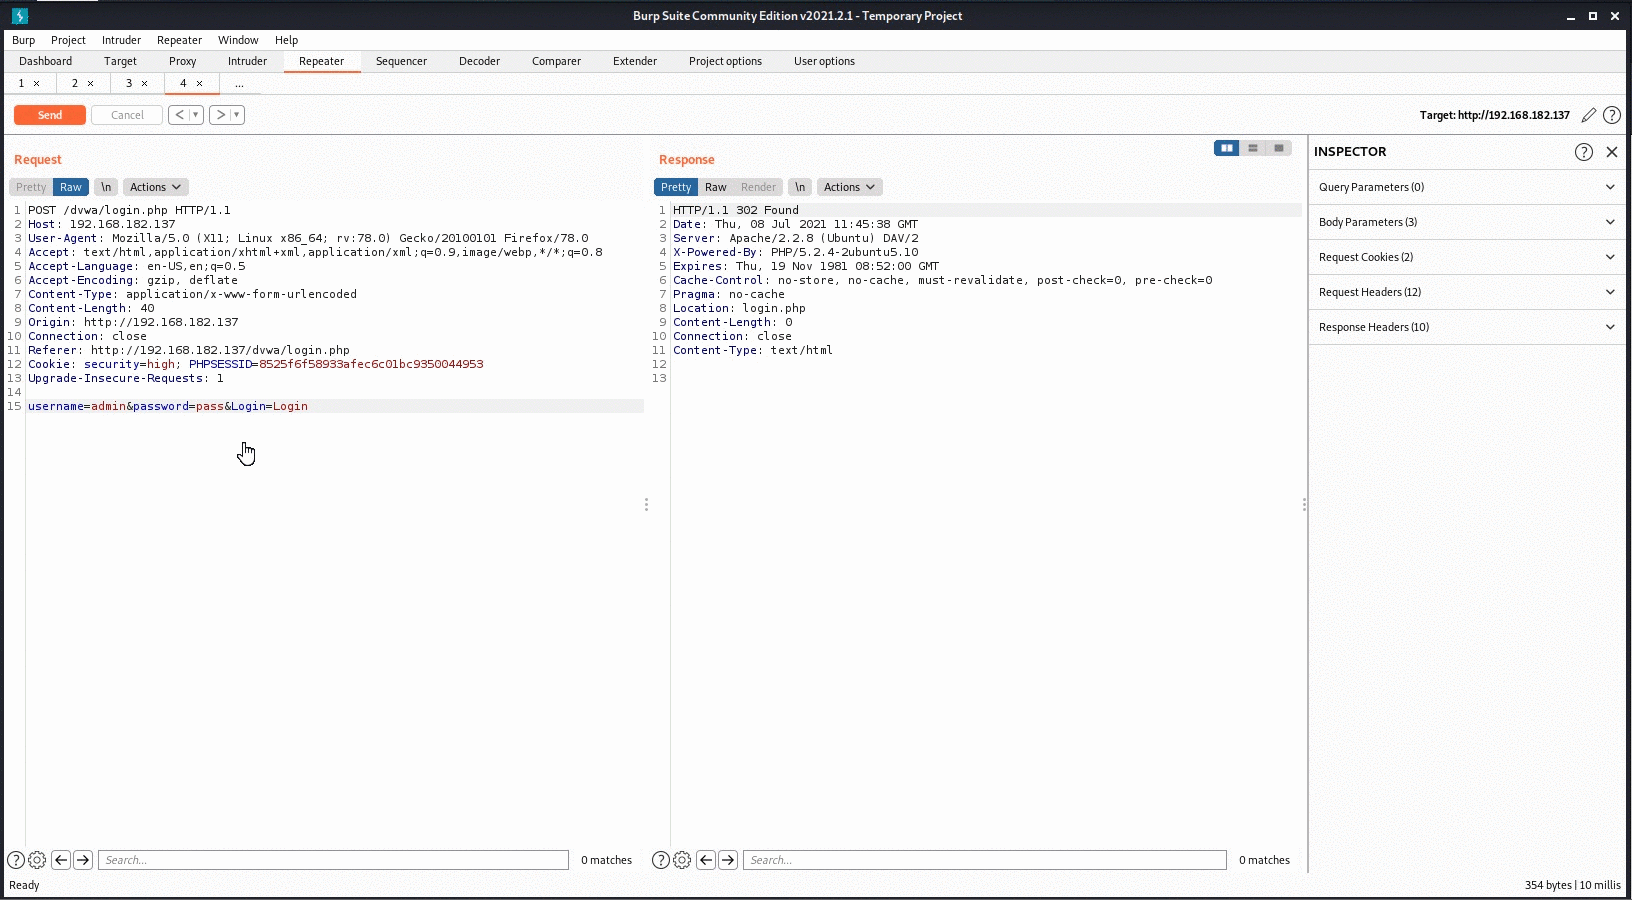
We made a POST request to “x.x.x.x/dvwa/login.php”.

On this page, we click on the “DVWA” application. Click on the “DVWA” application and you will be redirected to the Burp Suite application. In Burp Suite, we click on the “Forward” button.
In Burp Suite, we click on the “Forward” button.
We are trying to log in to Damn Vulnerable Web Application (DVWA) from applications on Metasploitable 2 machine.

We made a POST request to “x.x.x.x/dvwa/login.php”. Since it is a POST request, the parameters are passed as “username=test&password=test&Login=Login” in the request body.

We can change the parameters as we want in this window and then send it to the target server. We change the username to ‘omer‘ and the password to ‘123456‘ and send the request.

As you can see, there is no user with the username “omer” and the password “123456” on the target server.

After the request was sent, it disappeared in the “Intercept” section. If we want to try different usernames and passwords in this way, Burp has the ‘Repeater‘ module. This module provides the possibility to make changes to the Request and send them repeatedly.
First, in the “HTTP history“, we find the request we sent to enter the DVWA application and send it to the Repeater.

After that, try to login with “admin:123456“, “admin:123456789” and “admin:pass” username-password pairs and examine the answers on the page. Burp will “render” the response from the server for us.

We follow the page redirects from the server with “Follow redirections“. To try again, we go back to the request and resubmit the request, changing the parameters as desired. Let’s say we have a list of usernames/email addresses. We want to find the passwords of these accounts by trial and error method (brute force attacks). Instead of typing and sending the passwords one by one in the Repeater, we will use a module called ‘Intruder‘ for this. This module will automatically test various payload sets for parameters.
We will see this module in practice by performing a dictionary attack on the admin user with the “Intruder” module. First, we send the request to the “Intruder” module.
Since the fields in the “Target” tab are filled automatically, we skip that. We come to the “Positions” section. There are different attack types here, but the most used types are “Sniper” and “Cluster bomb”. If we know one of the parameters, we use the “Sniper” module if we want to find the other by trial and error, and if we want to do trial and error for both, we use the “Cluster bomb” module.
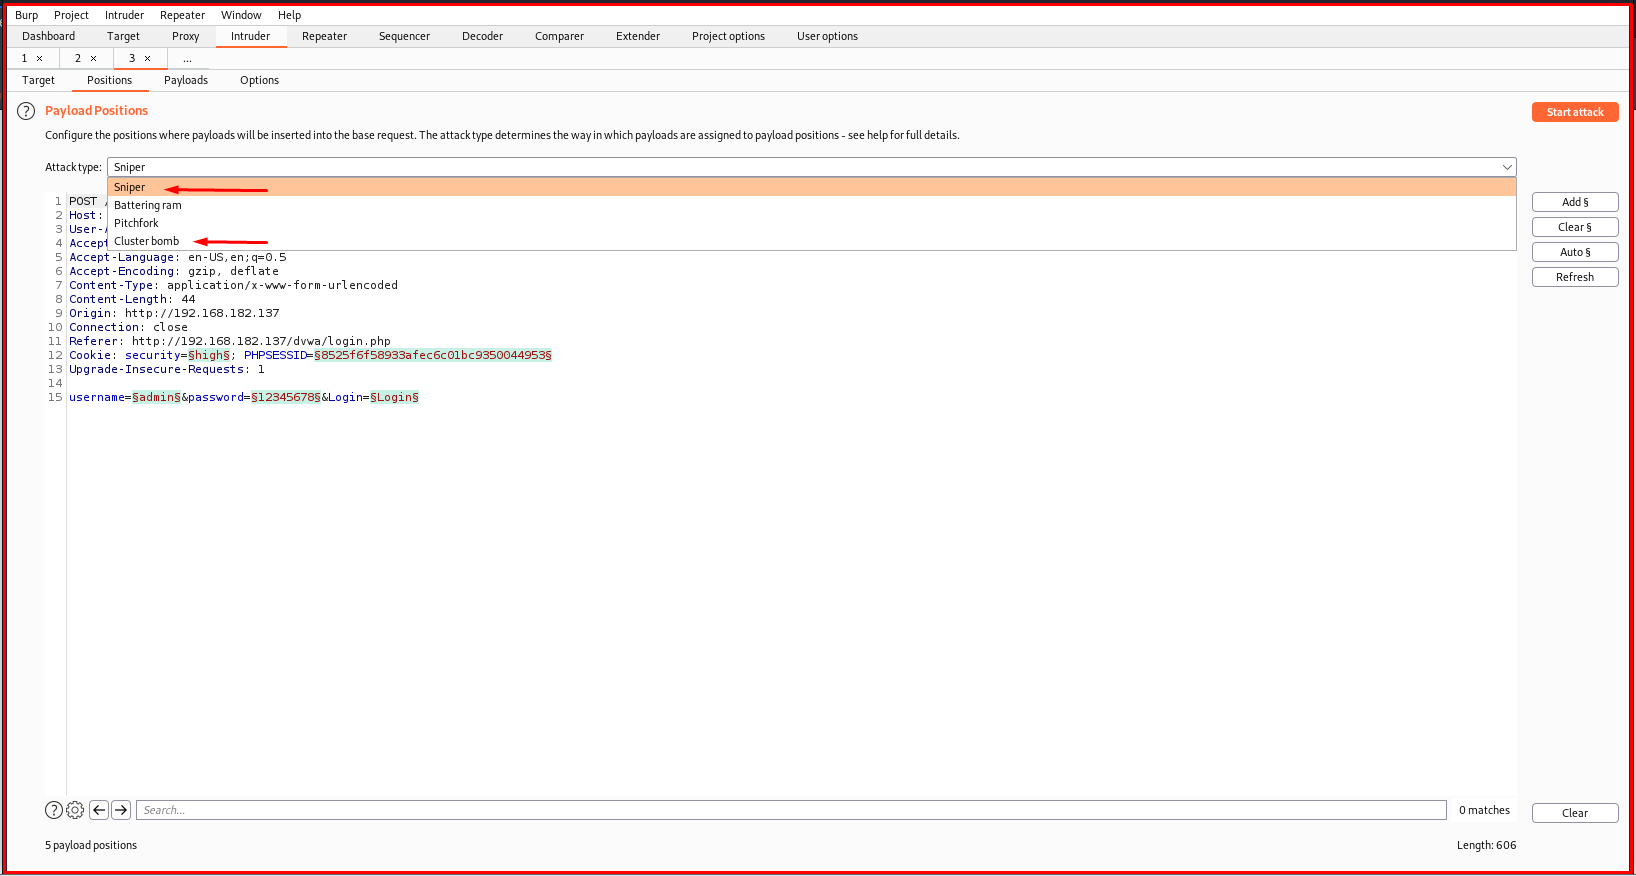
Burp prepends and ends with “§”, showing all the parameters that can be manipulated here.
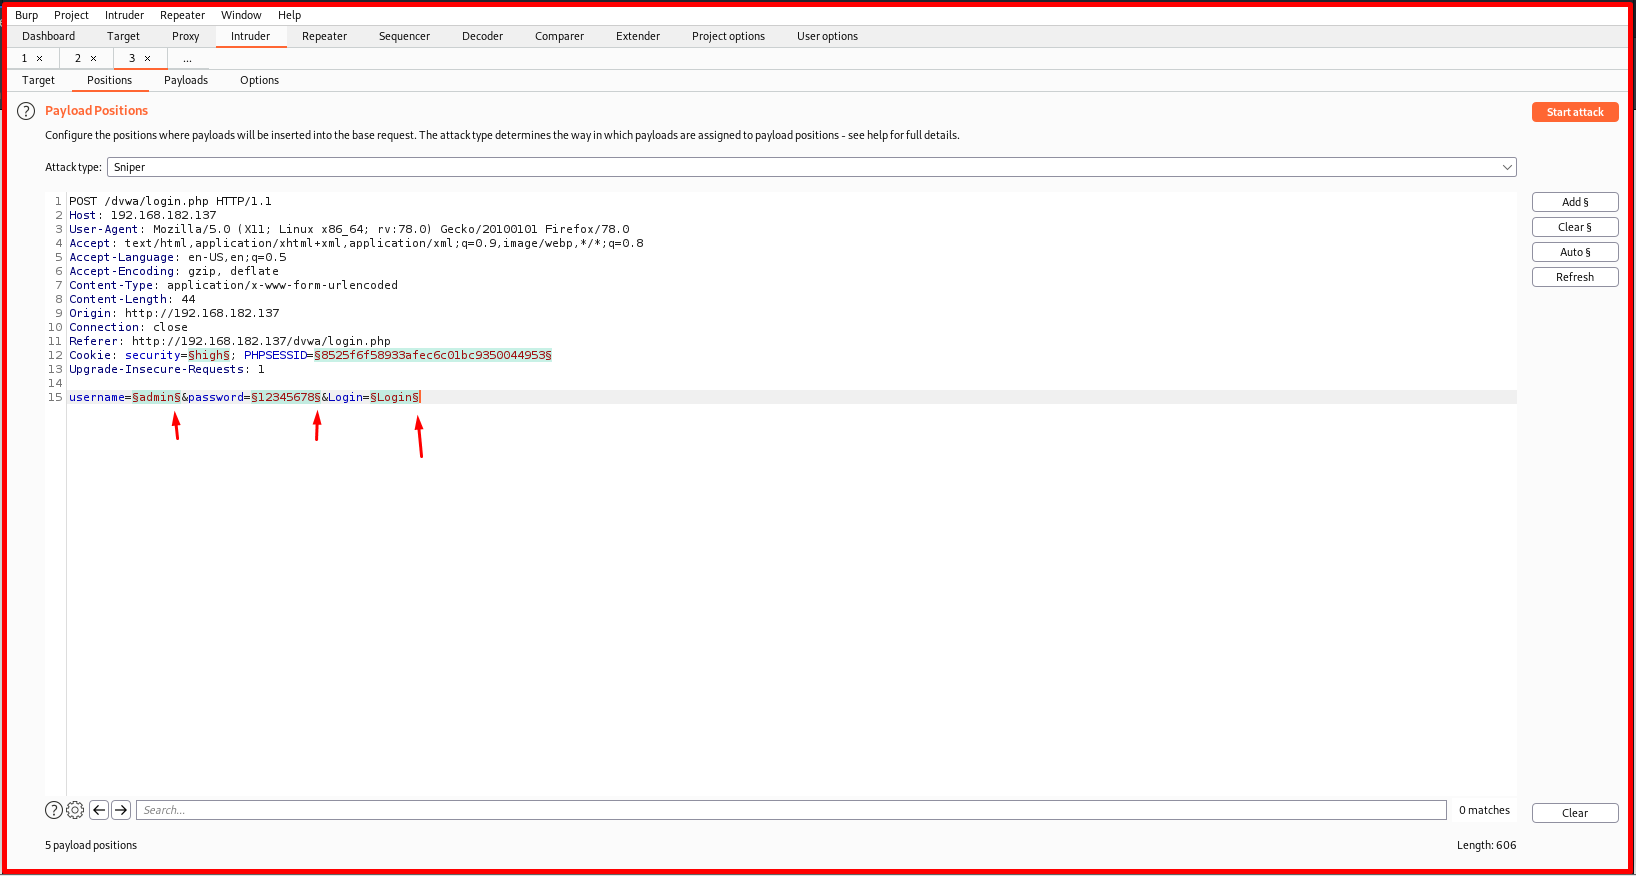
Whichever parameter you want to change should only have “§” at the beginning and end of it. First, we clear all the selections by saying “Clear §“, then we mark the parameters we want to change using the “Add §” button.

Payloads Module in Intruder tab
Now we are examining the Payloads Module in the Intruder tab. Incoming settings are set to do dictionary attacks by default. If a brute force attack is desired, you can select the ‘Brute force’ option from the “Payload sets” section.

In the Payload Options [Brute forcer] tab, the desired characters in the character set are entered to generate the password, then the minimum and maximum password sizes are entered. Burp will generate words for us with all possible possibilities. We can also use it for brute force attacks. The default character set includes lowercase letters and numbers. If desired, password frames can be enlarged by adding special characters (punctuation marks, etc.) and capital letters to the character set.
![Payload Options [Brute forcer] tab](https://www.systemconf.com/wp-content/uploads/2021/07/img_60e6f47cb5575.png)
We will do this attack using a dictionary. For this, we choose “Simple list” as “Payload type“. At the bottom, there is a section called “Payload Options [Simple List]”. If you want, you can add the words you will try one by one by clicking the “Add” button. If you want, you can use one of the many dictionaries available in Kali Linux with the “Load…” button.
![Payload Options [Simple List]](https://www.systemconf.com/wp-content/uploads/2021/07/img_60e6f5453373a.png)
Since the system we are attacking is a UNIX system, we can use the word list “unix_passwords.txt” in the directory “/usr/share/wordlists/metasploit” in Kali Linux. We load the “unix_passwords.txt” file with the “Load…” button.

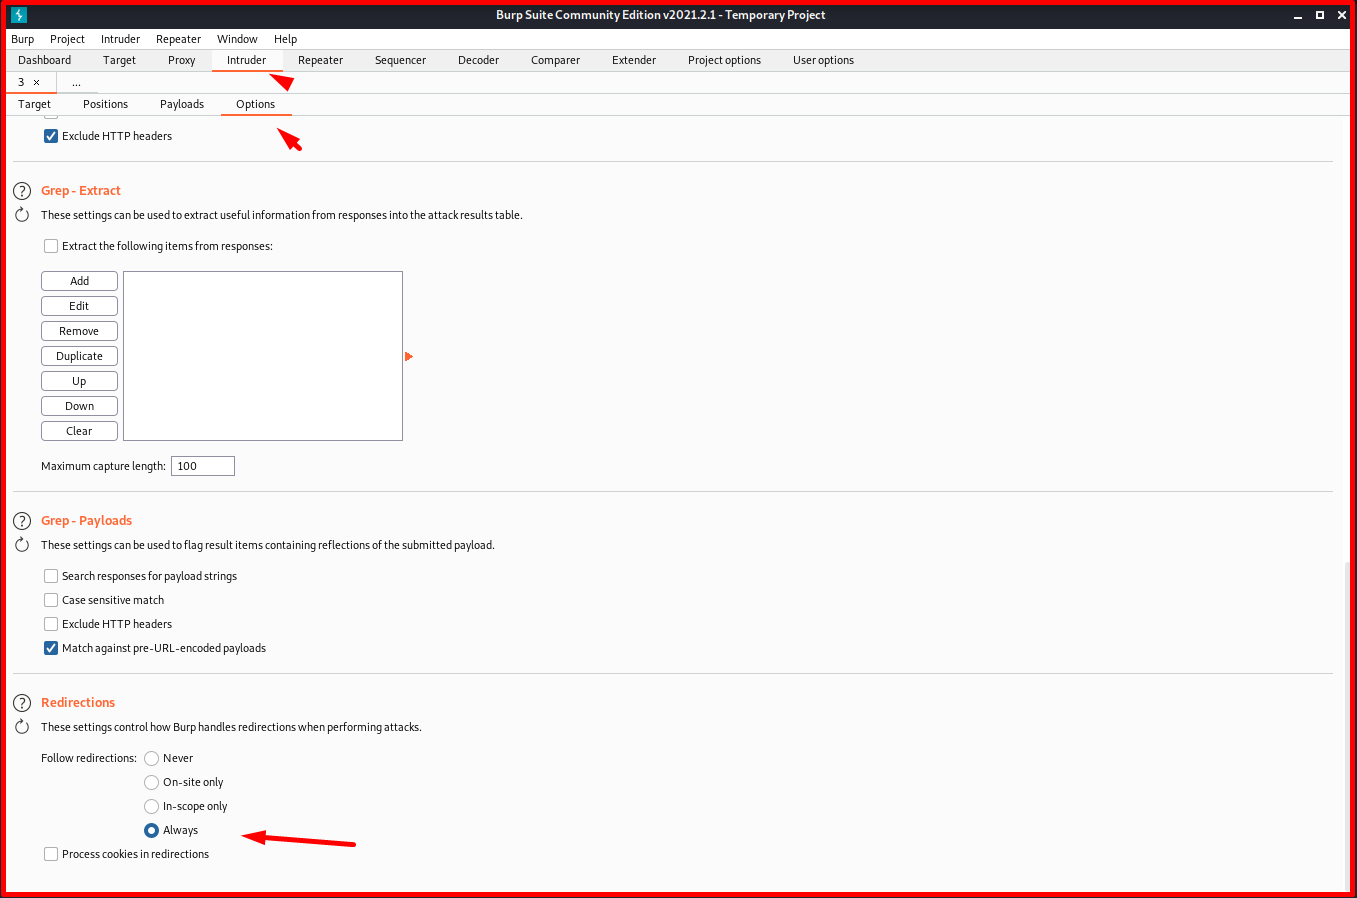
In the “Options” tab, we select the “Follow redirections” option as “Always” from the “Redirections” section at the bottom. Because, as we have seen before in the “Repeater” module when a request is made to the server, page redirection is made. You can go as far as you can to see the results.
Now Burp shows us the passwords it tried and the “Length” of the response returned. The password with the largest response size is the admin password. Because other passwords will warn “Login Failed” and stay on the login screen. However, it will log in to the system with the real password and open a new page. Therefore, we will follow the sizes of the answers and observe if there are any larger ones than the others.
Now everything is ready for the attack. We start the attack with the “Start attack” button in the upper right.

Finally, we got the highest answer size with the password “password“. When we tried this password, we confirmed the correctness of the password. We have successfully logged into the system.


