 by
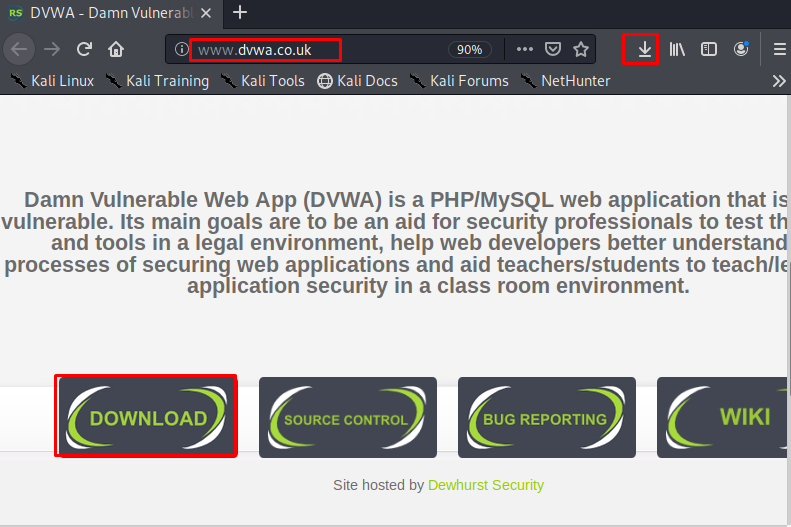
by DVWA(Damn Vulnerable Web Application), For pentesters and web security users who want to improve themselves in the field of web application security. It is an education system created with PHP that contains certain web weaknesses.
Weaknesses Hosted:
– Brute Force
– Command Execution
– CSRF
– File Inclusion
– SQL Injection
– Upload
– XSS Reflected
– XSS Stored
There are 3 difficulty options in DVWA System. These are low, medium and high.
Install DVWA Kali on Linux
By clicking the “Save File” option on the page we click the “ok” button and our file will be downloading.
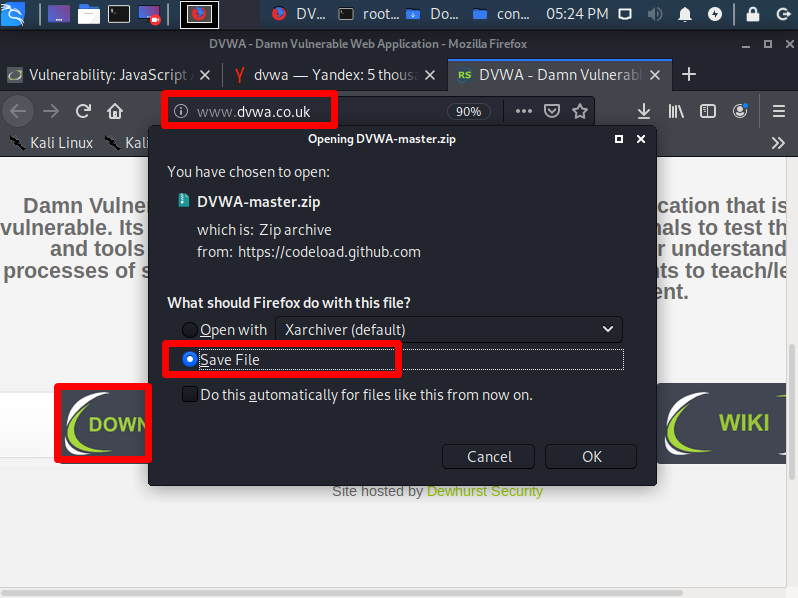
As you can see, the file DVWA-master.zip is down. The downloaded “DVWA-master.zip” file will be in .zip format.

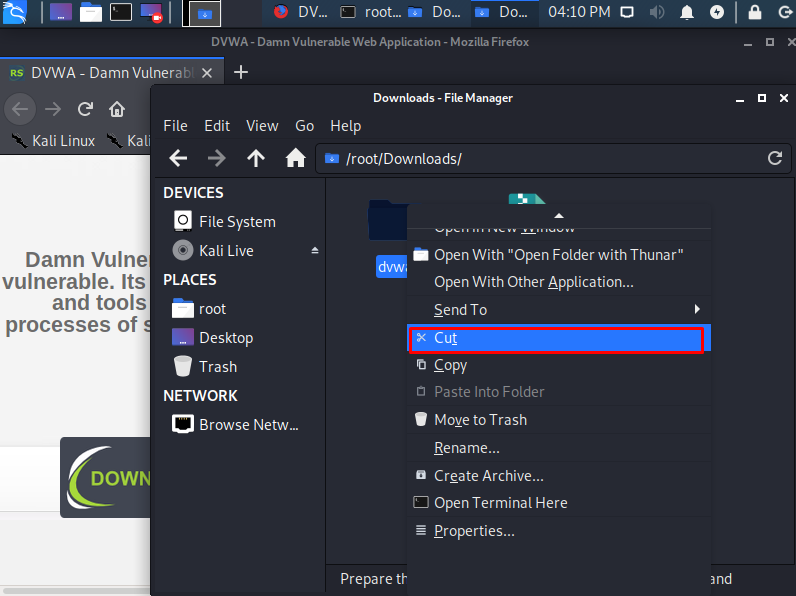
We extract this “DVWA-master.zip” file from the .zip file.

We change the filename to “dvwa” to make our job more comfortable.

Then let’s cut this dvwa file.
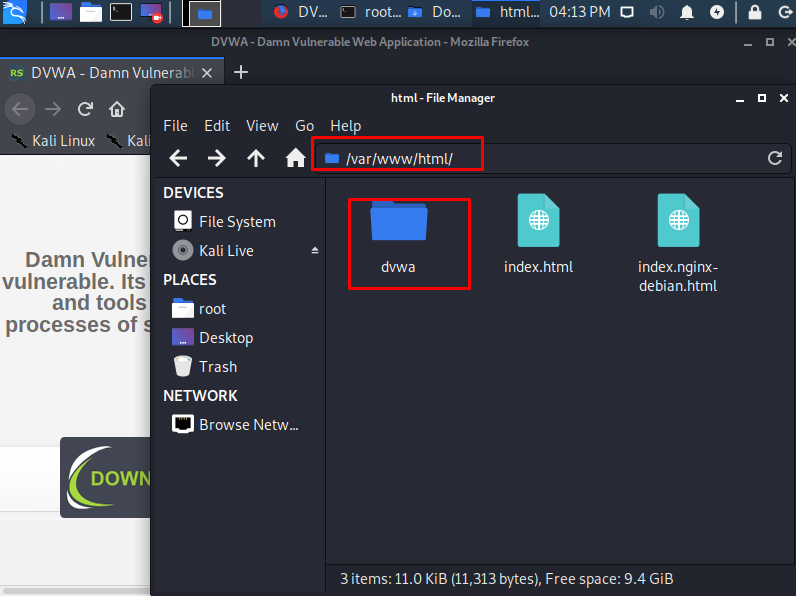
After opening the “/var/www/html” directory, let’s paste this file here.

We found that the dvwa file is in the “/var/www/html” directory.
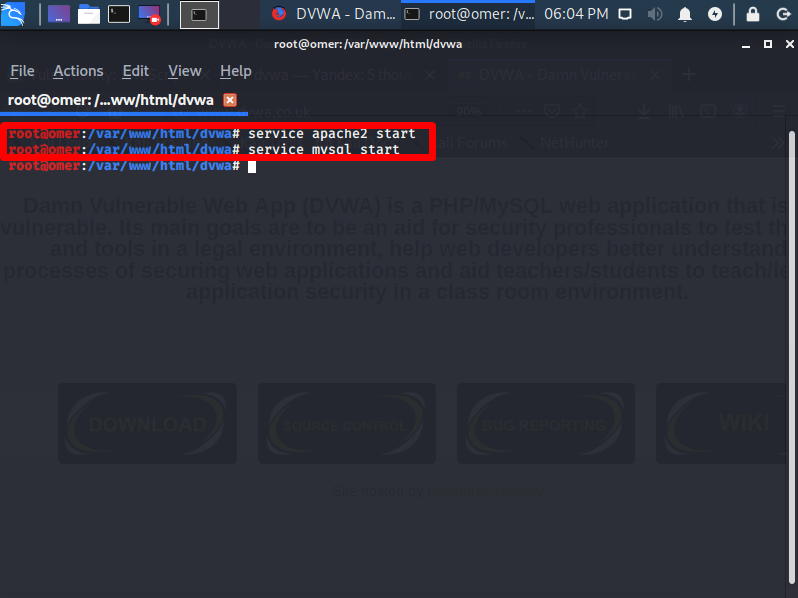
After doing the above operations, we will activate the “apache2” and “mysql” service first, as we will run the Dvwa file on our local device. “service apache2 start” and
Let’s start the services using “service mysql start” commands.
service apache2 start
service mysql start
We activated the services and started running the web service on our own device.
We need a database where we will save the data entries above our web service. In this, we need to connect to MySQL and create a new user and new database. First of all, we connect to MySQL with “mysql -u root -p” command. He will ask us for the password. Let’s enter mysql by pressing “Enter” without entering the password.
mysql -u root -p

After logging in, we will create a new user via Mysql, define and authorize a password. To create the user, “create user dvwa1;” We use “grant all on dvwa1. * to dvwa1 @ localhost identified by ‘ddos’;” , “flush privileges;” , “grant all on dvwa1.* to ‘dvwa’@’%’; ” , “flush privileges;” commands. You can use “exit” command to exit MySQL database.
> create user dvwa1;
> grant all on dvwa1.* to dvwa1@localhost identified by 'ddos';
> flush privileges;
> grant all on dvwa1.* to 'dvwa1'@'%';
> flush privileges;
> exit

After defining the necessary operations related to MYSQL, it is time to go to the “dvwa” folder of the web service and edit the config files. First of all, after downloading, the extension of the config file in the “dvwa” folder seems different to us. The file extension comes as “config.inc.php.dist”. To run this config file in an apache2 service, the file extension must be “php”. For this, I am changing the name of the file. We can replace it with these commands. ”Mv /var/www/html/dvwa/config/config.inc.php.dist /var/www/html/dvwa/config/config.inc.php”
Mv /var/www/html/dvwa/config/config.inc.php.dist /var/www/html/dvwa/config/config.inc.php


We activated the config file. After bringing it, we need to go to the editing process. In the example we will edit using a text editor.

It wants to match the database information and host information of DVWA that we will install in the config file. In the example below, we will enter the username, password and database information I made in mysql. “127.0.0.1” indicates that I have my own computer.

We entered the username, password and database information that I made in Mysql.

After doing the operations, we save the file and exit.

After finishing the config process, we give full permission to the “dvwa” folder in the folder where our web service broadcasts to provide the necessary access and access to the “DVWA” installation. This process will allow us to see the files of the site we accessed. ”Chmod -R 777 /var/www/html/dvwa”
chmod -R 777 /var/www/html/dvwa

We will need to make a few apache2 settings specified on our computer with apache2 installed. For this, by accessing the file I specified in the command. We need to do “allow_url_include = on” and “allow_url_fopen = On”. You can enter apache2 settings and edit using these commands. ”Leafpad /etc/php/7.2/apache2/php.ini”

After the processes are finished, let’s restart the apache2 and mysql services.

After all our processes are finished, we can open the internet browser page and access Dvwa. To do this, simply write “localhost / dvwa” or “127.0.0.1/dvwa” on the website. We will see a screen like the one below. This screen provides us with the programs that are missing and not found in the installation and operation of our DVWA program, mysql access information and versions, everything we need to do for the first time at installation. There may be some shortcomings, but this will not interfere with installation unless this is very important.

By clicking on the “Create / Reset Database” button below, the program will access the database that we have created for us, write the necessary columns and enable us to work.

The default username of the DVWA we have installed is “admin” and the password is “password”

Now that the whole setup is over, we can start using DVWA.

There are 3 difficulty options in DVWA System. These are low, medium and high. We can choose the level we want. The level here is medium