 by
by BitLocker is a disk encryption system that Microsoft provides free of charge to provide data security in Windows Pro and Enterprise operating systems. We can use this feature on the hard disk or portable external disks. BitLocker encrypts the entire drive and creates a layer of security when attempting to access encrypted data. If the security layer is successfully passed, it offers the right to access data.
Every file you upload to a drive that you encrypt is automatically encrypted by BitLocker. As long as the files are stored on the encrypted drive, they are stored in encrypted form. Files copied to another drive or computer are copied out without a password.
How is it used?
If you have shared files over the network, those files will remain encrypted as long as they are stored on the encrypted drive. Authorized users will be able to access these data bypassing the security layer. If you encrypt the drive where the operating system is located (drive C:), BitLocker checks at startup for conditions that could pose a security risk to your computer. If a potential security risk is detected, BitLocker locks the operating system drive. To unlock this lock, a special BitLocker recovery key must be entered.
Make sure to create a “BitLocker recovery key” when you turn on BitLocker for the first time. Otherwise, you may permanently lose access to your files. If you encrypt hard or removable disks, you can unlock the encrypted drive with a password or smart card, or you can set the drive to unlock automatically when you log on to the computer. You can suspend BitLocker at any time, temporarily or permanently turn it off by decrypting the drive.
Encrypting the Operating System Disk with BitLocker
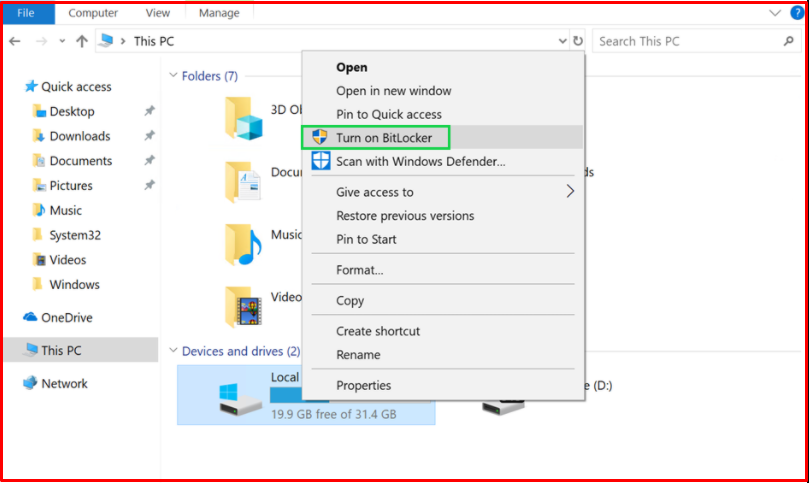
In order to encrypt the disk with the operating system with BitLocker, we hover over the disk and select the “Turn On BitLocker” option. If you have a D disk, you can encrypt it too.
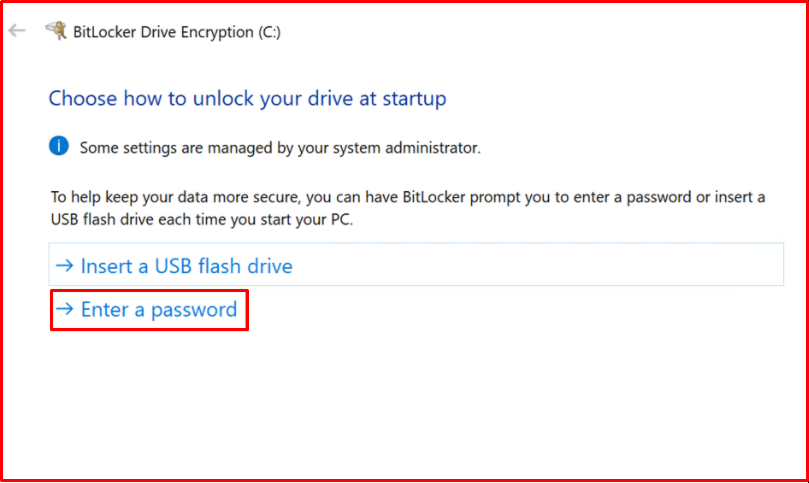
When we encrypt the operating system disk with BitLocker, the computer will first ask for a method to open BitLocker, and then the user information will be entered. On the first screen, we determine how we want to login to the screen that appears. If you want, you can print the necessary information to open BitLocker on the USB flash memory and proceed with this option. In this method, every time we turn on the computer, we have to install this flash memory and move. Or, we will create a password by proceeding through the second option and we will continue by entering this password on the screen that appears. We prefer this option and continue with the “Enter a password” option.
We continue by entering a strong password on this page.

This page allows you to create a key in case you forget the password. In the options that come, you can take this key to USB flash memory if you want. We can save it on a computer or in a shared space, or print it out and keep it. Since the disk where the operating system is located will be encrypted, the system will not allow you to save the file somewhere on this disk.


We will keep the recovery keys of BitLocker operations on our computers in the area we have created on our backup computer. You can proceed with a suitable option and field. We proceed by saving the file.

As you know, Windows 10 has switched to build 1511. It is useful to select “Compatibility Mode” to work with versions prior to Windows 1511. Since we are in a test environment, we select “New encryption mode” and proceed with the Next button.

In order to check before BitLocker encryption and to avoid any problems, we select Run Bitlocker system audit and click the “Continue” button. Then we confirm when he says that he will make the necessary checks on the system regarding BitLocker.

After that, our computer will restart. When our computer is rebooting, the operating system asks us for the BitLocker password as we encrypt the disk. We continue by entering this information.

Then the computer will ask us for the power-on password and we log in by entering this information.
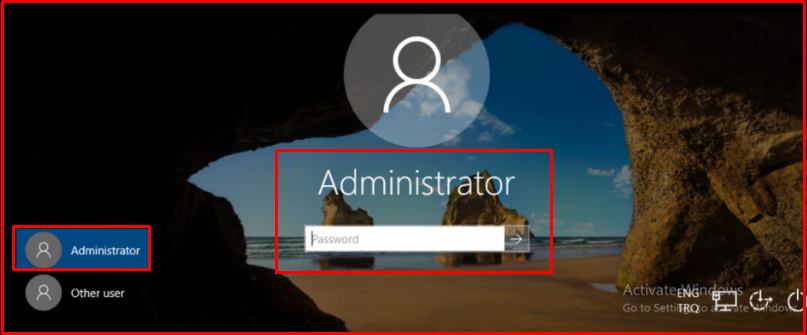
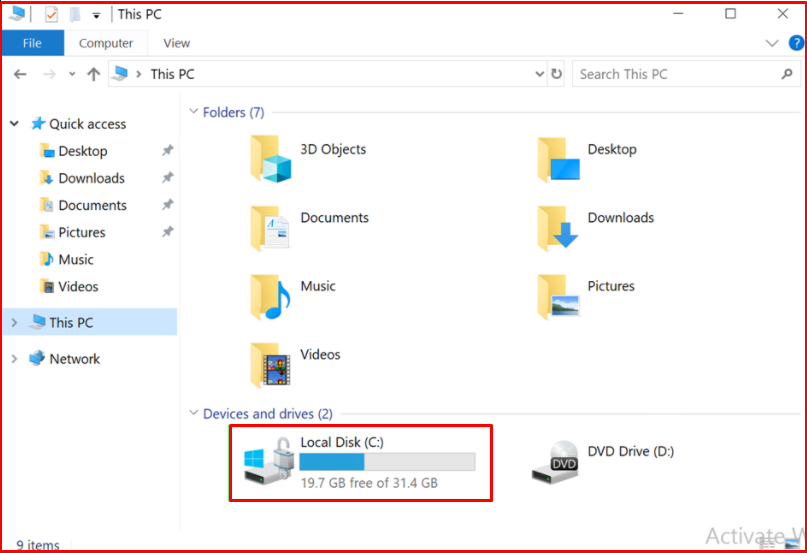
When we check, we see a lock sign on our C drive. Since we entered the BitLocker password while logging into the computer, it is open. If we didn’t have this password, we wouldn’t be able to log into the system.
BitLocker Password Change
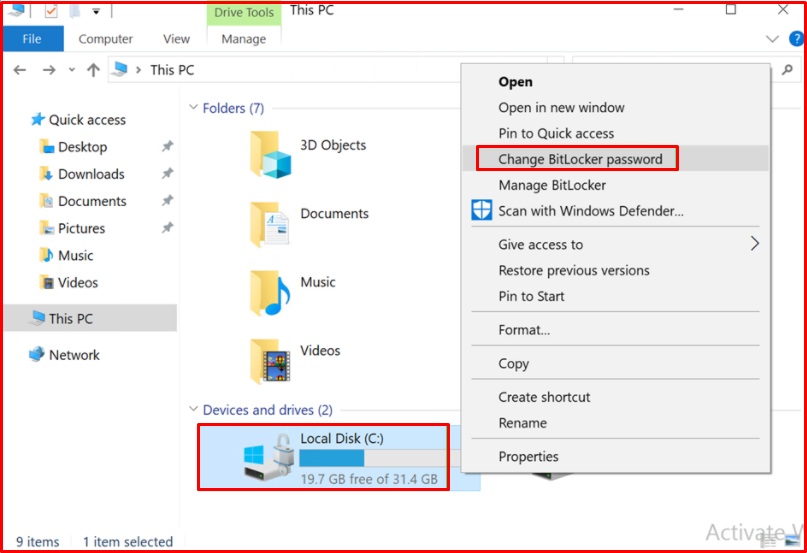
By right-clicking on our drive, we can change our password first by entering our old password, then new passwords from the “Change BitLocker password” option.
We can do this by entering the old password and new password information on the screen that appears.

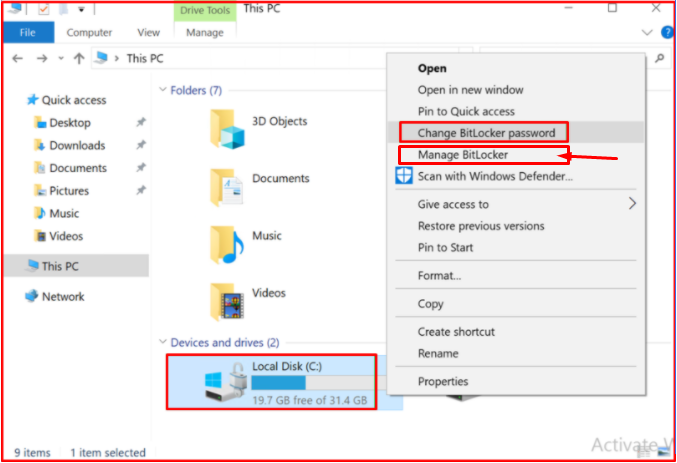
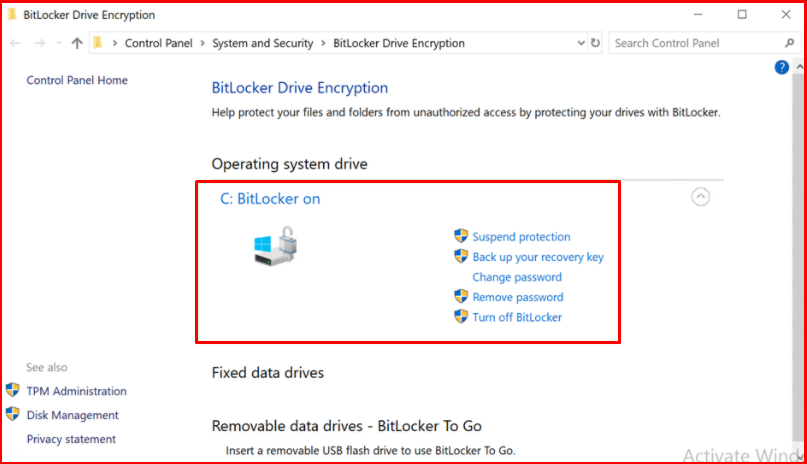
By clicking the “Manage BitLocker” option on the “BitLocker Drive Encryption” screen, we can suspend the protection, create a return key or remove BitLocker completely.
BitLocker Sample Scenario
Let’s assume that we forgot the password we put in BitLocker in our scenario, we restart the computer again and press the ESC key on the screen where it requests the BitLocker password from us, and we can turn on our computer by entering the key we have previously taken to the backup computer.
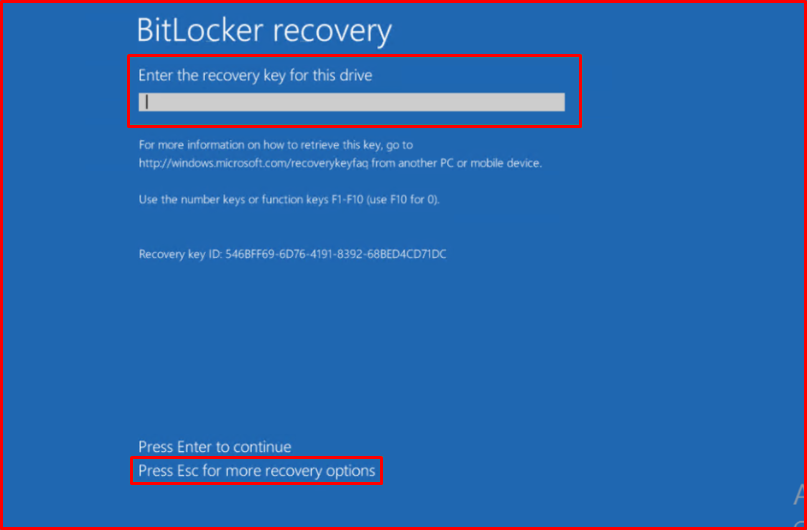
The Key information we record below varies for each system and must match the Identifier information.