Mcafee FRP(File and Removable Media Protection) is a Mcafee application that provides automatic and transparent encryption of files and folders stored or shared on computers, file servers, cloud storage services, emails, removable media such as USB drives and CD/DVDs.
How to Use Mcafee FRP?
You can use Mcafee FRP internally or externally from USBs encrypted with FRP. You can use a method according to your institution’s policy. This article will show you the one and the second method, which is more used. You can use all three methods at the same time.
Mcafee FRP is managed through Mcafee EPO. Three methods are used for Mcafee FRP. These;
The first method: Users can set the password for the USB directly. In this usage, when the user inserts the USB, he can see the data in it as read-only.
Second method: It is done by creating a key on the FRP policy on the EPO. This is achieved by assigning the key to the users or the system. For this key to be assigned, the key is assigned to the user by logging on via FRP. Thanks to this key, when users will send data to the USBs they have inserted, this data is encrypted with the key. Since this key will only be on the institution machine (FRP), this data can only be opened on this machine.
Third method: You can use FRP using a certificate.
Setting for Mcafee FRP from Mcafee ePO “Server Settings”
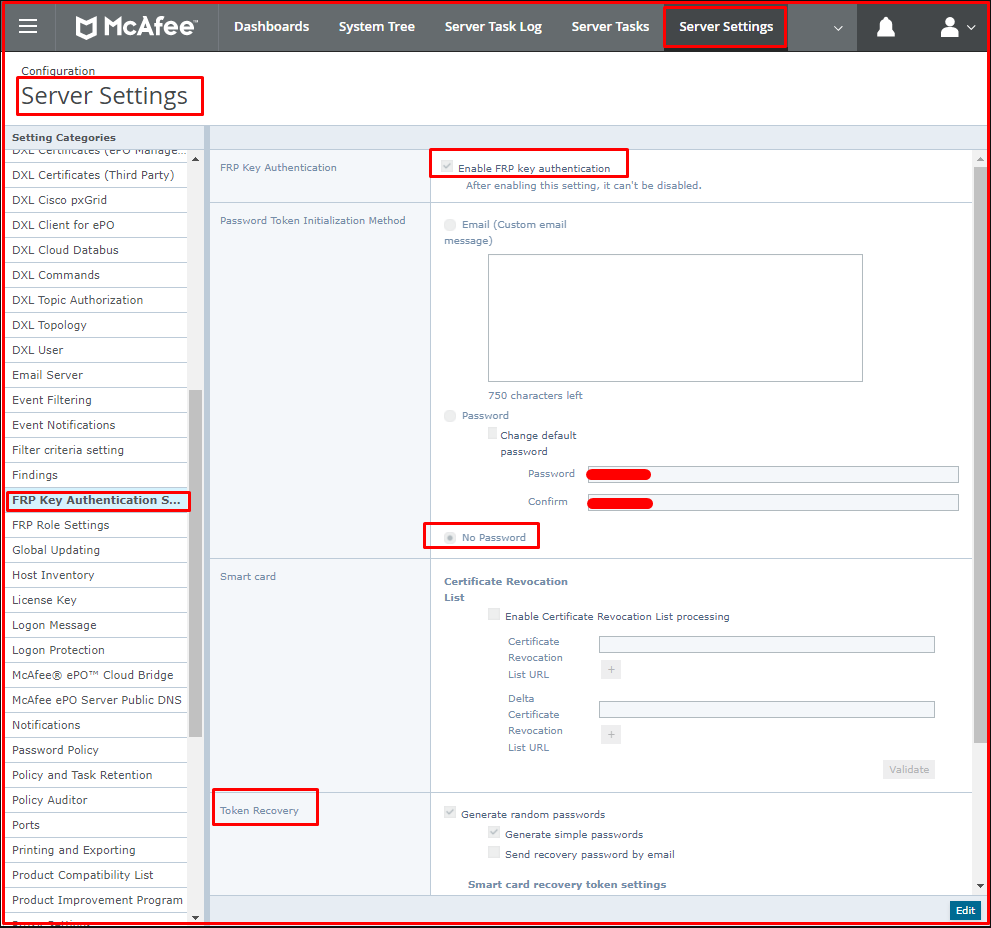
First, we click on the “Server Settings > FRP Key Authentication Settings” tab to make Mcafee FRP key login settings. Here we make the necessary adjustment. We did not want to enter a password when using the Mcafee FRP key. We make and save the settings as follows.
Generating Policy for Mcafee FRP
Secondly, we will set the “Authentication(User-Based Policy)“, “Removable Media(User-Based Policy)” policies of users via Mcafee ePO.
Authentication(User-Based Policy) Policy
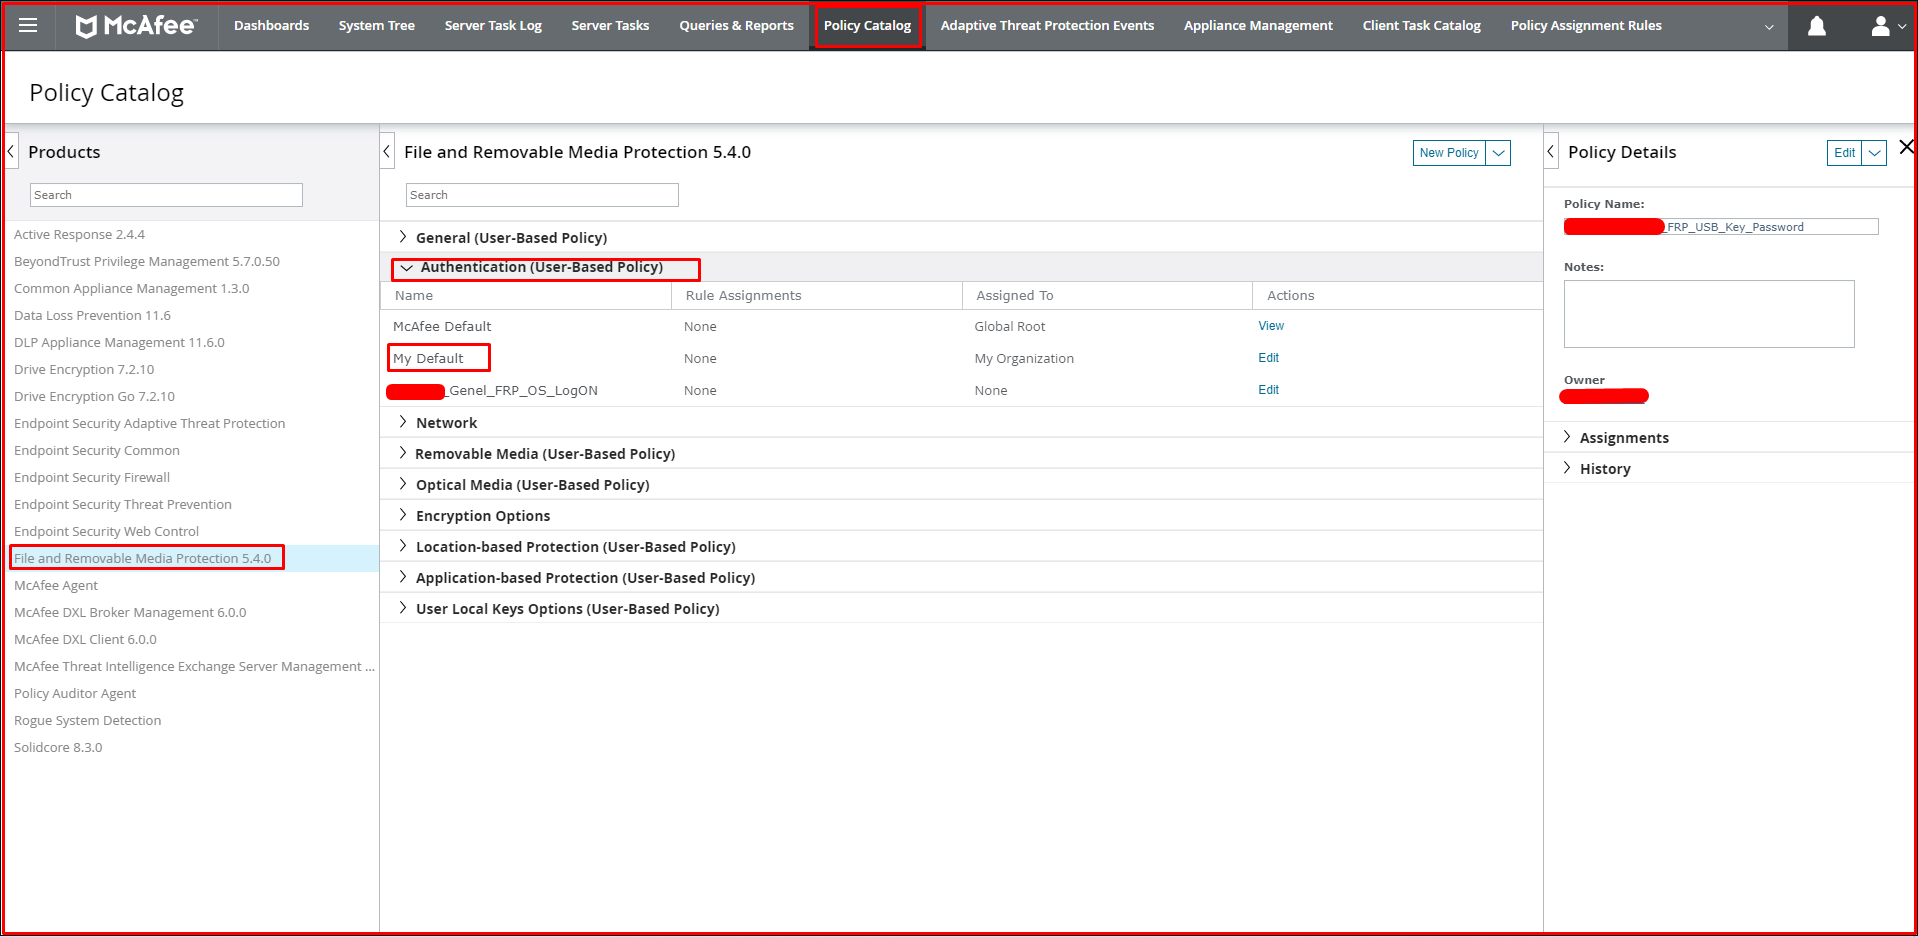
Click “Policy Catalog > File and Removable Media Protection 5.4.0 > Authentication (User-Based Policy) > My Default” policy to create the Authentication policy of users via Mcafee ePO. If you want, you can duplicate the default policy here. Click on the “Edit” tab to edit this policy.
You can set the password policy for “Removable Media” in the “Password” tab on the incoming page.

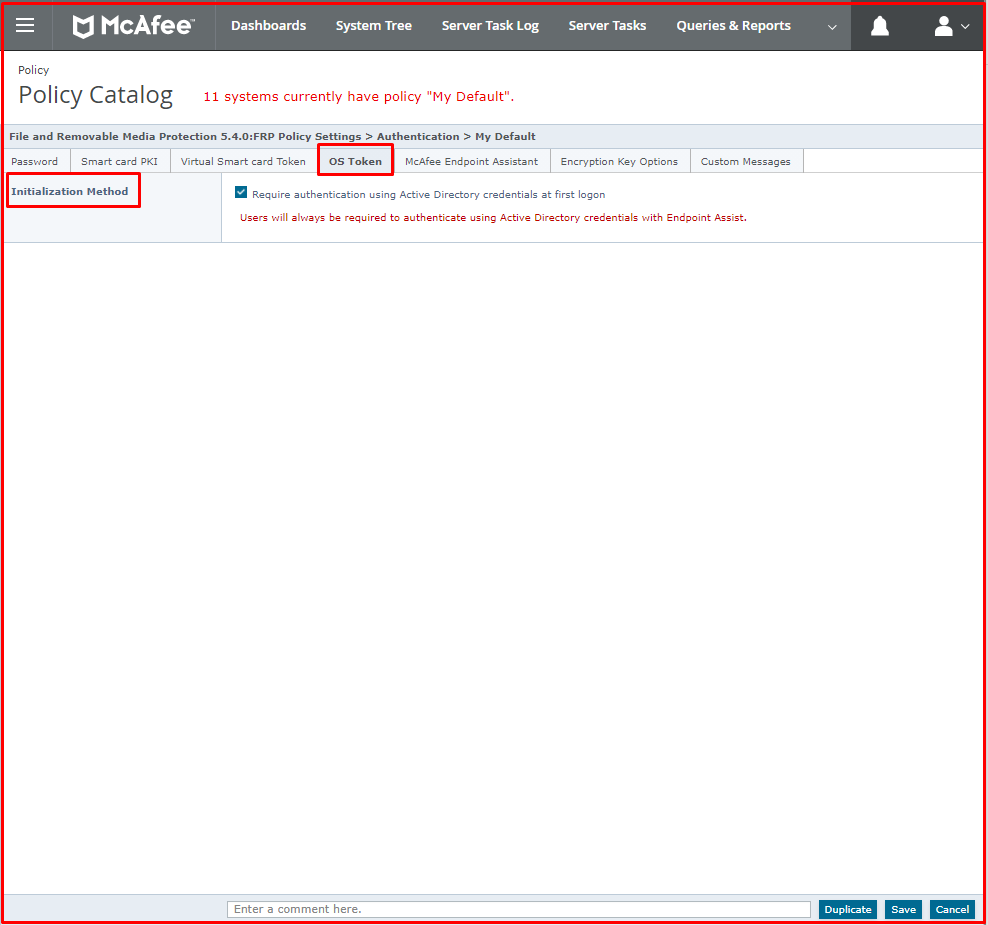
On the “OS Token” tab, it states to log in using Active Directory credentials.
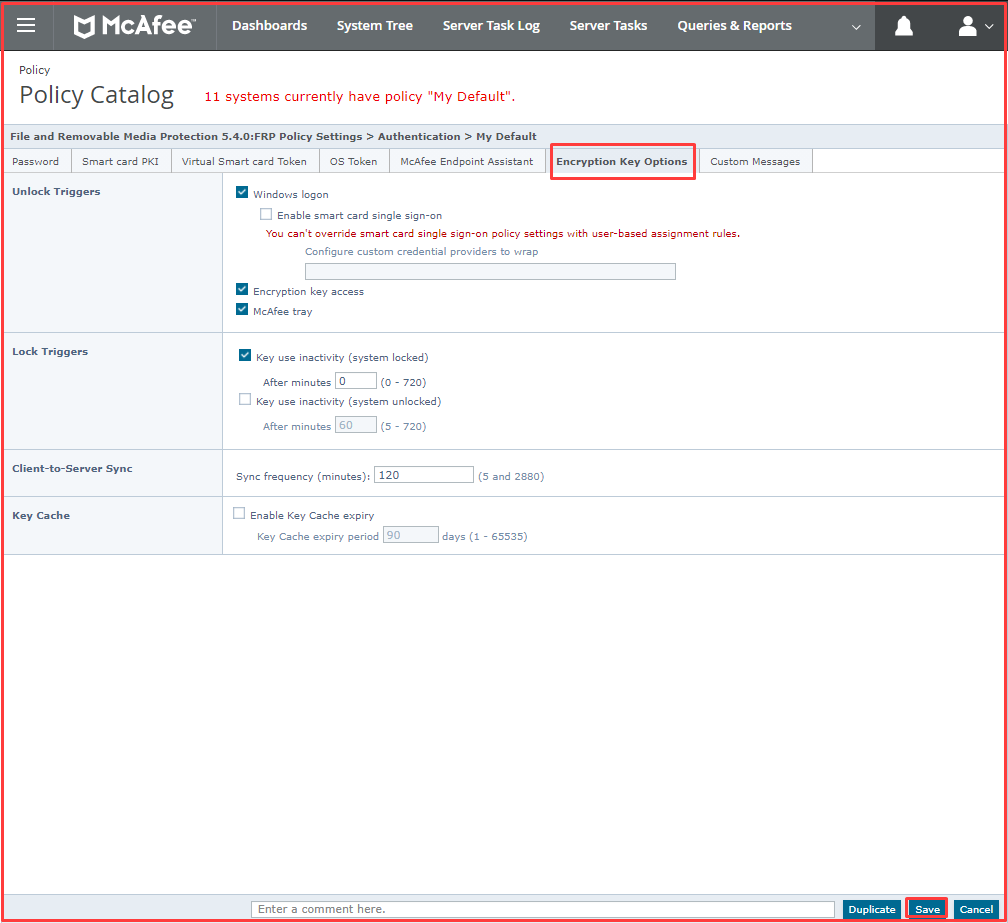
The “Encryption Key Options” tab explains how to enable the FRP key. We continue with the selected ones as follows.
Removable Media(User-Based Policy) Policy
Click “Policy Catalog > File and Removable Media Protection 5.4.0 > Removable Media(User-Based Policy) > My Default” policy to create the Authentication policy of users via Mcafee ePO. If you want, you can duplicate the default policy here. Click on the “Edit” tab to edit this policy.

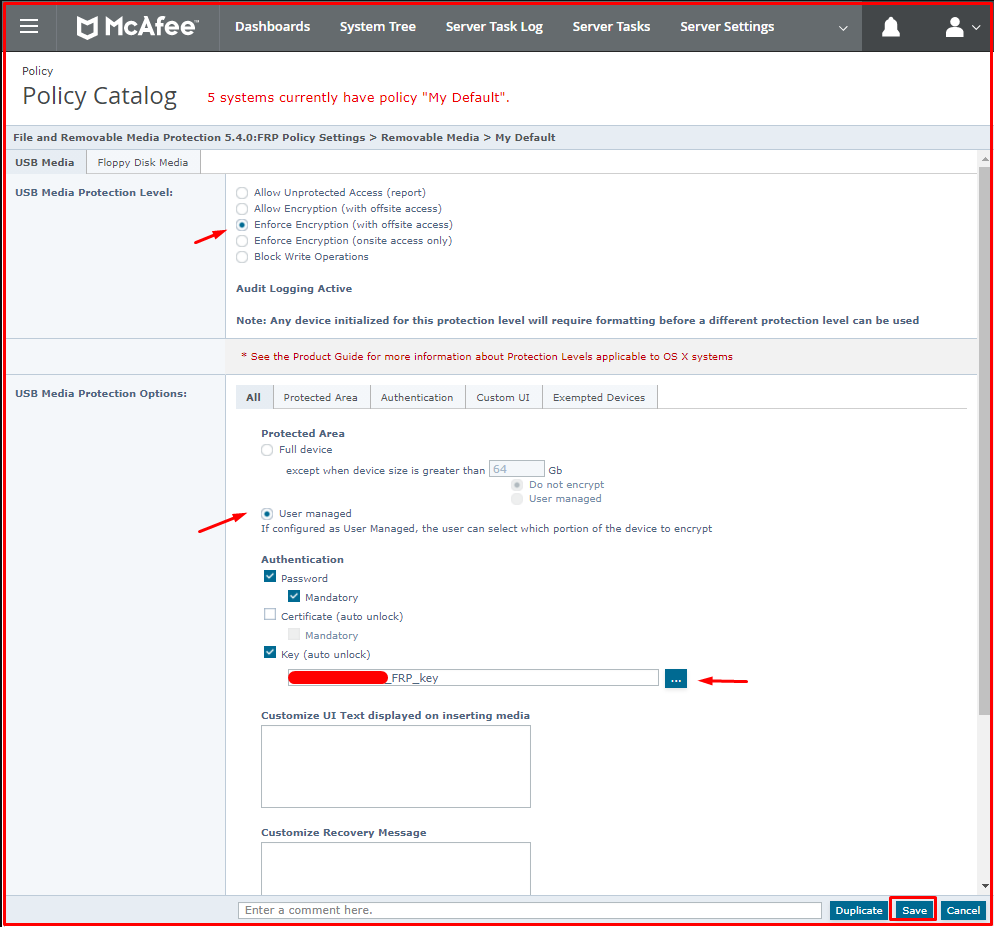
In our FRP policy, we select “Enforce Encryption (with offsite access)” from the “USB Media Protection Level:” tab, since Removable Media will be used outside the institution. For the user to determine how much space on the USB to be encrypted, we select the “User managed” option from the “USB Media Protection Options:” tab. We choose the “Password-Mandatory” options to specify a mandatory password to use USB. Since we will use the FRP key in-house, we choose the FRP key we have prepared from the “Key (auto-unlock)” option. Click the “Save” button and save our policy.
In the “Customize UI Text displayed on inserting media” option, the message that comes when you plug the USB into the computer for the first time indicates. You can edit this field according to your language.
You have inserted an unprotected device into the computer.

All unencrypted devices will be read-only until encrypted by initializing with FRP.

Do you want to encrypt this device?
Generating Key for Mcafee FRP
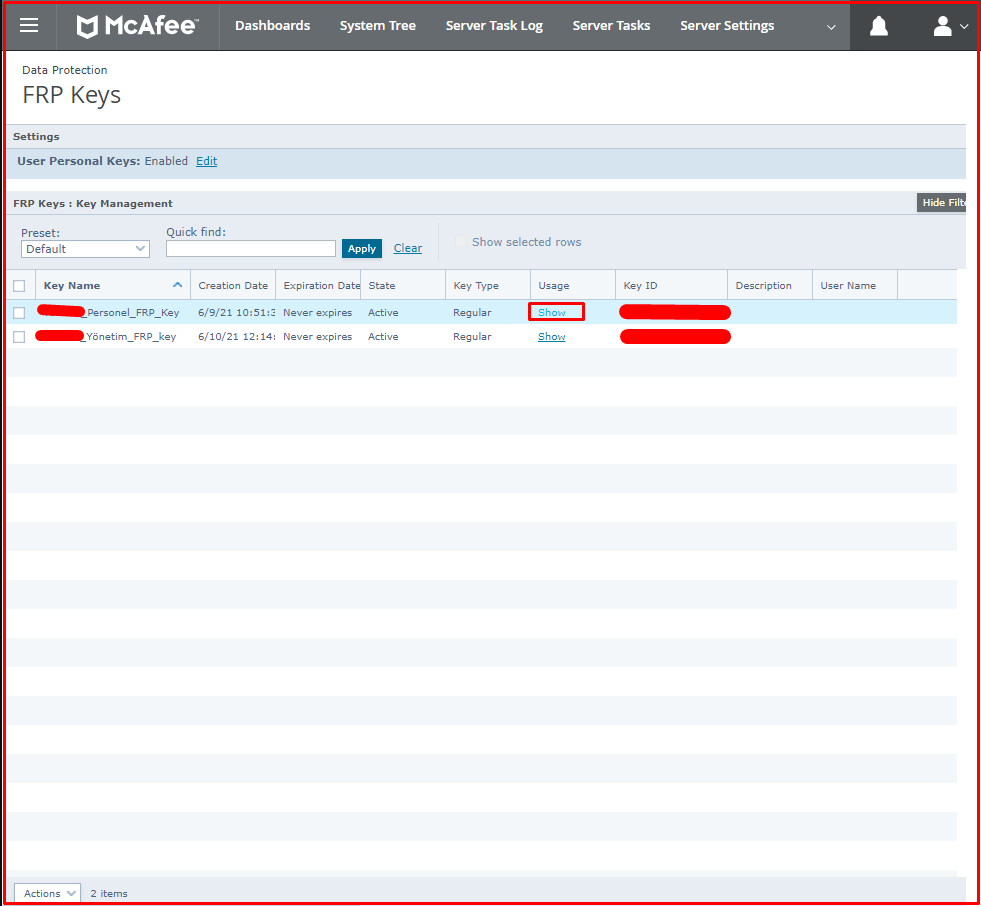
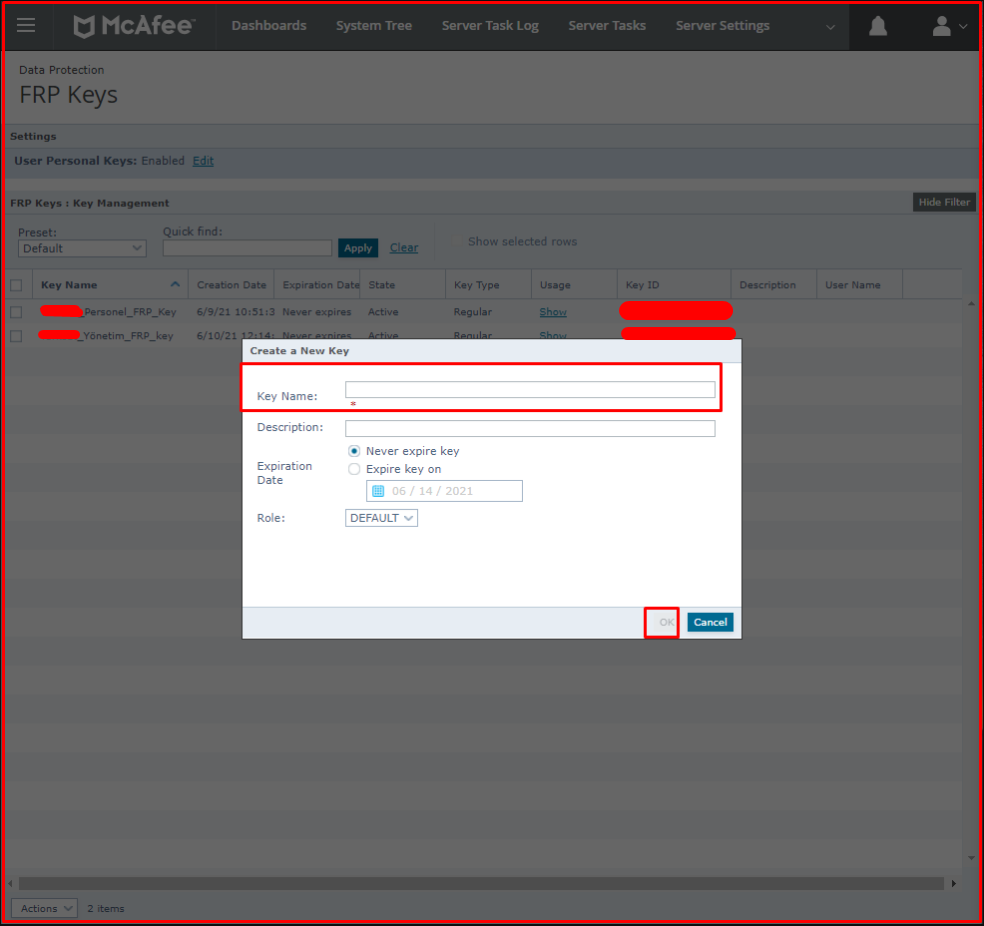
Third, we will use the FRP key that we will use in-house. For this, click “FRP Keys” from the ePO menu. To create a new Frp key, click the “Actions > Create a New Key” button at the bottom of the page that comes up.

On the next screen, give the name “Key Name:” and click the “OK” button.
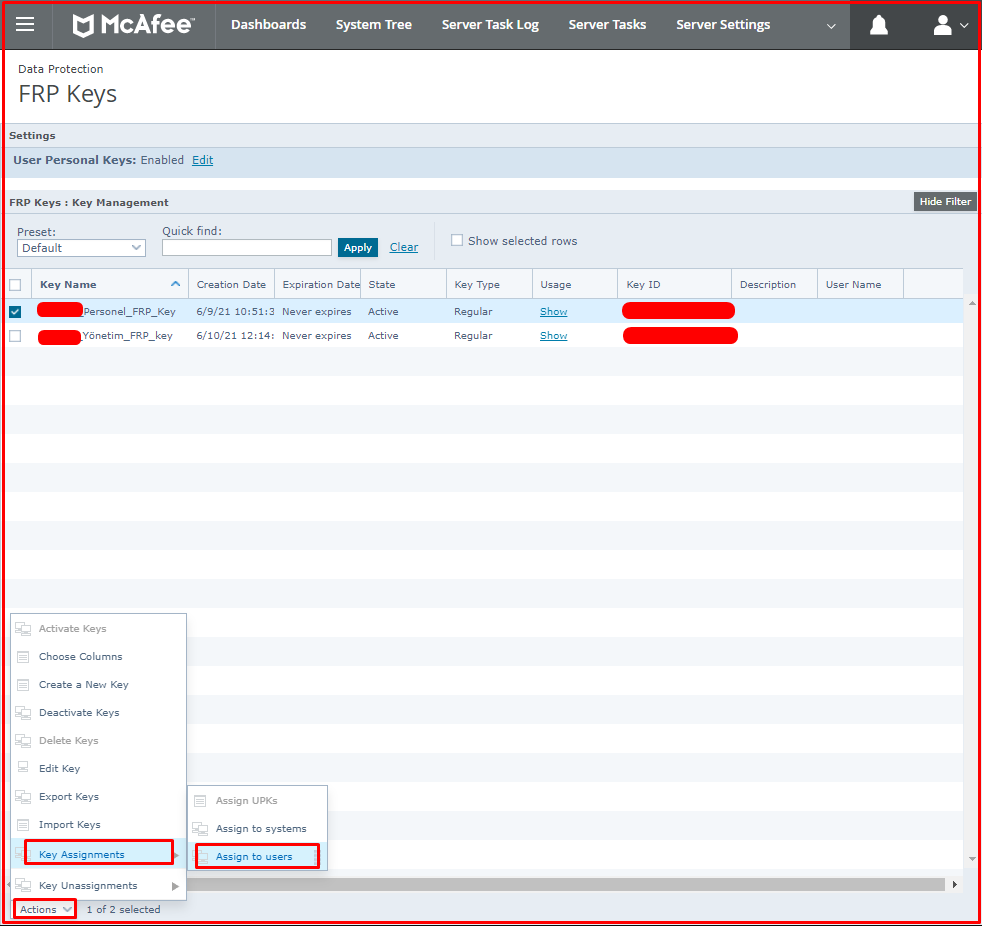
We choose the FRP key we created. Then click “Actions > Key Assignments > Assign to users“. Here you can assign a key to either the system or the user. We will assign the key to the user.
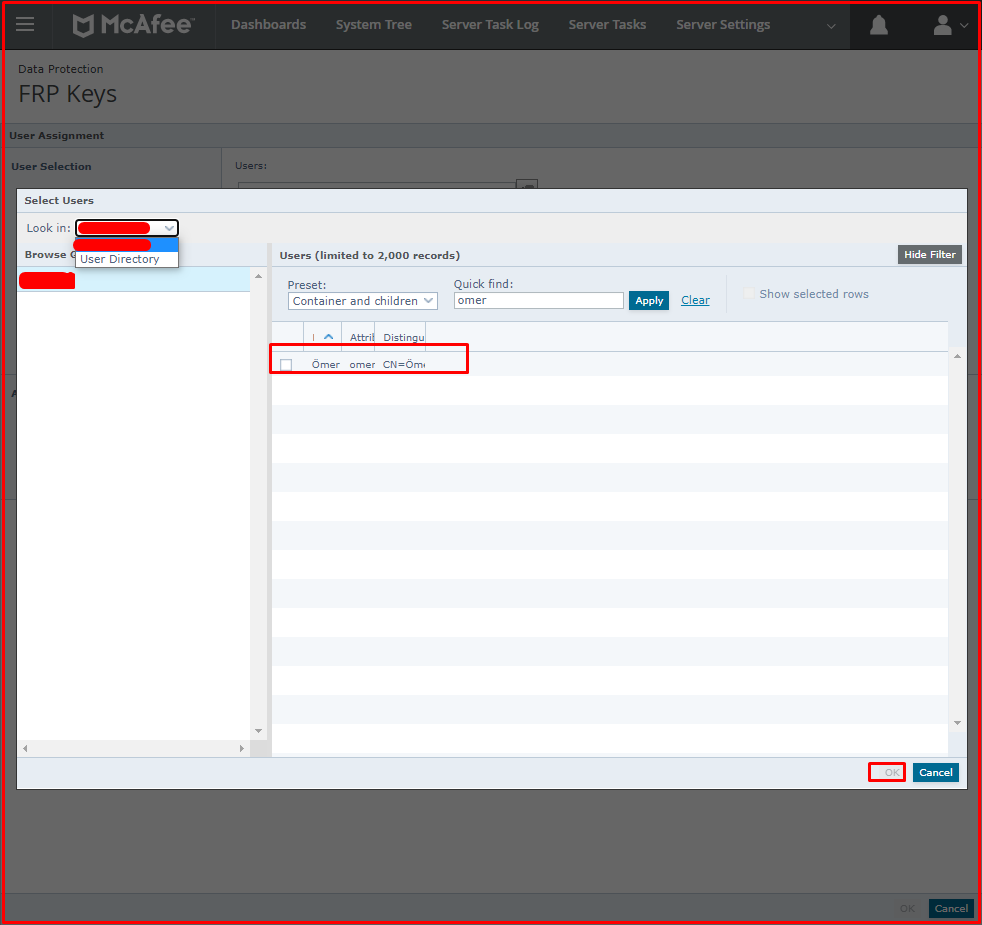
If you are a domain user, select the domain from the “Look in:” option. Select the person to whom you will assign the Mcafee FRP key. Click the “OK” button. You need to select the person in the “User Directory” to assign to a computer user in the workgroup. In the “User Directory“, you need to add people in the workgroup beforehand.
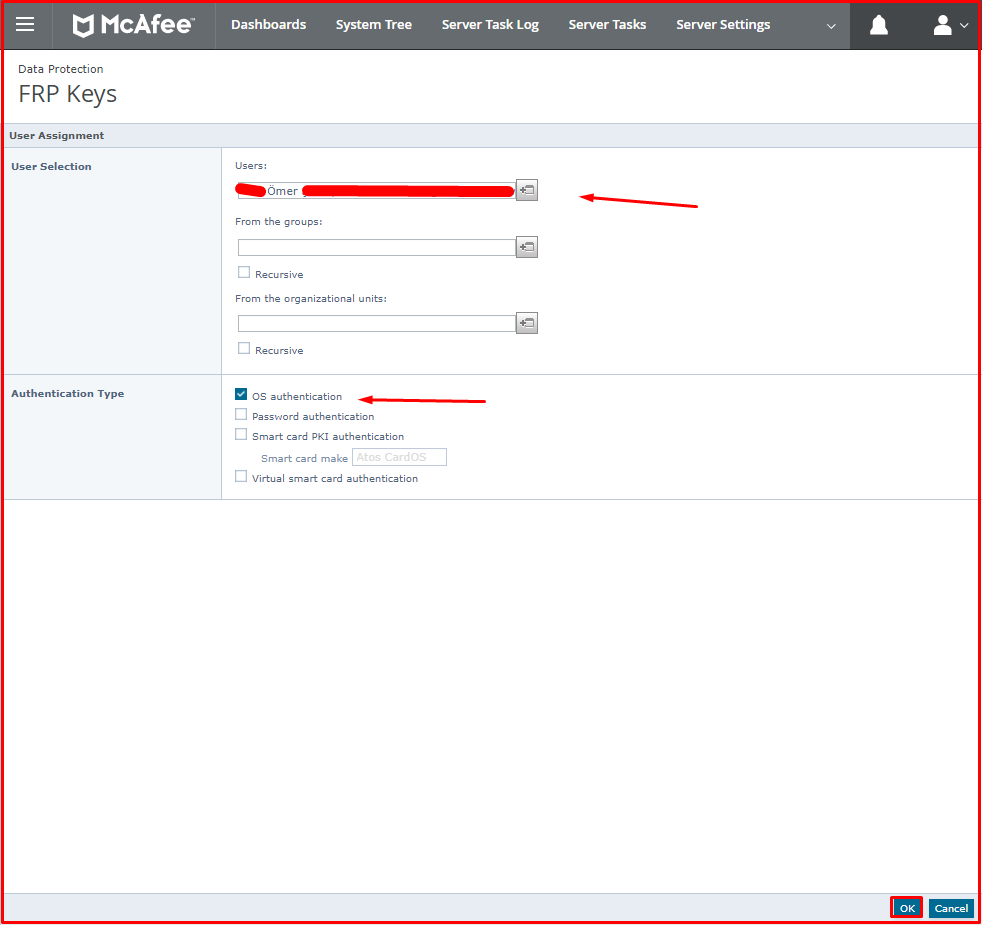
After selecting the user, we select “OS authentication” in the “Authentication Type” tab. We click the “OK” button.
We click the “Show” button to see the users we added to the FRP key we created. You can see the users we have added to the FRP key here. In our next article, we will explain the installation and use of FRP on the computer.
