Mcafee Frp installation is done via Mcafee ePO. Before the installation, we determined the FRP policies in our previous article. We assume that Mcafee Agent is installed on the client before installation. Now we are installing Mcafee FRP on the client via Mcafee ePO. Click on the “System Tree” tab on Mcafee ePO. We choose the client we will install for Mcafee FRP. Then we click on “Actions > Agent > Run Client Task Now” at the bottom.

On the “Run Client Task Now” screen, click “Mcafee Agent > Product Deployment > Create New Task“.

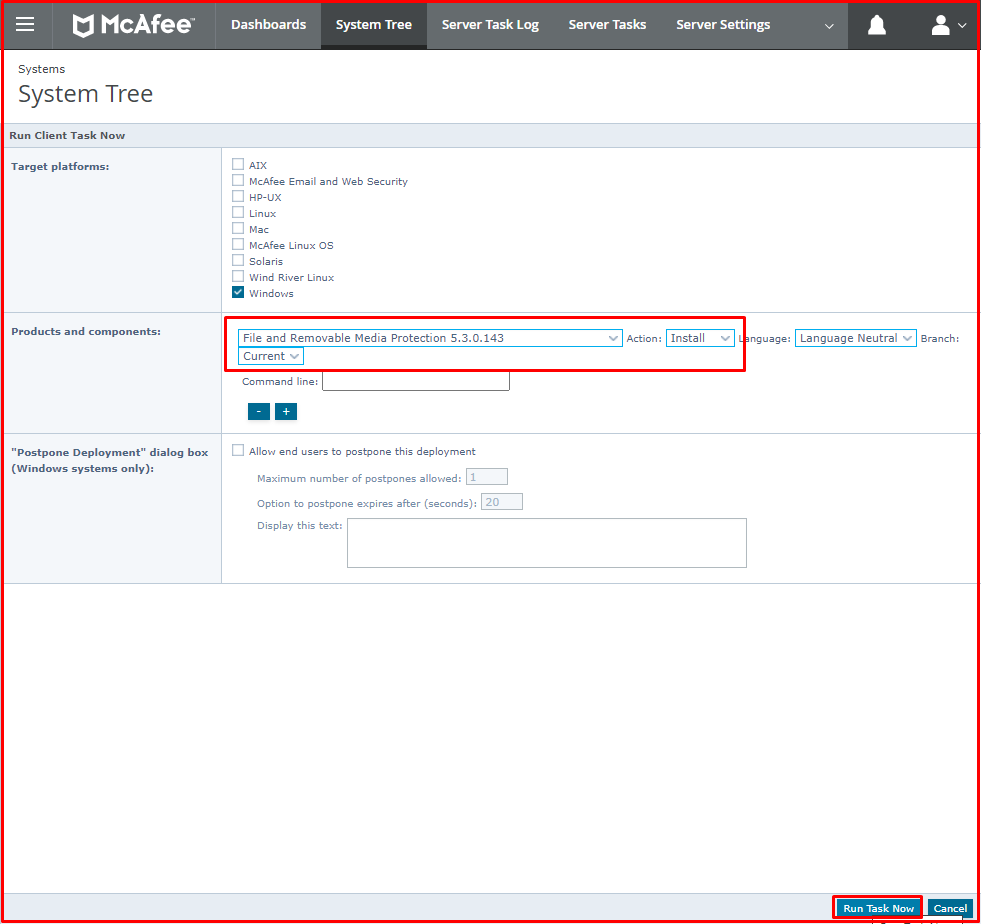
On the screen that comes up, we select “windows” in the “Target platforms:” tab. We select Mcafee FRP from the “Products and components:” tab. We start the installation of Mcafee FRP by clicking the “Run Task Now” button below.

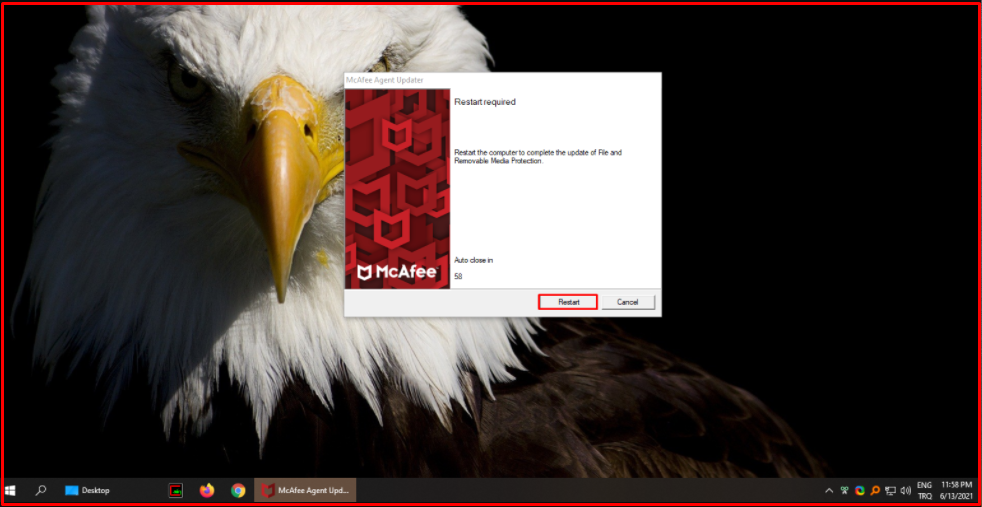
When the installation is done, the following screen will appear on the client. After restarting the client, the installation will be complete.

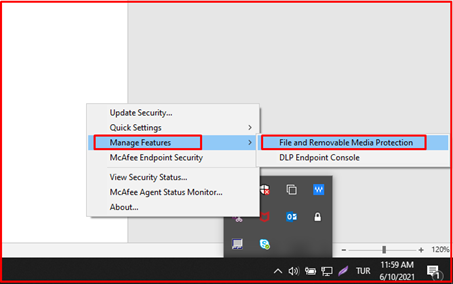
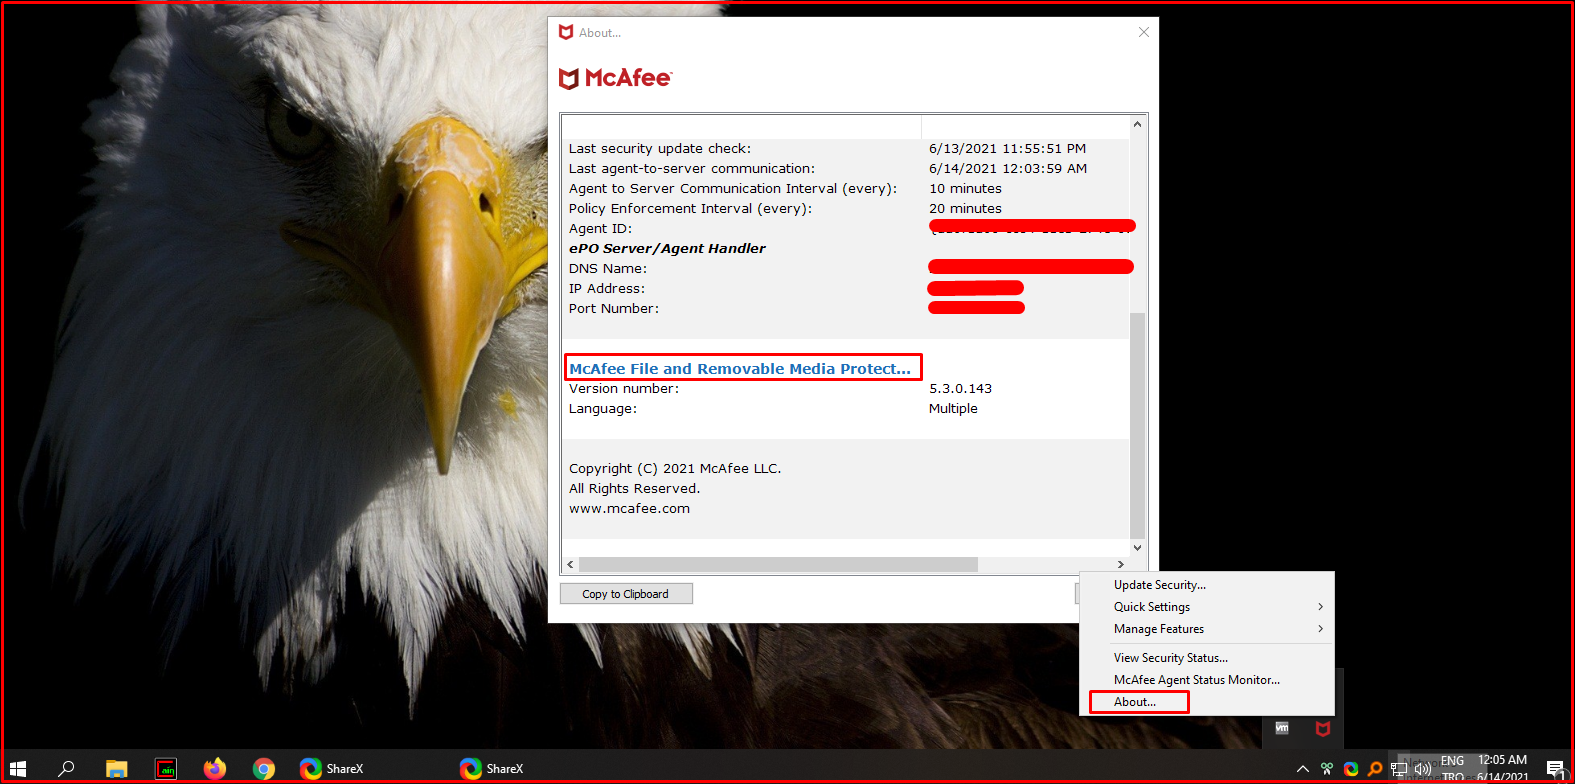
To understand that there is a Mcafee FRP installation, we right-click on the Mcafee agent at the bottom right of the computer. There should be a “Manage Features > File and Removable Meda Protection” or “About… > File and Removable Meda Protection…” tab.


Click the “File and Removable Media Protection” tab to see Mcafee receives the FRP Policy. The key policy should appear in the “Available keys” tab on the page that comes up.

If Mcafee did not receive the Mcafee FRP policy, that is, if there is no necessary policy under “Available key“, we right-click on the Mcafee agent at the bottom right. Click on the “Quick Settings > FRP Log On” tab.

When we click on the “FRP Log On” tab, the following screen will appear. When we click the “Authenticate” button, the login will be successful.

When we click the “Authenticate” button, the following screen will show that the Mcafee FRP session was successful.


