

 by
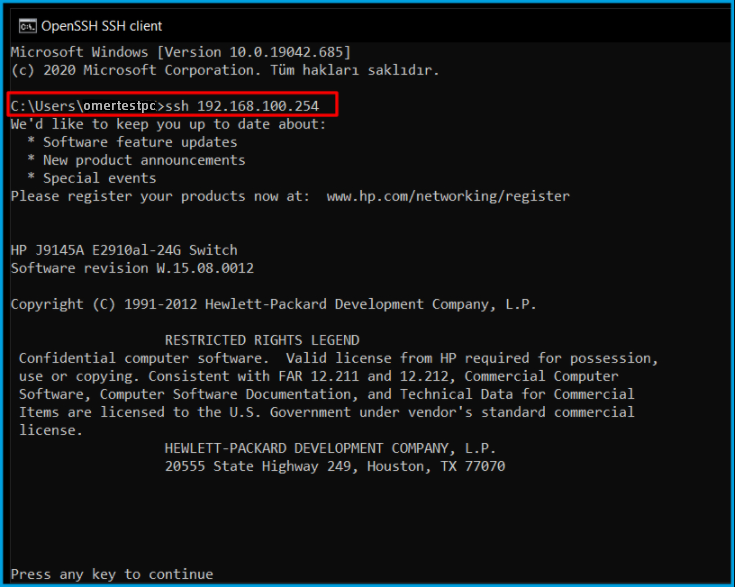
by We will be distributing IP to VLANs on Layer-3 and Layer-2 Switches in our test environment over DHCP. The commands here are for HP brand Switch devices and there is little difference in other brands of devices, for example, DELL, Cisco brands, but the logic is generally the same. You can view our structure in the image below.

We will activate the DHCP service over Windows Server 2019, which we will connect to the VLAN-100, and distribute IP automatically to the relevant VLANs. Now we are connecting to the Layer-3 Switch.
We specify the IP address of our DHCP Server by writing ip “helper-address 192.168.100.5″ to the VLANs that we want to get an IP address over DHCP. Since we want to make automatic IP distribution over VLAN-100 and VLAN-200 in our Bezim structure, we have added the relevant command to these VLANs.

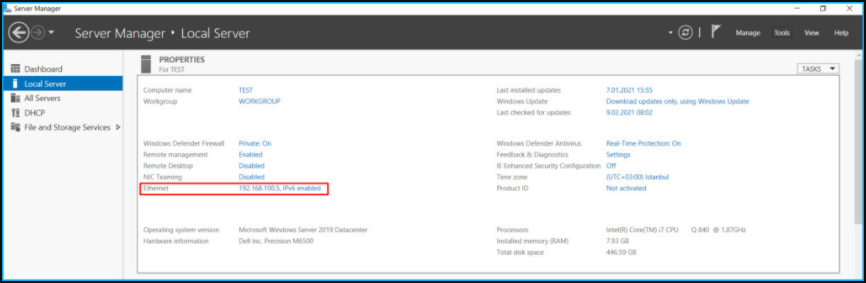
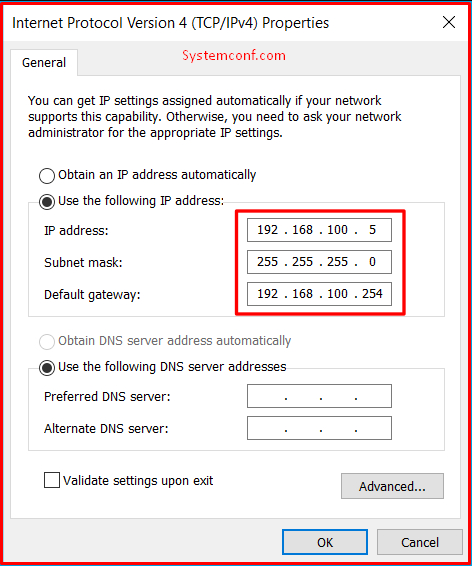
We have completed our transaction on the switch side. Now we go to our DHCP Server. We set our server’s IP address to be fixed. We have given the 192.168.100.5/24 Block. This server will be connected to a port of VLAN-100 in the system.
We set the server’s IP configuration as follows.
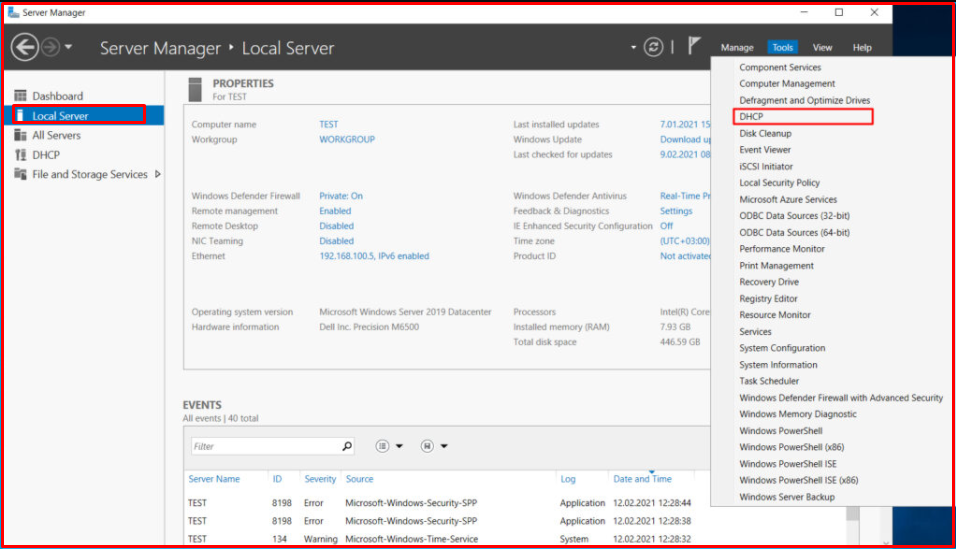
Now, to make the settings of the DHCP service, we click on the “Server Manager> Local Server> Tools> DHCP” field as on the screen.
Our server’s name is a TEST and we see that there is no “Scope” definition available.
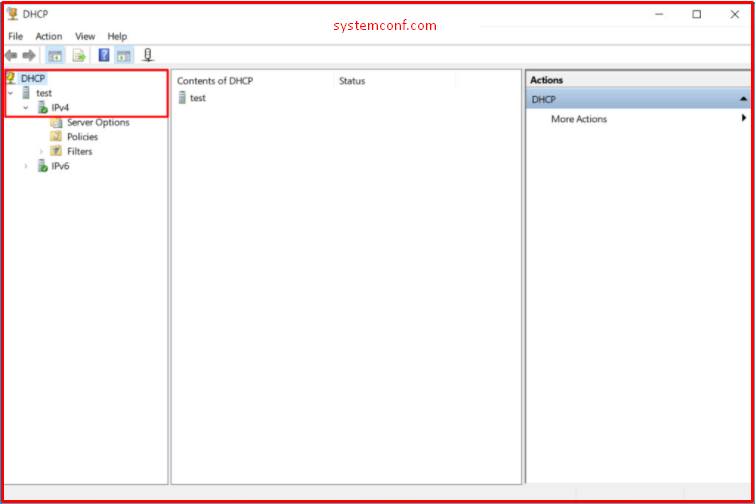
Since we will distribute the IPv4 address, we right-click in the IPv4 field and start creating a new “Scope”.

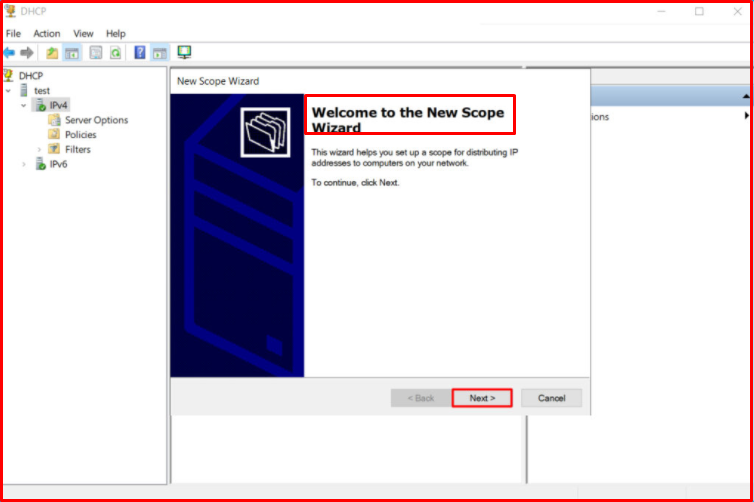
The “Scope” creation wizard greets us. We continue by clicking the “Next” button.
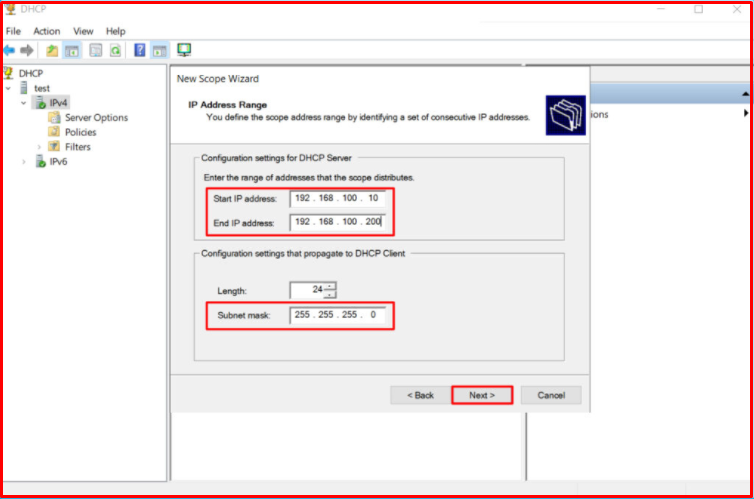
First, we will create a “Scope” for DEPO-VLAN [192.168.100.0/24] VLAN-100. We continue by clicking the “Next” button by giving the name.

We choose our IP address pool from 192.168.100.10 to 192.168.100.200, and we want it to distribute IP addresses in this range.
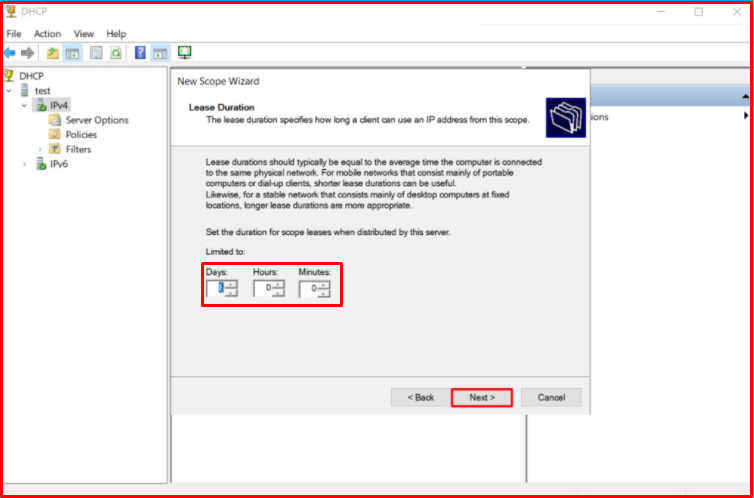
We do not touch the default time for rental IP addresses and continue by clicking the “Next” button.
We declare that we will make our settings for this “Scope” and “Yes, I want to configure these options now.” We choose the option. We continue by clicking the “Next” button.

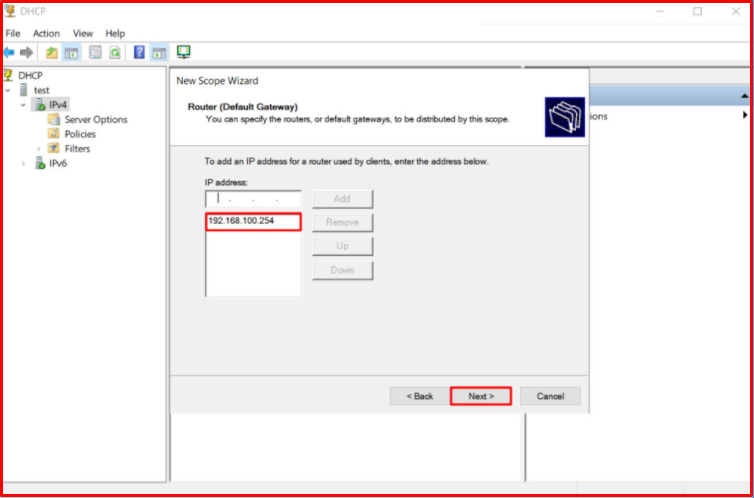
We enter whatever the Default Gateway is for the relevant VLAN. Since it is 192.168.100.254 in our structure, we enter it and continue by clicking the “Add” button.

Our gateway address has been added. We continue by clicking the “Next” button.
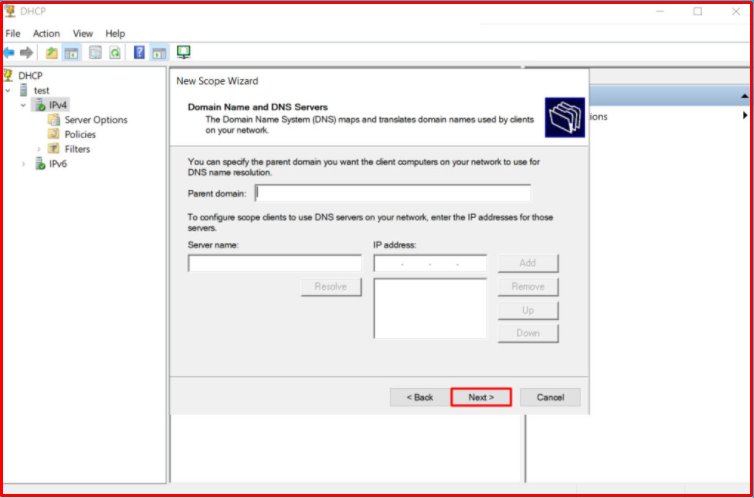
On this page, you can see the add DNS Server screen. Normally, you need to enter the IP and FQDN name of your DNS Server in your structure. We do not have a DNS server, so we skip this step. We continue by clicking the “Next” button.
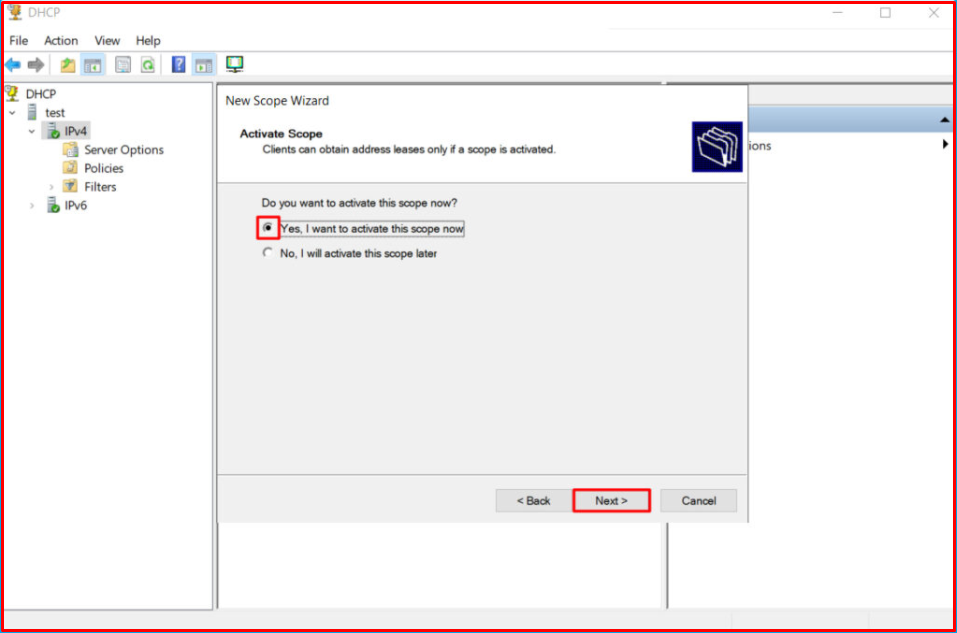
On this screen, “Yes, I want to active this scope now.” We choose the option. We continue by clicking the “Next” button.
We have completed the related “Scope” setup for “VLAN-100“. We finish by clicking the “Finish” button.

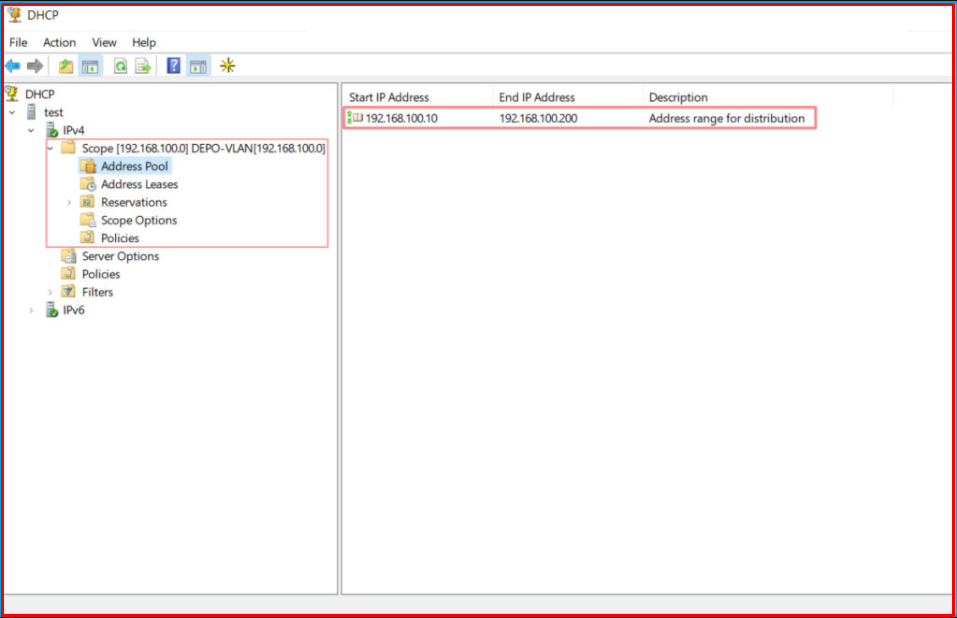
The “Scope” we have created comes under IPv4. Under “Address Pool“, you can see the IP range we defined.
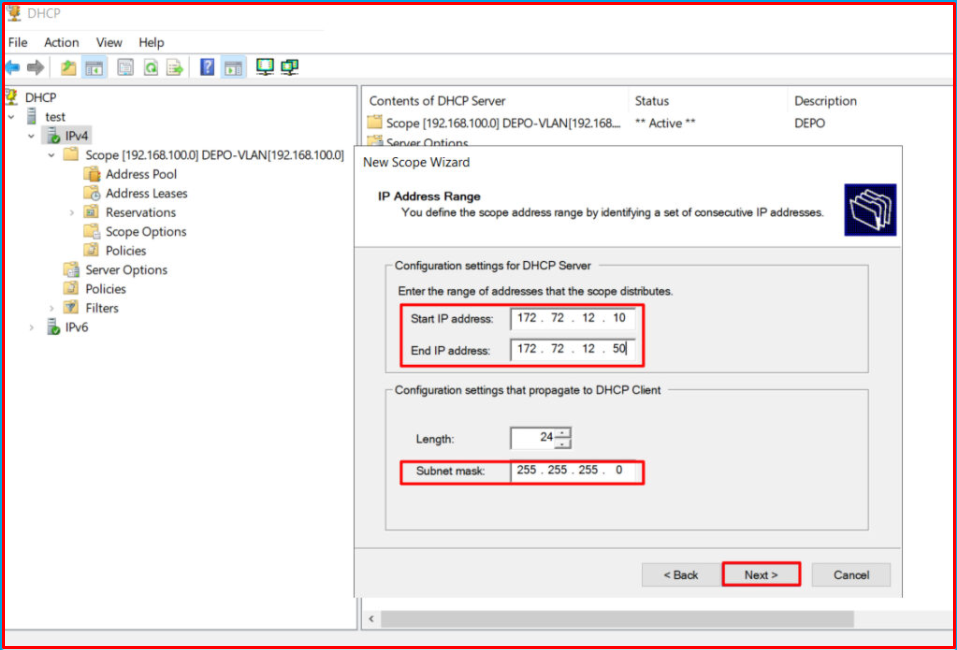
Now we will create a “Scope” for the SHIP-VLAN [172.72.12.0/24] VLAN-200. We only change the IP address and range for the relevant Scope, and enter its Gateway address.

We set this Scope IP range from 172.72.12.10 to 172.72.12.50.
Now it came in two Scopes under the IPv4 tab as we set IP ranges.

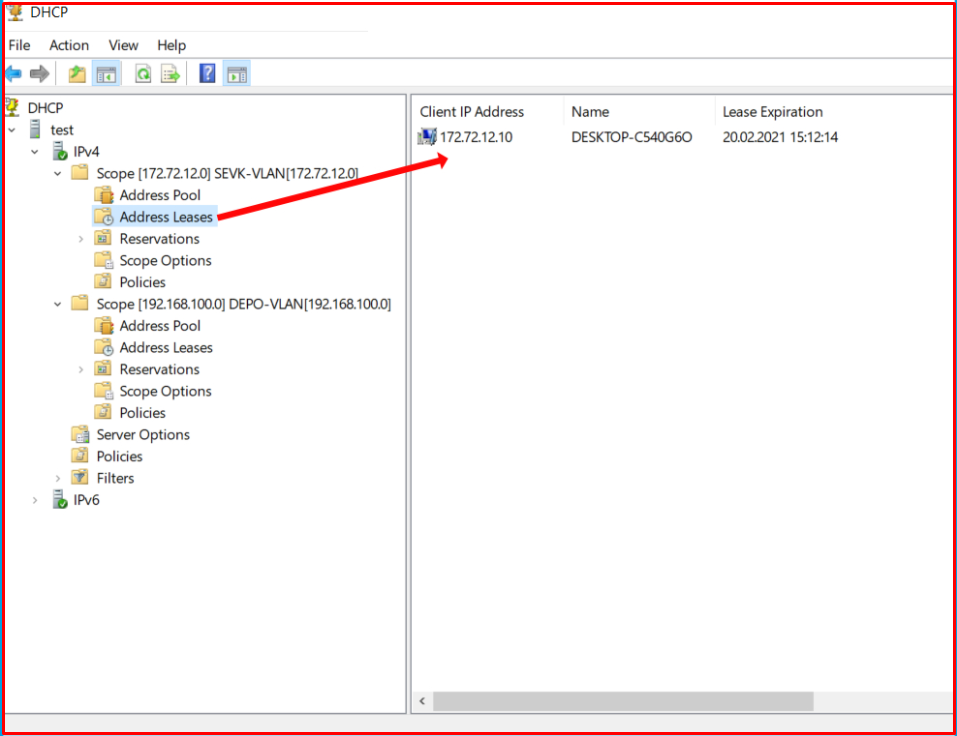
Now, we connect a computer whose network settings are set to receive IP automatically to the Port of the VLAN-200 and check whether it can obtain its IP address automatically. The address 172.72.12.10, which is the first IP address of the range we have specified, is given as follows.
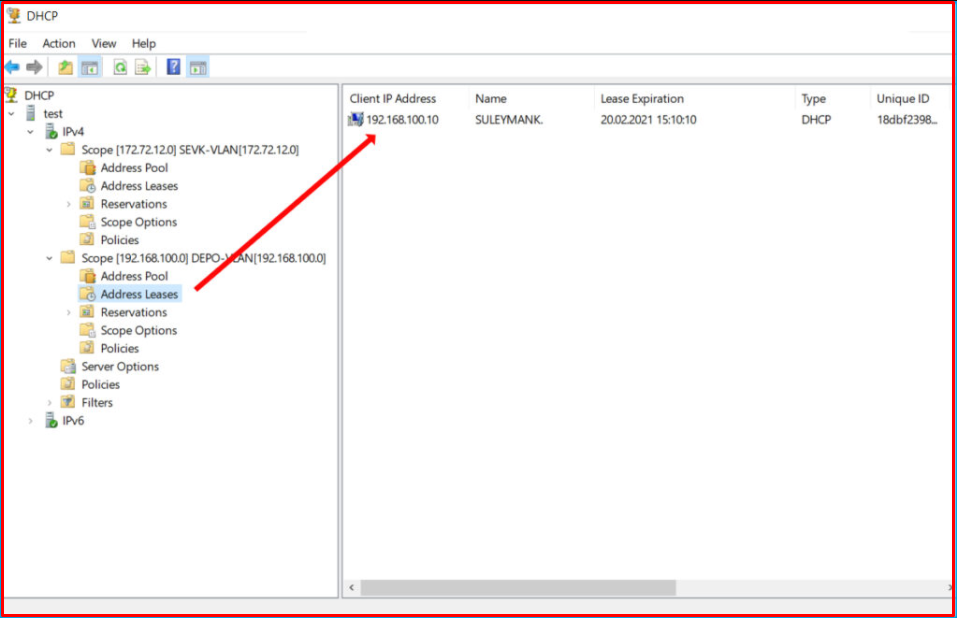
Likewise, we connect another computer to a port belonging to VLAN-100 and we control it. We see that it automatically obtains the IP address from the range for the VLAN-100 we have specified.
We created VLANs on HP brand Switches and enabled these VLANs to communicate with each other. Then, in such a setup, we practically realized how to distribute the IP distribution process to more than one VLAN over a DHCP.


