Iptables is a local firewall that uses the Netfilter framework infrastructure and comes with the Linux kernel for a long time.
How to use iptables?
Netfilter allows defining callbacks to be called while packages are processed in the Linux kernel. iptables, on the other hand, uses the Netfilter infrastructure to provide an interface to prepare callbacks to be called by the kernel while the packets are processed.
Iptables has defined a chain for packets that come to the server, exit the server, and that the server routes. These chains are called INPUT, OUTPUT and FORWARD respectively. iptables allows the user to add rules to these chains and take certain actions when the inspected package complies with one of these rules. The package leaves that chain with the first rule it matches in a chain. When the packet matches, it either jumps to another user-defined chain or is DROP or ACCEPT.
If a package does not match any rule in the chain, the default action of that chain is applied to the package. The default action can be ACCEPT or DROP. For example, if a TCP – 80 ie HTTP request comes to a server whose default action is DROP and the only TCP – 22 port is allowed, the DROP action will be applied by the kernel to the packet that does not match any rules in the INPUT chain. In systems where security is at the forefront, the default action is selected as DROP with the default DROP concept, and services are added with rules ending with ACCEPT.
Chains
When entering the rule regarding iptables or seeing an iptables rule, we will need to understand the graph below so that we can understand this. Of course, the diagram below is an understandable representation in its simplest form.
In Iptables, the rules are kept in structures that we call chain within the tables (filter, nat, mangle, etc.) that provide a sort of category order. With Iptables, these tables contain ready-made chain structures. These ready-made chain structures, which you can easily understand when you look at the table below, mean the following:

INPUT: It is checked whether an incoming package matches the rules in this chain structure during its entry to the user. If they match, the target option is applied.
OUTPUT: During the exit of a packet from the user, it is checked whether it matches the rules in this chain structure. If they match, the target option is applied.
FORWARD: If the packet is to be forwarded correctly to a new address, it is checked whether it matches the rules in this chain structure. If they match, the target option is applied.
PREROUTING: Pre-routing package header information is checked to see if it matches the rules in this chain structure. If they match, the target option is applied.
POSTROUTING: After routing, it is checked if it matches the rules in this chain structure in order to organize the package header information. If they match, the target option is applied.
Tables
This table is listed by default when we list filter: iptables. This table contains the INPUT, OUTPUT and FORWARD chains. It handles rules such as whether the package will go or drop it.
nat: Operates rules on network address translation. This table contains the PREROUTING, INPUT, OUTPUT, POSTROUTING chains.
mangle: Process defined rules to change the information of the IP packet. This table contains the PREROUTING, INPUT, FORWARD, OUTPUT, POSTROUTING chains.
raw: It processes the necessary rules to monitor package states. PREROUTING, OUTPUT chains.
security: It processes the necessary rules for the Selinux security module. There are INPUT, FORWARD, OUTPUT chains.
We can summarize the table/chain structure as follows.

Match Options
To determine if a package matches a rule, it will be necessary to compare a value specified in the rule by the user with the value in the package. For this, we can use one of the options below.
–Source (-s): If the source IP in the package and the IP specified in the rule match, the target option is applied.
–Destination (-d): If the target IP in the package and the IP specified in the rule match, the target option is applied.
–Protocol (-p): If the target protocol in the package and the protocol specified in the rule match, the target option is applied.
–Source-port (–sport): If the source port in the package matches the source port specified in the rule, the target option is applied. – It is used with the protocol parameter.
–Destination-port (–dport): If the target port in the packet matches the target port specified in the rule, the target option is applied. – It is used with the protocol parameter.
-Tcp-flags: If the flag in the package matches the ports specified in the rule, the target option is applied. Used with the –protocol parameter.
–Input-interface (-i): If the packet comes from the specified interface, the target option is applied.
–Output-interface (-o): If the packet leaves the specified interface, the destination option is applied.
Match modules
In addition to matching options, you can also use different matching options through modules. There are many modules that come in iptables by default. You can use them together with the –match (-m) parameter.
You can see the modules in the directory below.
ls /lib/modules/$(uname -r)/kernel/net/netfilter/
Example of using the state module:
iptables -A FORWARD -i eth0 -m state ! --state NEW -j DROP
Destination Options
The state of the package that matches the rule is specified with one of the following target values in that rule. Used with the –jump (-j) parameter in the rule.
ACCEPT: Package is accepted.
DROP: The package is not accepted, it is dropped.
REJECT: The package is not accepted, it is dropped. Also, an ICMP message is sent to the packet sender. (see: Firewall Reject or Drop?)
LOG: Logs the package.
RETURN: Sends the package back to the chain rule it came from and allows it to continue the filtering process from where it left off.
REDIRECT: Redirects the package.
SNAT: Realizes the Source Nat transaction. IP and port range can be specified. It happens with POSTROUTING. SNAT is used if more than one exit IP is required to access the internet.
DNAT: Realizes the Destination Nat operation. It happens with PREROUTING. Multiple servers may want to use a single ip. For example, we can give the load-balancing process as an example. You can think of it as port forwarding.
SAME: It takes the same operation as SNAT, except it always uses the same address.
TTL: Used to change the TTL value. For all systems, the TTL value can be pulled to a suitable value.
<User Defined Chain>: The package is assigned to a user-defined chain.
Add / Delete rules
The first of the most important functions in a firewall is to enter and delete rules. In iptables, –append (-A) parameters are used to add rules, and –delete (-D) parameters are used for deleting.
iptables --append OUTPUT --destination 192.168.254.129 --protocol tcp --destination-port 80 --jump DROP
The easiest method to delete is to delete by specifying the rule number in the chain. Or you can enter the same rule you entered by replacing the -A parameter with the -D parameter. You can learn the rule number with the –line-numbers parameter.
iptables --list OUTPUT --line-numbers
iptables --delete OUTPUT 1
The rule added with the –append parameter is always added to the last row. If you want to specify the order, you can use the –insert (-I) parameter. For example, if we want to add it to the 1st row, we can use it as follows.
iptables --insert OUTPUT 1 --destination 192.168.254.129 --protocol icmp --jump DROP
Changing rule values
With the –replace (-R) parameter, you can change the values in the rule to another value.
iptables --list OUTPUT --line-numbers
iptables -R OUTPUT 2 -s 192.168.254.0/24 -j DROP
For example, the above rule changes the values in the -s and -j position of the OUTPUT rule number 2. While entering the rule, take care to enter all the parameters, otherwise, those that are not entered will change to any.
Save iptables rules, revert to old rules
You can screen iptables rules with the iptables-save command and then save them to a file. So, even if you make any changes, you can go back to the old configuration with the iptables-restore command.
iptables-save > rules.txt
iptables-restore < rules.txt
Permanently apply iptables rules
Your entered iptables rules fly when your server is restarted. So the rules entered are on-the-fly.
In order to make it permanent, we will write the rules we have entered into a fixed file.
iptables-save > /etc/iptables.conf
Then it is entered in /etc/rc.local file to start at startup to process this file on every reboot.
iptables-restore < /etc/iptables.conf
Clearing the rules in the chain
You can clean the chains in iptables with the –flush (-F) parameter.
iptables -F
iptables -F OUTPUT
iptables -t nat-F
Clearing the byte counters of the rules
You can see the number of bytes corresponding to the rule you have written by saying –verbose (-v). To clear this counter, you can clear it by saying –zero (-Z).
iptables --list OUTPUT --line-numbers -n -v
iptables --zero OUTPUT 3
Changing the default policies of chains
Firewalls generally show two default behaviours. One accepts everything, rules constrain. Another is that nothing is accepted, it is activated by rule. You can change this default policy of your chain structure with the –policy parameter.
iptables --policy INPUT DROP
iptables --policy OUTPUT DROP
Orientation
-J REDIRECT is used to route the incoming packet. The pattern is as follows.
iptables -t nat -A PREROUTING -p tcp --dport 80 -j REDIRECT --to-ports 8080-8082
iptables --list -t nat
How to use iptables with examples
In systems where usability is prioritized, the default action is determined as ACCEPT with the default ACCEPT concept and the services to be blocked are added one by one with the DROP rule. Let’s try to understand how to use iptables with examples.
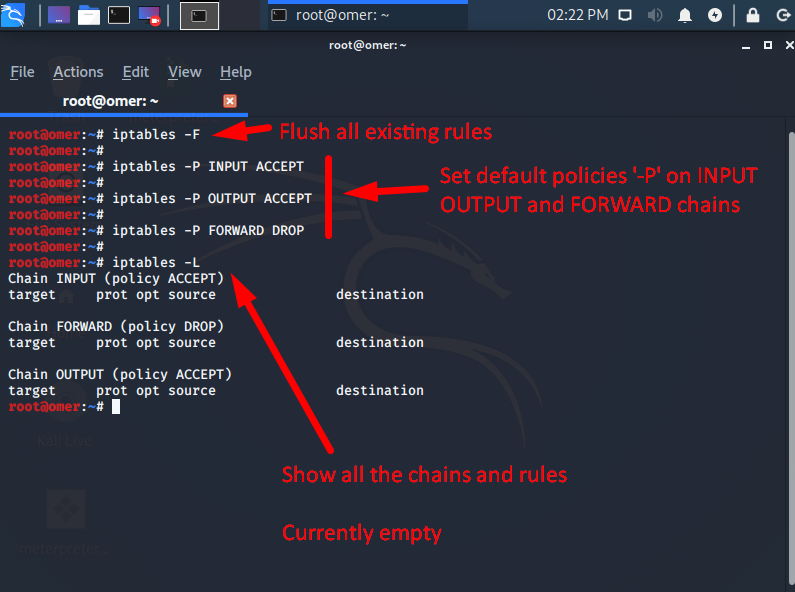
In the screen output below, first, the existing rules are deleted, then the default INPUT and OUTPUT default actions are ACCEPT, and the FORWARD default action is DROP. In fact, the firewall is effectively disabled, except FORWARD.
root@omer:~# iptables -F
root@omer:~#
root@omer:~# iptables -P INPUT ACCEPT
root@omer:~#
root@omer:~# iptables -P OUTPUT ACCEPT
root@omer:~#
root@omer:~# iptables -P FORWARD DROP
root@omer:~#
root@omer:~# iptables -L
Chain INPUT (policy ACCEPT)
target     prot opt source               destination

Chain FORWARD (policy DROP)
target     prot opt source               destination

Chain OUTPUT (policy ACCEPT)
target     prot opt source               destination
root@omer:~#

If connecting to the server remotely, if the default DROP rule is added to the INPUT chain without allowing the SSH port, access to the server will be lost. In this case, we can add the SSH rule to the chain first.

After we specifically allow SSH, we can now switch to default DROP in the INPUT chain. By switching to default DROP, we will run a web server on the server and try to access it from outside.
root@omer:~# iptables -P INPUT DROP
root@omer:~#
root@omer:~#
root@omer:~# python3 -m http.server 80
Serving HTTP on 0.0.0.0 port 80 (http://0.0.0.0:80/) ...

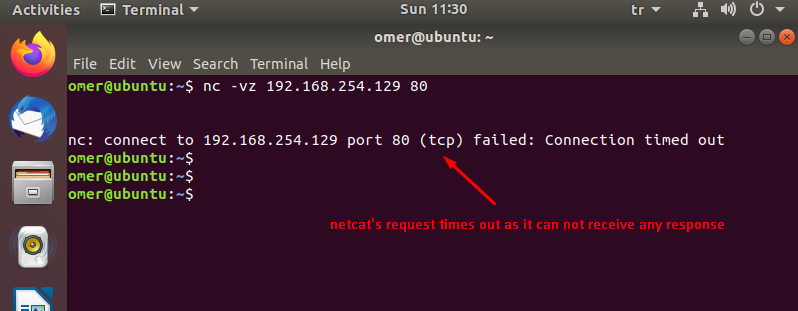
omer@ubuntu:~$ nc -vz 192.168.254.129 80
nc: connect to 192.168.254.129 port 80 (tcp) failed: Connection timed out
omer@ubuntu:~$

As you can see, the TCP connection request made to port 80 has been timeout after waiting for a few minutes. Since the package was DROP by the kernel, no positive/negative response was returned to the client about the request made, the package is officially trashed.
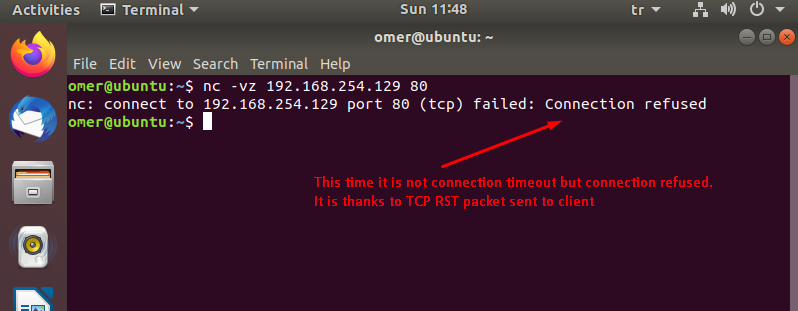
When a response is requested from the firewall to the client, the REJECT action can be used instead of DROP. In the screen output below, the default ACCEPT mode is switched to, and the REJECT action is configured for TCP – 80, and Linux has been provided to give a negative response to the client.
root@omer:~# iptables -P INPUT ACCEPT
root@omer:~# iptables -A INPUT -p tcp --dport 80 -j REJECT
root@omer:~# python3 -m http.server 80
Serving HTTP on 0.0.0.0 port 80 (http://0.0.0.0:80/) ...

omer@ubuntu:~$ nc -vz 192.168.254.129 80
nc: connect to 192.168.254.129 port 80 (tcp) failed: Connection refused
omer@ubuntu:~$

The reason for using DROP instead of REJECT is to give the malicious people who want to scan the network the least possible information about the IP / port and in the longest time. However, there is not much difference with the parallel scanning of the ports with the developing tools.
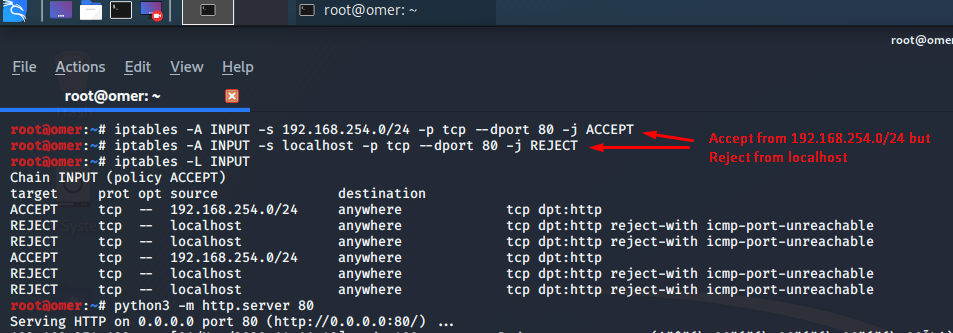
Finally, with iptables, you can also filter by a specific IP or network interface (eg eth0). Below, the webserver is configured to only accept traffic from 192.168.254.129 and the request from localhost was answered negatively.
root@omer:~# iptables -A INPUT -s 192.168.254.0/24 -p tcp --dport 80 -j ACCEPT
root@omer:~# iptables -A INPUT -s localhost -p tcp --dport 80 -j REJECT
root@omer:~# iptables -L INPUT
Chain INPUT (policy ACCEPT)
target     prot opt source               destination
ACCEPT     tcp  --  192.168.254.0/24     anywhere             tcp dpt:http
REJECT     tcp  --  localhost            anywhere             tcp dpt:http reject-with icmp-port-unreachable
REJECT     tcp  --  localhost            anywhere             tcp dpt:http reject-with icmp-port-unreachable
ACCEPT     tcp  --  192.168.254.0/24     anywhere             tcp dpt:http
REJECT     tcp  --  localhost            anywhere             tcp dpt:http reject-with icmp-port-unreachable
REJECT     tcp  --  localhost            anywhere             tcp dpt:http reject-with icmp-port-unreachable
root@omer:~# python3 -m http.server 80
Serving HTTP on 0.0.0.0 port 80 (http://0.0.0.0:80/) ...

omer@ubuntu:~$ nc -v localhost 80
nc: connect to localhost port 80 (tcp) failed: Connection refused
omer@ubuntu:~$

omer@ubuntu:~$ nc -z 192.168.254.129 80
omer@ubuntu:~$ telnet 192.168.254.129 80
Trying 192.168.254.129...
Connected to 192.168.254.129.
Escape character is '^]'.

The common use of Netfilter and iptables is packet filtering. Although these are known as Firewalls, they are also used to perform different and useful functions in Linux.


