
 by
by We will discuss this topic for Permanent Kali Linux Installation on USB. You will be able to use Kali Linux permanently without deleting files on your USB. I will explain how to permanently install Kali Linux on USB. Kali Linux will open the moment you plug in the USB. The settings and similar files that we will add will remain permanently in the flash memory.
Required Software
You can see the necessary software below. After downloading the software, you can start installing kali Linux or the Linux core operating system you will install.
- Rufus (for writing iso file). Download link.
- Mini Tool Partition FREE (for partitioning). Download link.
- Kali Linux or the Linux-core operating system you will install. Download link.
- Flash Memory (8 GB, 16 Gb, 32 GB, etc).
Permanent Kali Linux Installation on USB
Open the Rufus program and choose your USB from the top. Select the “Create a bootable disk using” at the bottom. Select your iso by pressing the cd mark. Select the “DD Image” mode from the menu next to it.
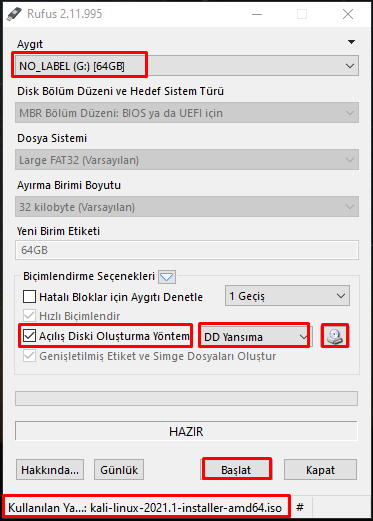
Click on the “Open” button after selecting your iso by pressing the cd mark. We press the Start button and after we say OK to the warning that the flash memory will be formatted, it will start to install.

MiniTool Partition Wizard
After printing Kali Linux ISO, we open MiniTool Partition Wizard. Right-click on the free space on our USB and press the “Create” button.
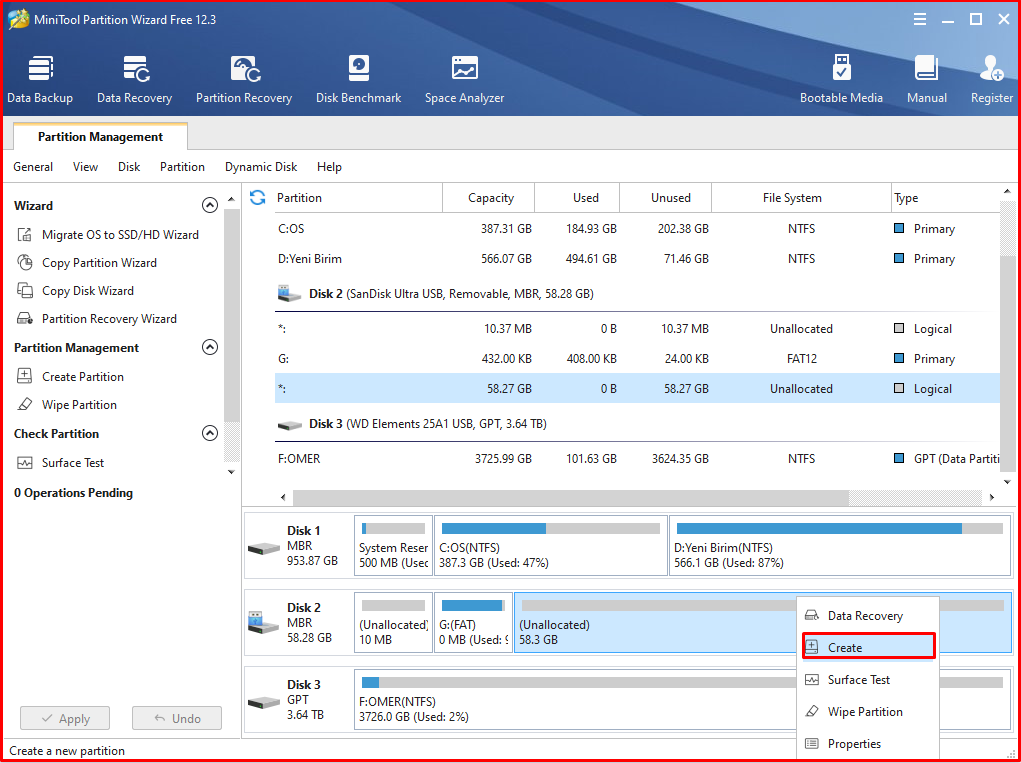
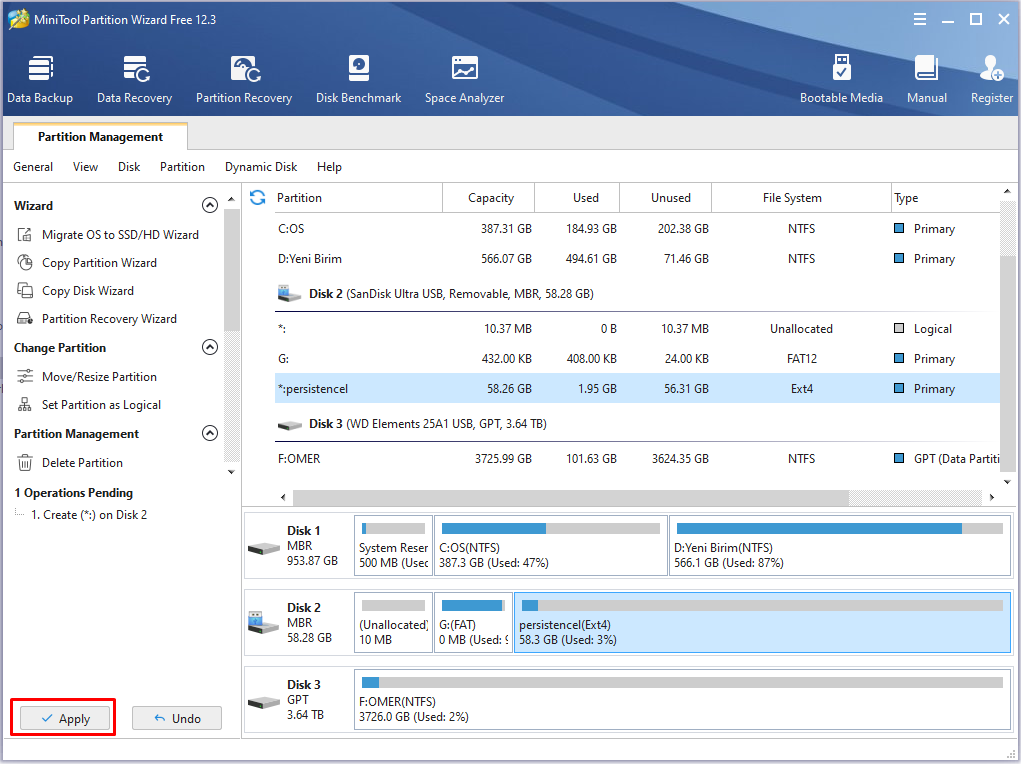
After clicking the “Create” option, a menu will appear in front of you. We write persistence in the Partition Label section. There is another section called Create As, at the bottom, we change it to Primary. We are doing the File System part under it as Ext4. After making the necessary adjustments, we press the “OK” button.

Press the “Apply” button on the left side below to apply the changes. If you do not press this button, transactions will not start.
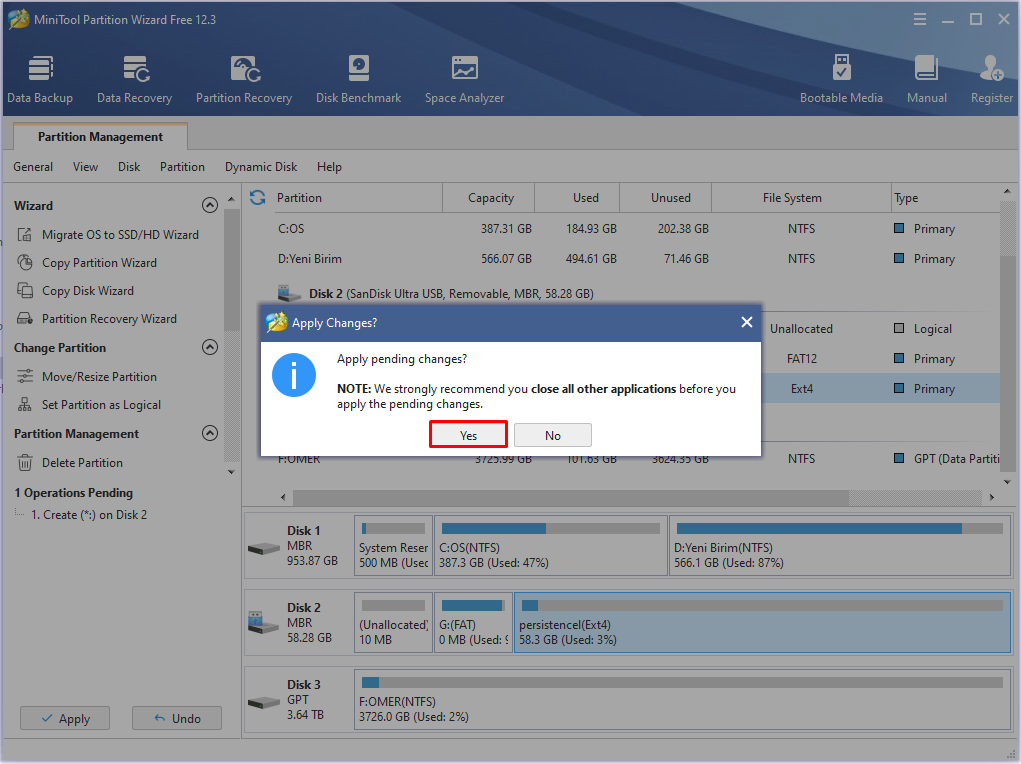
There will be a warning that it will be formatted. Click the “Yes” button and continue.
The duration of this process may vary depending on the size.

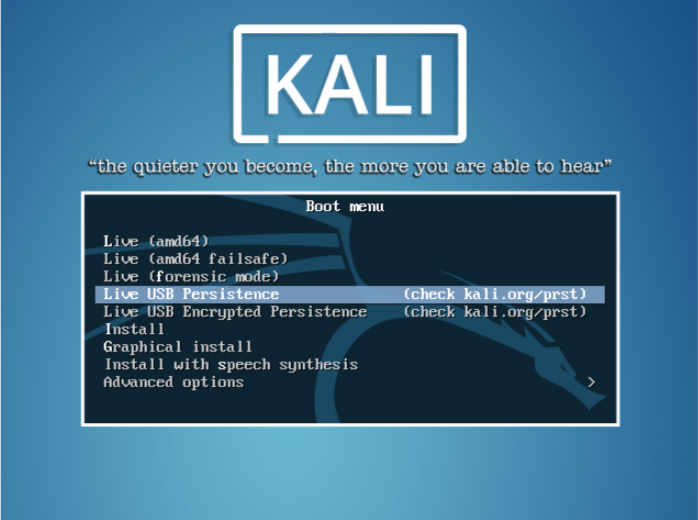
After the process is done, plug in the USB and boot your computer from the USB. At the opening, you will see Kali’s bootloader. Select the option that says “Live USB Persistence” from the menu that appears. Note: You can find out how the USB Boot settings are done by searching on your computer model. Generally, with the f12 key, the Boot settings are entered. If it asks for a password at startup, enter the username “root” and the password “toor“.
Open the terminal and enter the command fdisk -l. You will see the discs connected in the text on the screen. From here, we need to find the ext4 formatted partition in the USB. So those connected to /dev /sda point are your current hard drive. If you remember the capacity of the ext4 formatted partition you created while partitioning, it will be easier to find it from the table displayed on the fdisk -l command.
At the same time, as there will be a total of three partitions in the USB, it will immediately catch your eye on the table. We write the following commands via /dev/sdb3. If necessary, you should change it according to your own. Apply the codes at the bottom one by one.
▪ mkdir -p /mnt/my_usb
▪ mount /dev/mapper/my_usb /mnt/my_usb
▪ echo "/ union" > /mnt/my_usb/persistence.conf
▪ umount /dev/mapper/my_usb

That’s all to do. Then we reboot the system with the reboot command. Do not forget to select the one that says “Live USB Persistence” in the bootloader that appears when the computer is booting. When you restart to test, create a file by right click on the Desktop and turn it off and on again. If you did the procedure correctly, you will be able to find the file you created again.