

 by
by You can add a new disk to Linux-based operating systems that you virtualize with VMware via the SCSI interface without restarting the system. You need to rescan the SCSI buses so that the new disk you added can be detected by the system. SCSI buses are kept under the /sys/class/scsi_host/ directory in RHEL and Debian distributions. Therefore, the SCSI bus scanning process to be done is the same for both distributions.
Adding Disk with VMware Workstation
- Come to the settings section of the system where you want to add a disk and click the “Add” button. Select the “Hard Disk” option and click the “Next” button.

- Select the SCSI interface and click the “Next” button.

- Select the “Create a new virtual disk” option and click the “Next” button.

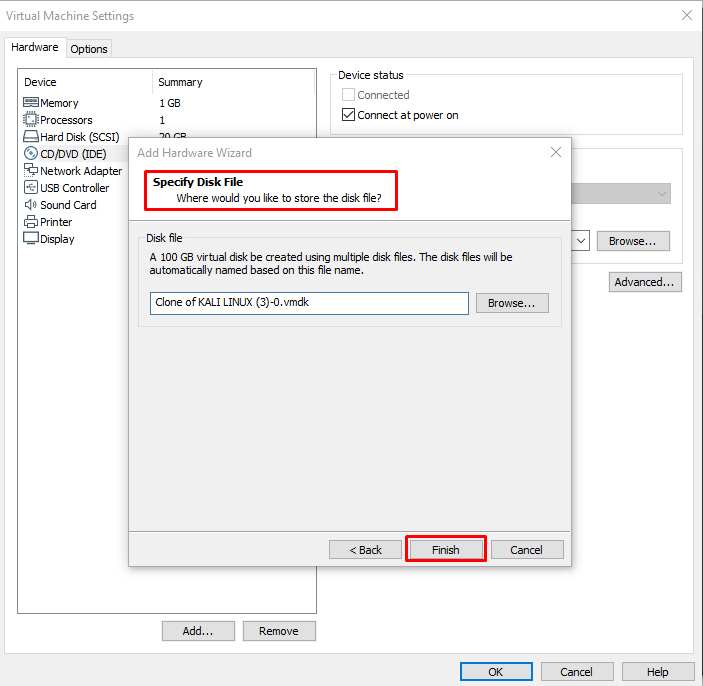
- Determine the disk size and click the “Next” button.

- Complete the process by clicking the “Finish” button.
Scanning SCSI Buses in a Linux System
- You can use the lsblk command or fdisk –l command to check your existing disk blocks before scanning.
root@omer:~# fdisk -l

- Scan the SCSI buses with a root user so that the added disk can be seen by the Linux system.
root@omer:~# ls /sys/class/scsi_host/ | while read host ; do echo "- - -" > /sys/class/scsi_host/$host/scan ; done

- When you check your disk blocks again after scanning the SCSI buses, you should see the new disk you added to the system.
root@omer:~# fdisk -l

Partitioning the Newly Added Disk
You can make this disk you add to the system ready for use by partitioning it. If your operating system has a graphical interface, you can do this with the “Disk Utility” application or from the command line. We will partition the newly added disk to the system with the “fdisk” tool via the command line.
- Access the device you want to partition with the fdisk tool. Press the “m” button to get help about what you can do. Press the “n” key to create a new section as seen in the help commands.
root@omer:~# fdisk /dev/sdb

- Press the “n” key to create a new section as seen in the help commands.

- Press the “p” key to add as primary disk and press the “1” key as the partition number.

- Write where to start partitioning. Enter the number “2048” and press the “Enter” key to start from the beginning.

- Choose where to end the partitioning. If you want to use the entire disk and create a single partition, write “209715199”.

- Save the settings you have made by pressing the “w” key.

NOTE: In the process of determining your disk partitions you have done in the previous step, the partitioning has been made based on the starting and ending points. Although this process is not a problem for a single partition, we may want to divide the 100GB part we add to the system into 2 or more partitions. In this case, the end cylinder would not be worth “209715199” but for example “1255” for 10GB. In this way, you can give values in kilobytes, megabytes or gigabytes as the ending value instead of cylinder calculation. For example “Last cylinder, + cylinders or + size {K, M, G} (1-2610, default 2610) for 10GB: For + 10G500MB: Last cylinder, + cylinders or + size {K, M, G} (1- 2610, default 2610): You can give values such as + 500M.
Formatting the Part Created and Connecting to the System
- Format the partition you created with the “mkfs” tool. After the mkfs command, you need to put “.” (period) and specify your file system. With mkfs, you can create file systems such as ext2, ext3, ext4, msdos and vfat.
root@omer:~# mkfs.ext4 /dev/sdb

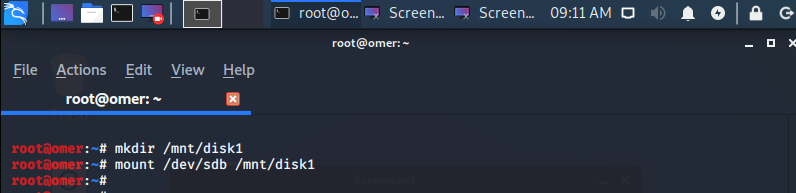
- We mount the formatted disk to the system with the “mount” command. Before mounting, we need to determine where to mount this disk in our system. (In this article, the “disk1” directory was created under the /mnt directory and linked here.)
root@omer:~# mkdir /mnt/disk1
root@omer:~# mount /dev/sdb /mnt/disk1
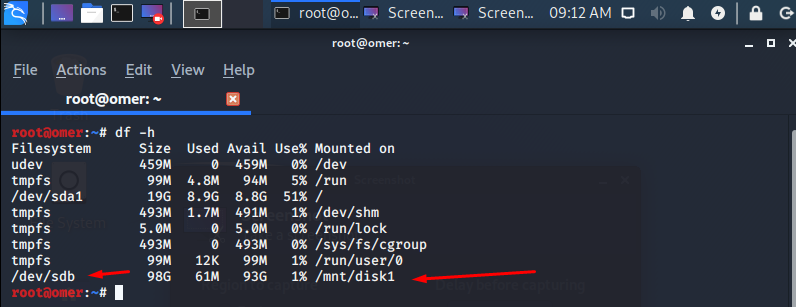
- Finally, check the disk you added to the system with the df -h command.
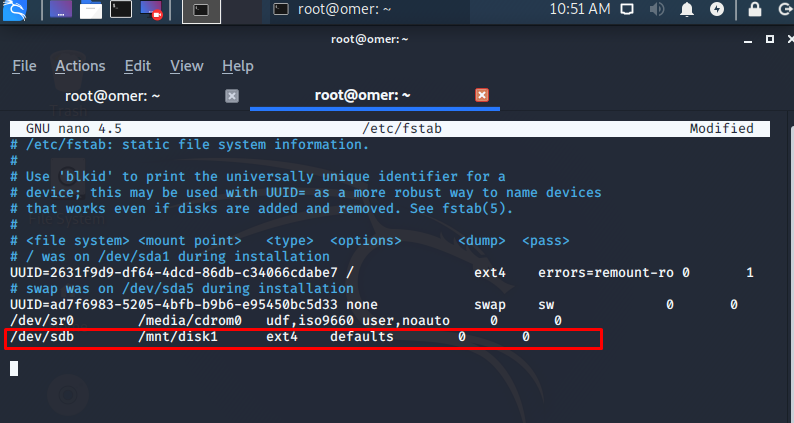
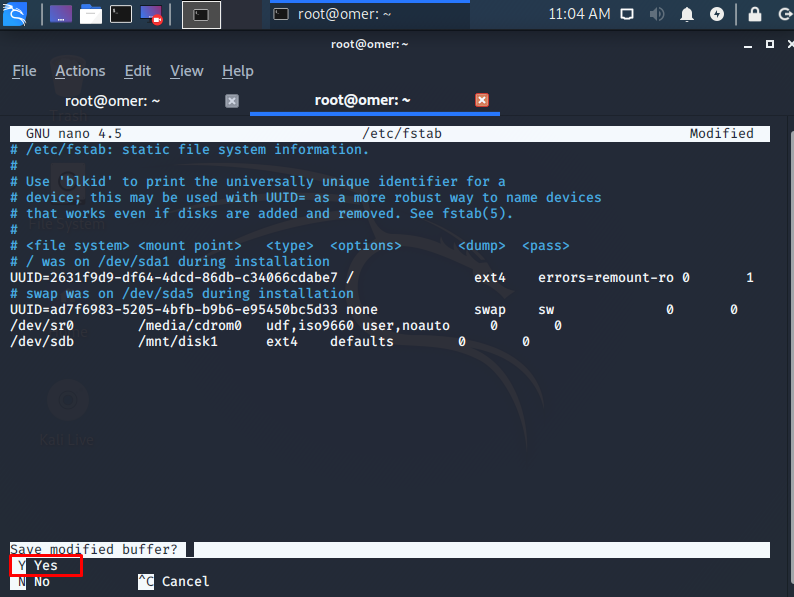
Note: If you want your disk mount operation to be valid when your system is rebooted, you need to perform this operation in the fstab file. Just add the line marked below to your fstab file. You can edit your /etc/fstab file with the nano text editor.
root@omer:~# nano /etc/fstab

- Now let’s add the following command to our Fstab file.
/dev/sdb /mnt/disk1 ext4 defaults 0 0
- Let’s exit with “ctrl + x” command on this screen.

- Let’s press the “Y” (Yes) button on the incoming screen.
- Finally, we finished our process by pressing the “Enter” key.


