 by
by We will be discussing the installation of SQL Server 2019, the stable version of which has been released on November 4, 2019.
The main features that came with 2019
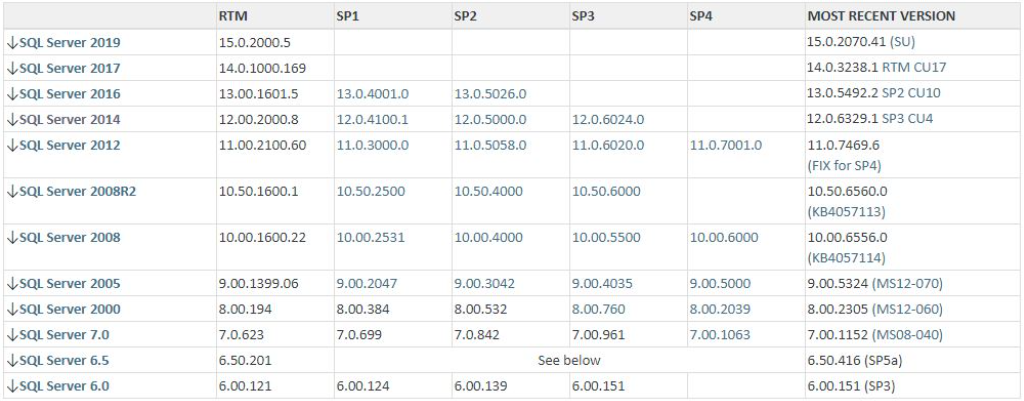
The main features that come with 2019 are performance improvement, security, the ability to build on LINUX and flexibility in azure integration licensing costs. SQL Server 2019 can be installed on all platforms where SQL 2017 can be installed. In general, the development table of SQL server that is actively used today is as follows.
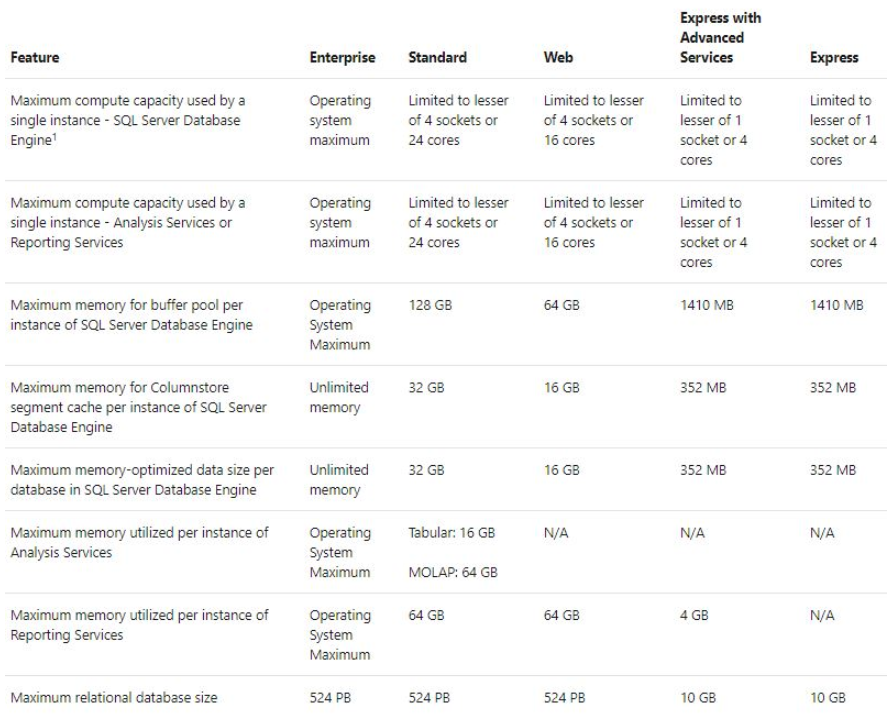
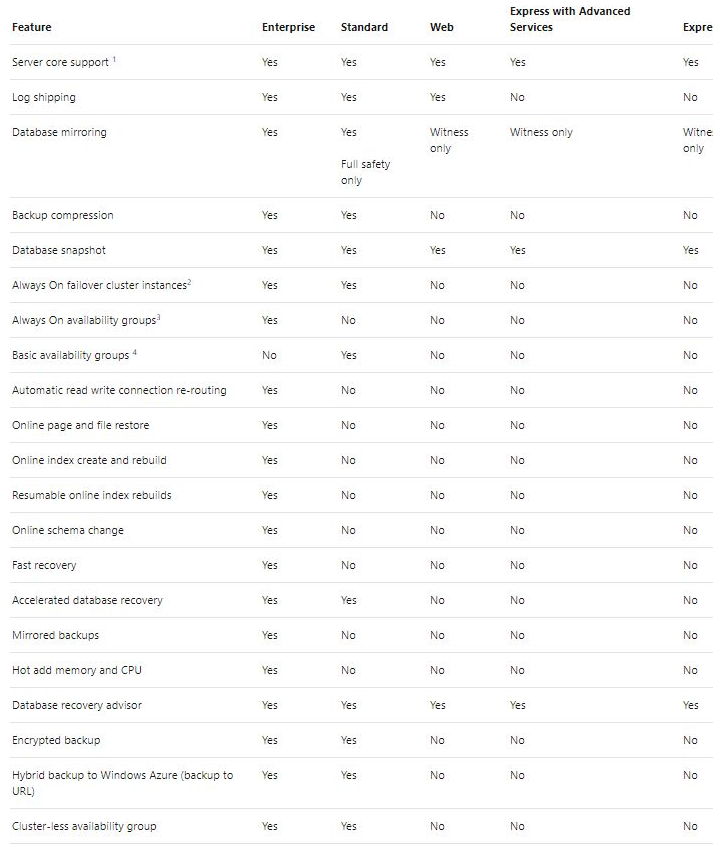
SQL 2019 limitations are as follows.
Performance before installation
Before the installation, let’s point out some points in terms of performance and configure our system accordingly. Performance problems are likely to occur after a certain time in large SQL load environments. For this reason, this issue is important. Of course, the settings we will make are in the hardware and installation phase, no matter how well we optimize them, let’s get the best hardware, but the work does not end there. The last point ends on the software running here. In cases where the software developer develops codes that will not be loaded on the system’s resources, consumes unnecessarily excessive resources, we will again encounter performance questions.
First of all, if it is not installed in the same environment as the SQL operating system, it will be good in terms of performance. In addition, it will be beneficial to use separate disk volumes for DB, Log, Temp DB, and Backup. Of course, we have to choose storage, disk and raid. It is important to consider these recommendations. We will be dealing with a standard installation.
SQL Server 2019 Installation
Before you proceed with the SQL Server 2019 installation, the Zone settings must be set to English and Windows Firewall must be disabled to avoid problems after installation.
Here we can download the SQL Server 2019 version.
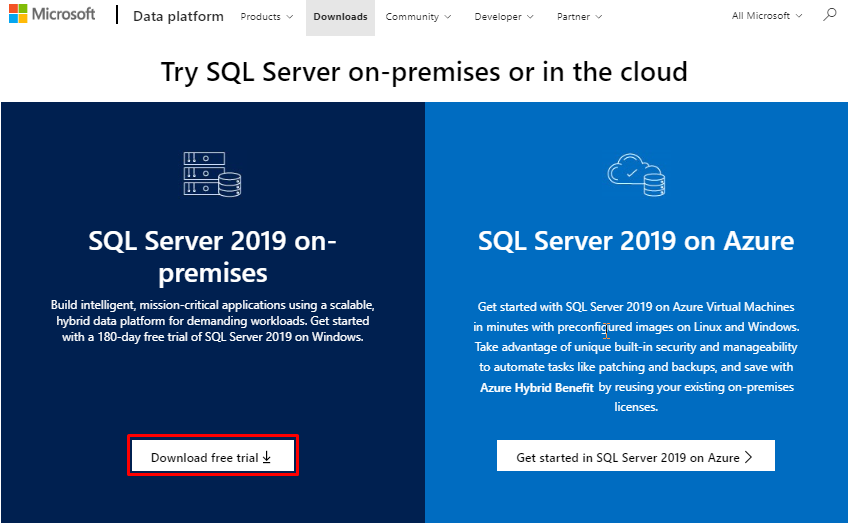
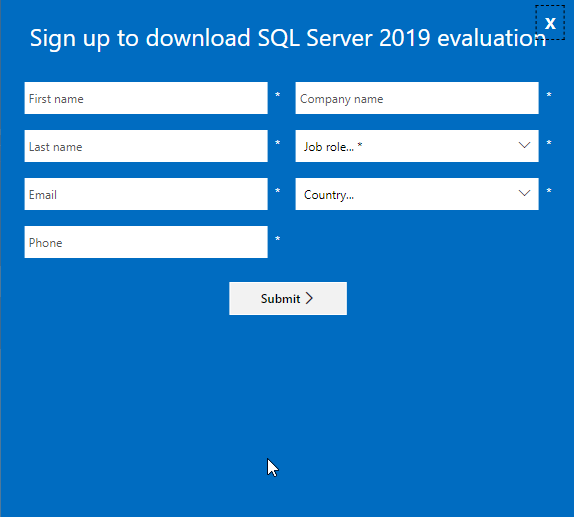
When we press the download button, we can fill in the requested information and download.
We are offered a tool for us to download, let’s run this tool.

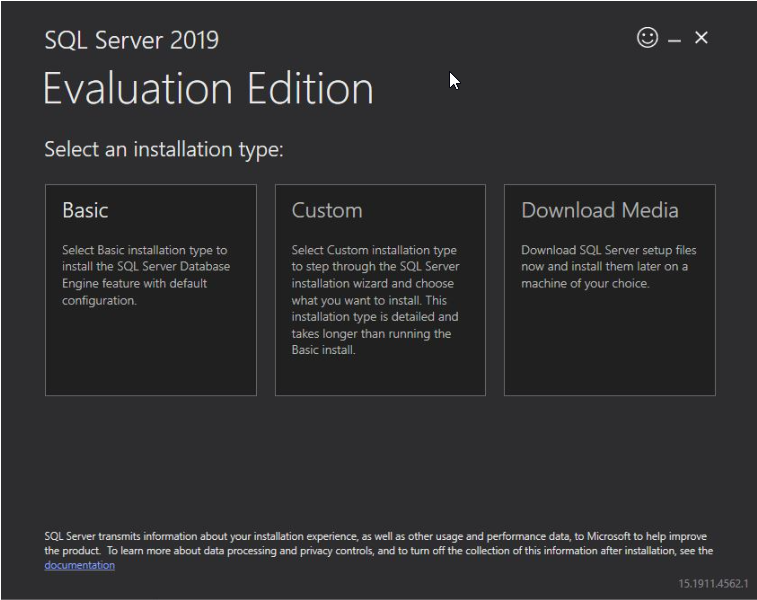
As you can see, there are three different types of installation that we can use. Basic, Custom and Download Media. Since I need files for installation, let’s click on “Download Media”. When the download process starts, the following page will appear.
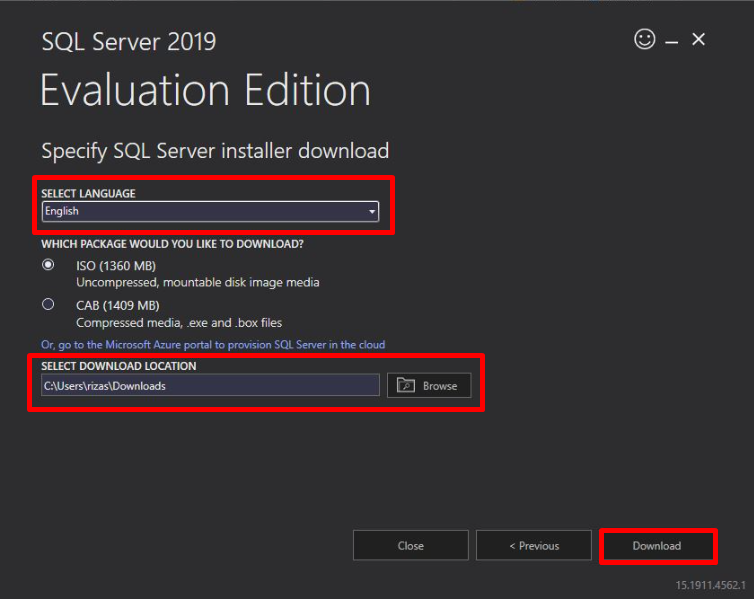
On the following page, we can choose the type of package I want to download (ISO or CAB) where we want to keep the installation files. I did not change the default and click the “Download” button. The download will start.
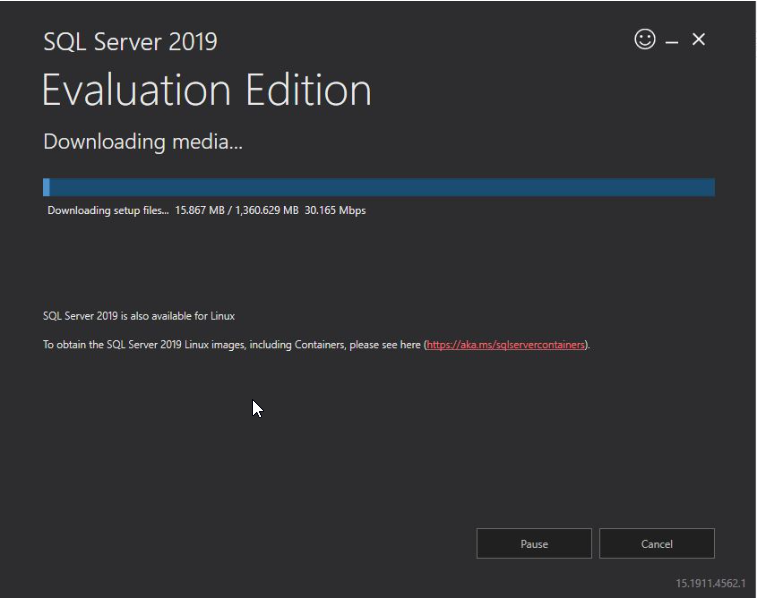
The download process will take some time depending on your internet speed.
The download is complete. Let’s close the page by clicking the “Close” button.
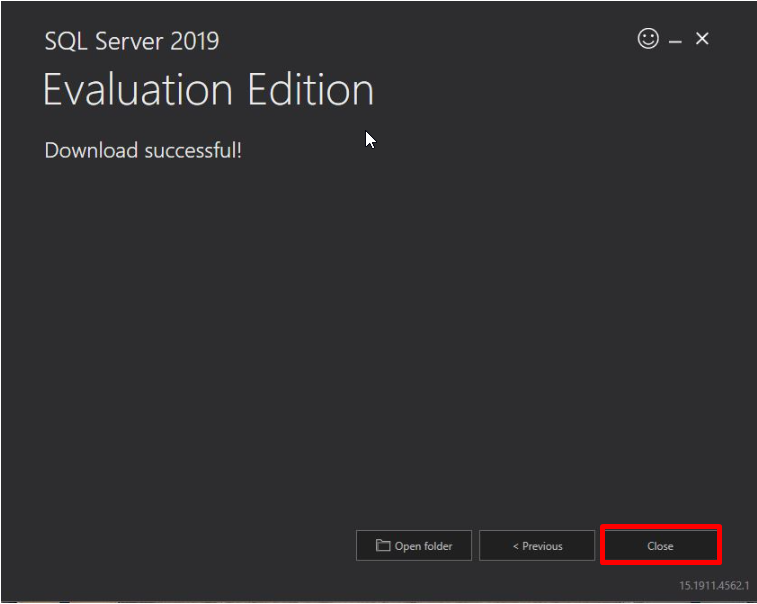
If we received the successful return of the download, SQL Server 2019 was downloaded as iso, the type we determined in the previous step. We can open the downloaded iso file and run the setup file.

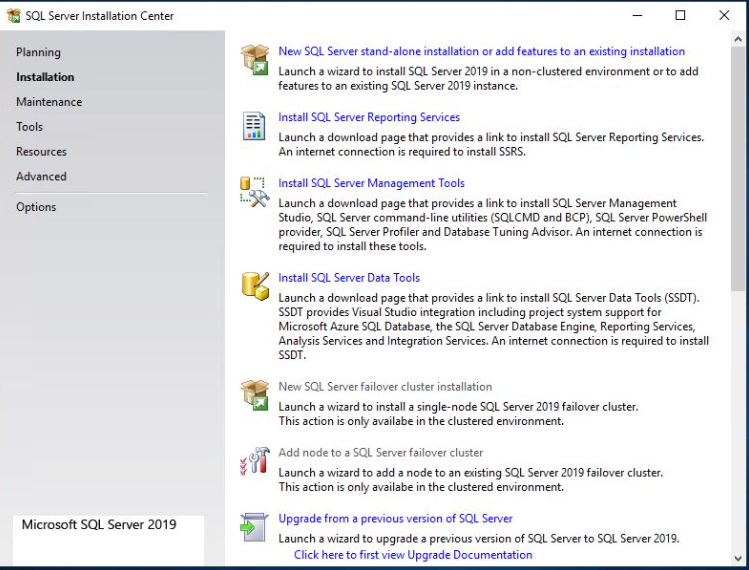
In order to optimize a good installation on this screen, we can use the links on our screen to get information at necessary points. Since we will go to the installation step, let’s click the “Installation” selection. Since we will make a new clean installation, let’s click on the “New SQL Server stand-alone installation or add features to an existing installation” option in the Installation tab.
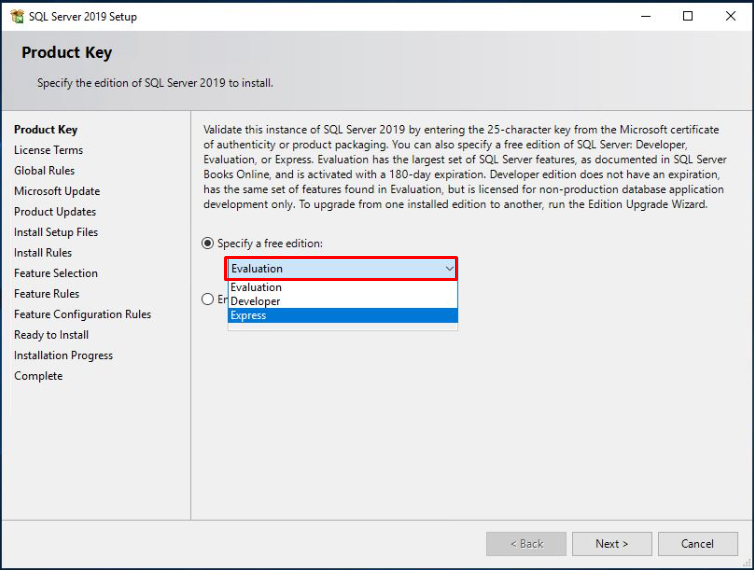
Let us enter the product key if the key is required by making the selection required for the installation. Since we will conduct test operations and we do not have a license key, choose “Evaluation” and proceed with “Next”.
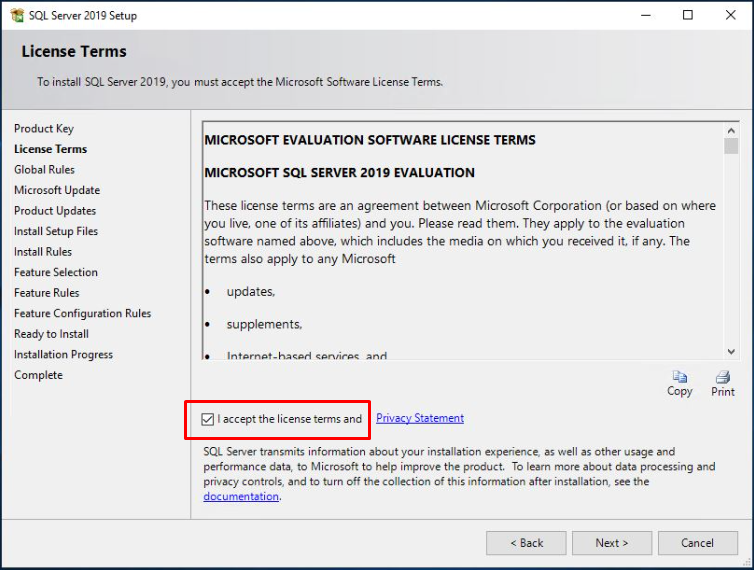
Let’s proceed by accepting the contract from the license agreement button.
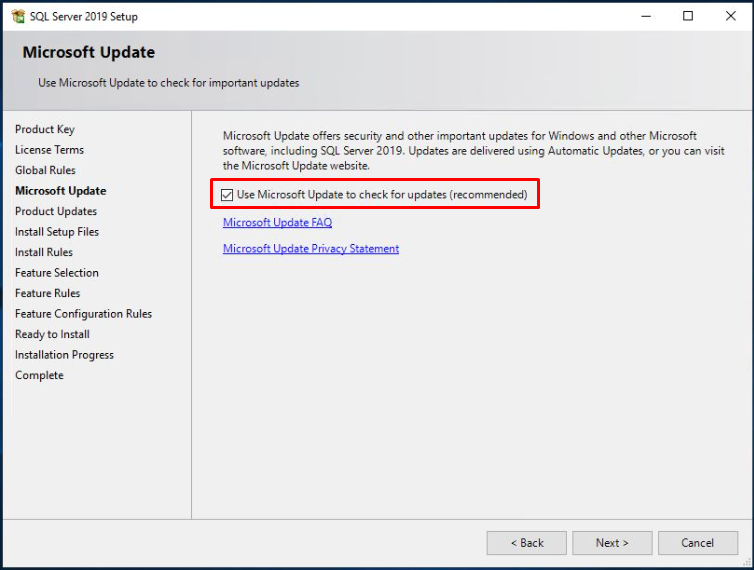
Let’s select the “Use Microsoft Update to check for updates (recommended)” option and make the necessary updates before installation.
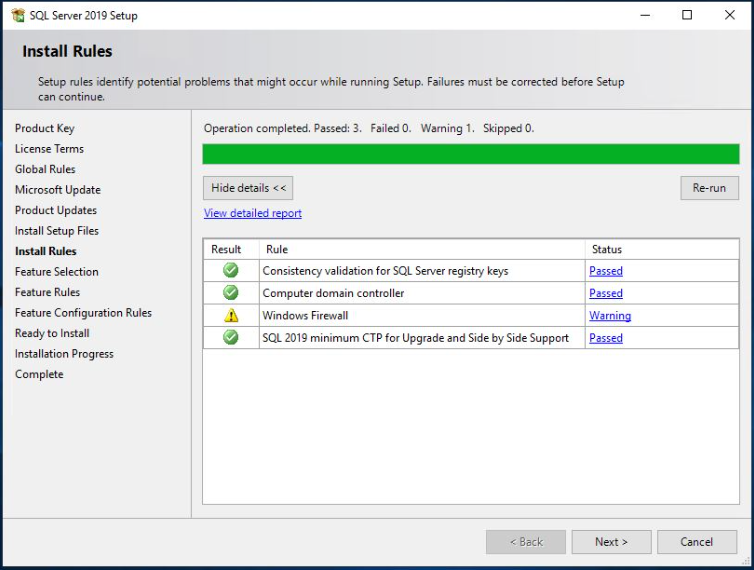
System requirements are checked before installation on the “Install Rules” page. Only the Windows Firewall warns because the necessary components are available. Since this is not a fault but a warning, we proceed by clicking the “Next” button.
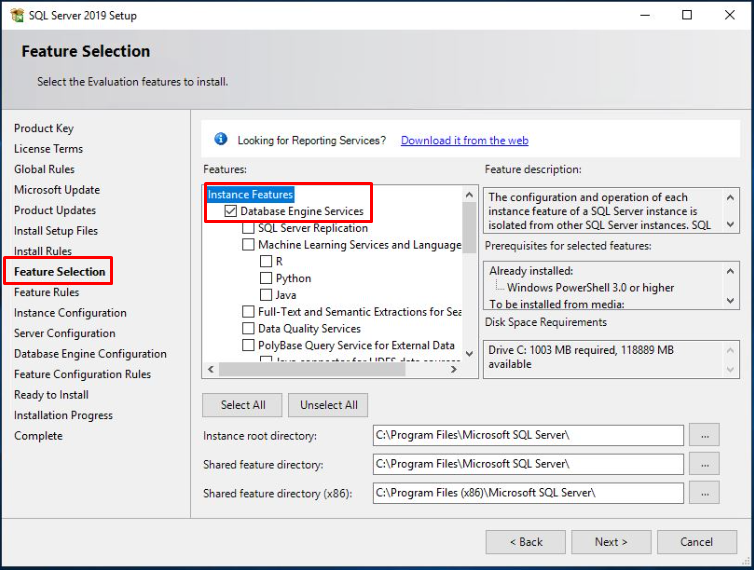
In the option presented on the “Feature Selection” page, we can install all the features of SQL if we want. We tick the “Database Engine Services” option for the installation required and sufficient for us. Services that can be selected for installation are Database Engine Services, Client Tools Connectivity, Client Tools Connectivity Backwards Compatibility and Management Tools. However, with Microsoft SQL Server 2019, Management Tools and Reporting Services are no longer included in the installation. We can download and install these features separately. It is possible to customize the installation ways according to performance optimization. The services and features selected during SQL Server 2019 installation will differ for the software and applications to be used.
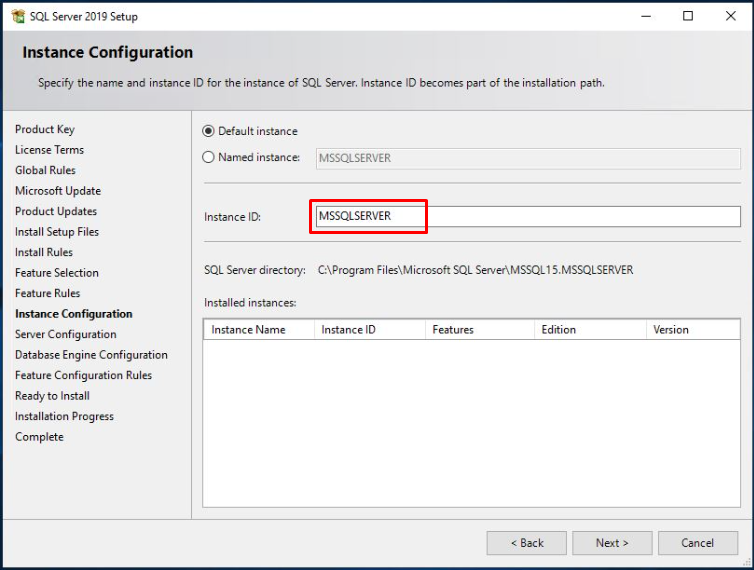
We can specify an instance name for SQL to be installed on the “Instance Configuration” page, or we can pass the installation step with the default instance name. Here we proceed to the next step with “Next” without changing the “MSSQLSERVER” instance name by default without changing the setting.
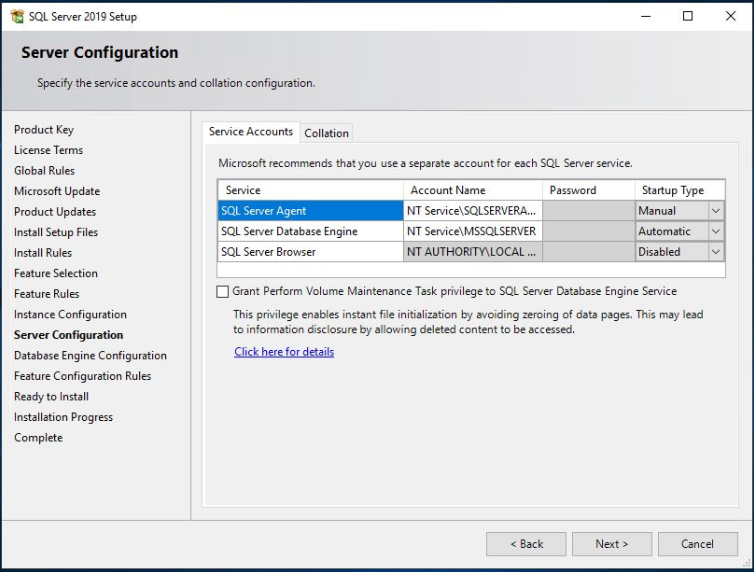
User accounts that will run SQL Server 2019 Services are determined in the “Service Accounts” tab on the “Server Configuration” page. You can leave these service selections as follows. Let’s click on this tab to select “Collation”.
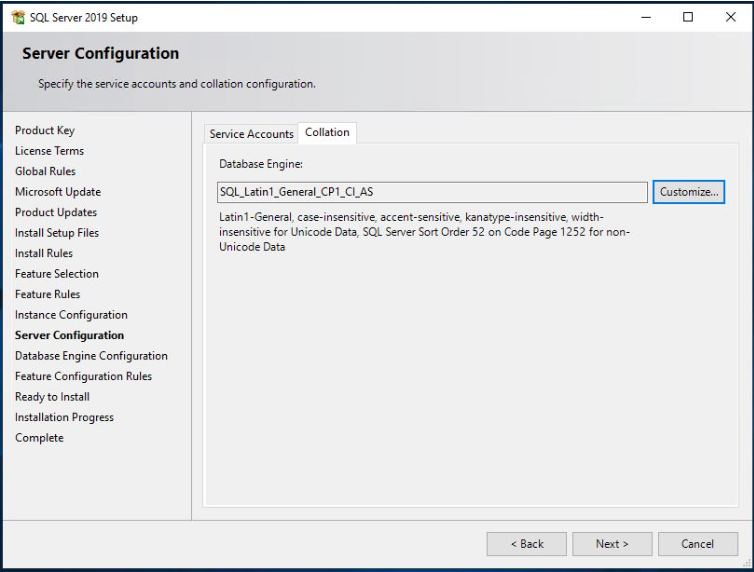
Language and character settings are made in the Collation tab. It will differ for the software to be used. After choosing from the Customize button, we proceed with the next.
In the Database Engine Configuration page, we will see Server configuration, Data Directories, TempDB, Memory, User Instances, FILESTREAM tabs. Authentication operations are performed in the Server Configuration tab. SQL is installed with Windows authentication and SQL Server authentication. If both are desired to be active at the same time, the “Mixed Mode” button must be selected and a password must be created for the user. By clicking the “Add current user” button, we add the current user.

In the Data Directories tab, where to install backup, log and other components seen on the page are determined. For better performance according to the software to be used, we can adjust and optimize these settings as desired. We do not interfere with the default settings, as we do a standard installation. It is extremely important to optimize these areas for performance.

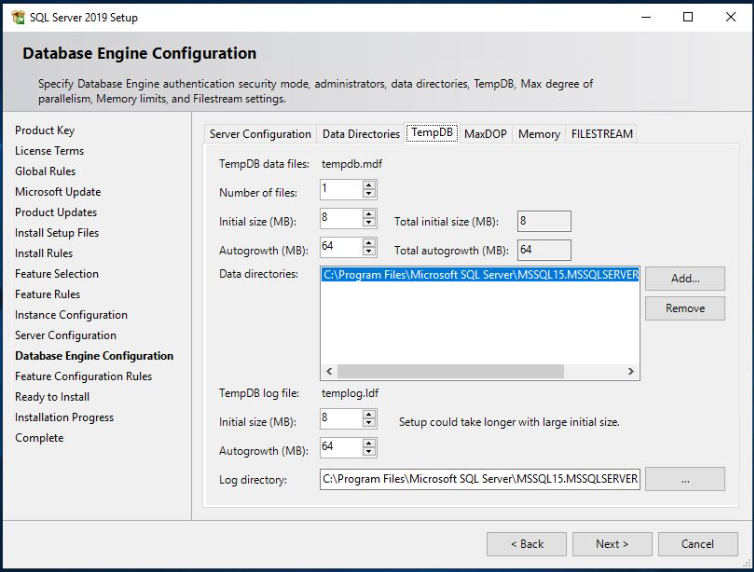
In the TempDB tab, we display the parameters where the TempDB (temporary database) will be installed. It can be optimized according to the condition of your building. We leave it at the default settings. Temporary tables, stored procedures and table variables are temporarily stored in TempDB. It is necessary to optimize TempDB settings well for better performance. These optimized settings vary depending on the applications to be used in SQL 2019.
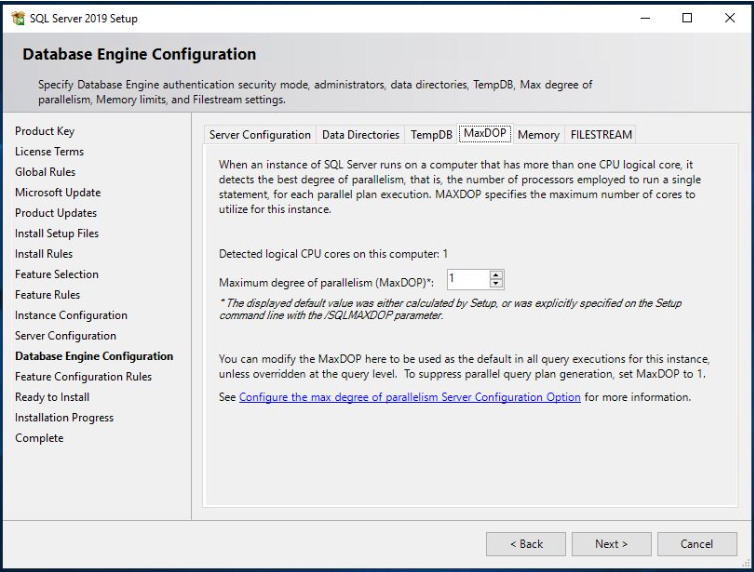
The “MaxDOP” tab is a new screen that comes with SQL 2019. MaxDOP can now be adjusted during the installation process. Let’s continue by leaving this screen at default settings.
There are explanations as below in Microsoft resources.
Microsoft SQL Server controls the number of processors used in executing a query for a parallel plan of the Maximum degree of parallelism (MAXDOP) configuration option. This option determines the number of threads used for query plan functions that execute in parallel. Depending on whether SQL Server symmetric multiprocessing (SMP) computer, non-uniform memory access (NUMA) computer, or hyperthreading enabled processors are set up, you must configure the maximum degree of parallelism option appropriately. The general instructions you can use to configure the Maximum degree of parallelism option for SQL Server are described when you use the sp_configure system stored procedure. If the query specifies this option (MAXDOP) option Transact-SQL query hints You can override the maximum degree of parallelism option sp_configure. If the value configured using Resource Manager exceeds the MAXDOP value, database engine SQL Server 2008 and later versions use the resource manager MAXDOP value. All semantics rules used with the maximum degree of parallelism are valid when you use the MAXDOP query hint. Two other options that can override or affect the MAXDOP setting are as follows:
Parallel index operations
The parallelism does not limit the maximum number of processors using SQL Server to the maximum configuration option. Use the affinity mask configuration option to configure the number of processors using SQL Server.
The MAXDOP setting (ex: Clustered Directory scan) applies to every operator of the plan. Each step uses the number of CPUs specified by a CPU or between MAXDOP and nothing. Executing multiple operator plans in parallel at the same time, the total number of threads used by the query can exceed the specified MAXDOP setting.
Additional information
The number of logical processors in the NUMA node, as well as the processor layout, depends on the manual configuration of the maximum degree of parallelism. When SQL Server starts, the SQL OS boot process prints the recognized and used processor layout.
You can use dynamic management views sys.dm_os_sys_info and sys.dm_os_nodes for information about the number of processors used by SQL Server and the number of NUMA nodes recognized by SQL Server.
SQL Server 2016 (13.x) and above
If each NUMA node or socket of soft NUMA nodes initially detects more than eight physical core database infrastructures, the service is created automatically by default, starting with SQL Server 2016 (13.x) at startup. Be careful by putting logical processors from the same physical core on different soft NUMA nodes that the database engine gets. The suggestions in the table below are intended for all running threads while keeping the parallel query in the same soft NUMA node. It improves the performance of queries and the distribution of threads between NUMA nodes for this workload.
When you configure the maximum degree of parallelism server configuration value, use the following guidelines, starting with SQL Server 2016 (13.x).
With a single NUMA node, keep the server 8 logical processors smaller or equal MAXDOP or below the number of logical processors.
Server 8 logical processors with a single NUMA node keep at MAXDOP 8 bigger
Server with multiple NUMA nodes Keep 16 logical processors smaller than or equal to NUMDOP per NUMA node or keep under NUMD node per MAXDOP or # logical processor.
Server with multiple NUMA nodes is greater than 16 logical processors per NUMA node Maximum number of logical processors on NUMA node per half is MAXDOP at 16
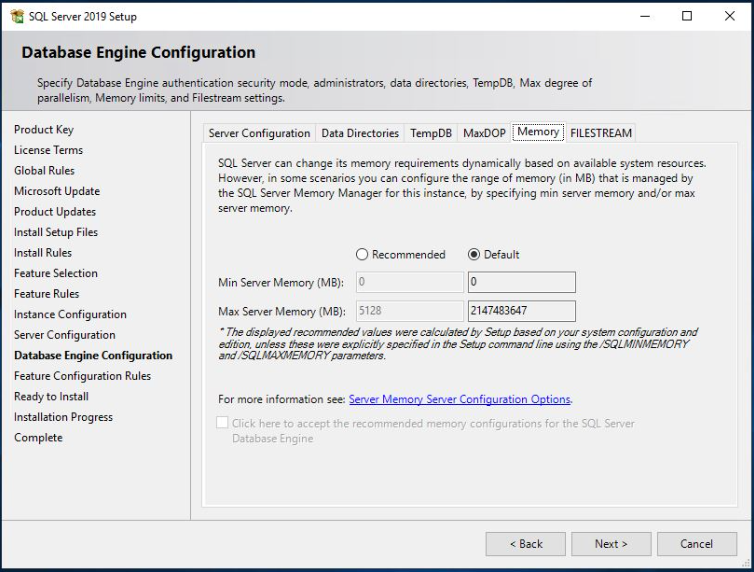
With SQL Server 2019, RAM-related settings can be made in the “Memory” tab. SQL Server has two types of memory management systems. These are “Dynamic Memory” and “Static Memory. In the” Dynamic Memory “method, SQL Server uses as much memory as it can use, and if other applications need it, it clears the memory as much as needed. In the” Static Memory “method, the min and max memory usage values are specified. The server can use memory according to these values. Since we set up a standard test environment, we switch to the “FILESTREAM” tab without interfering with this screen.
This function Specifying the FILESTREAM attribute in the varbinary (max) column causes SQL Server to store data on the local NTFS file system instead of the database file. Although it is stored separately, you can use the same Transact-SQL statements supported for working with varbinary (max) data stored in the database. Since we will not take any action on this screen, let’s move on to the next screen with “Next”.

Here is a summary of the elections held in this section. By accessing the file in the “Configuration file path” path on this screen, we can see which commands will be executed during these installations. We can start the installation by clicking the “Install” button.

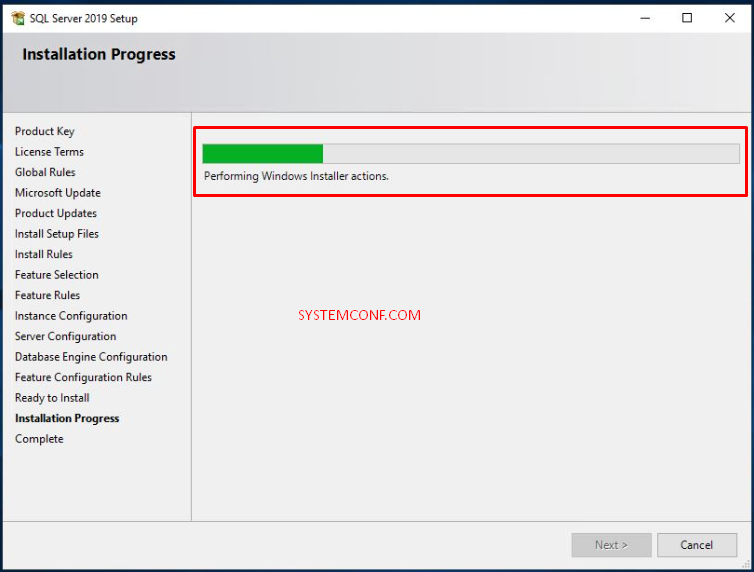
SQL Server 2019 installation steps have started.
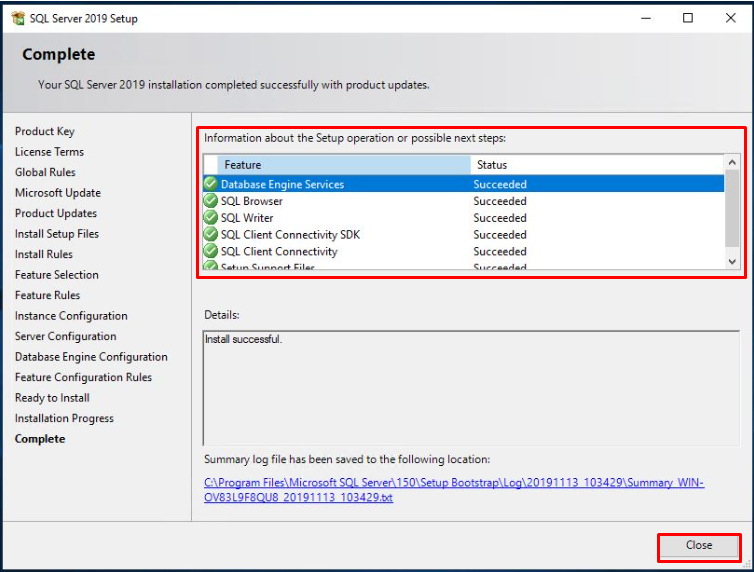
It is seen that the installation is completed without any problems on the “Complete” page. We can close our screen by clicking the “Close” button.
Setup is complete. It is observed that SQL Server 2019 shortcuts have occurred.
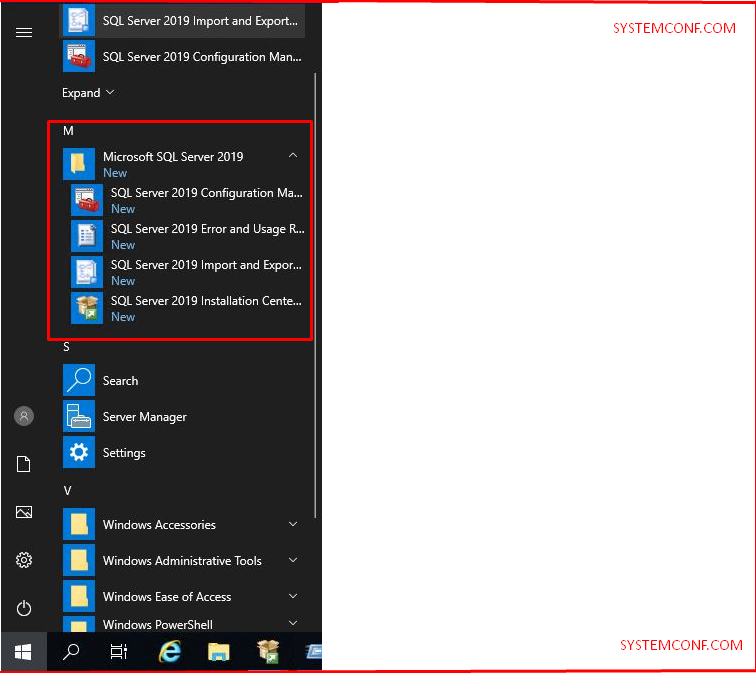
SQL services have been formed and the necessary ones appear to be running.

Management Studio
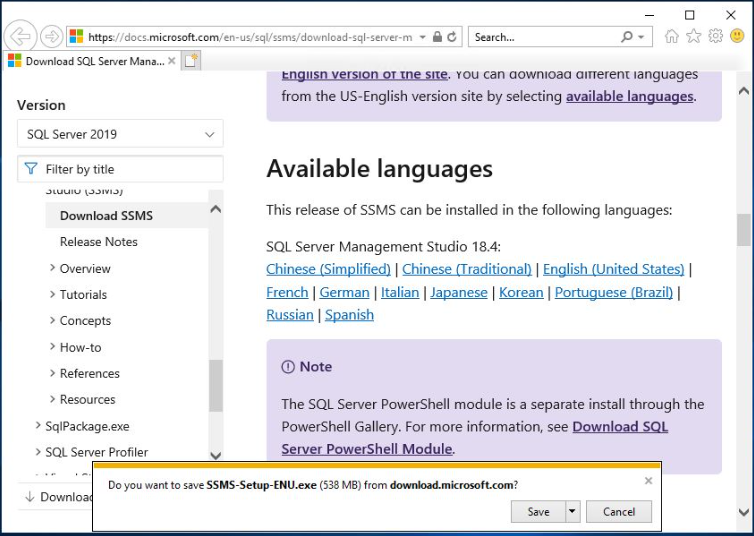
Management Studio does not come ready, we have to install it later. https://msdn.microsoft.com/en-us/library/mt238290.aspx we can download Management Studio from this address and install it for free. Let’s download and install the latest version.
The following screen appears in our downloaded “SSMS-Setup-ENU.exe” program. Let’s continue by clicking the “Install” button on this page. You can change the location where the program will be installed from the “Change” button. We will leave it at default. It will take between two and ten minutes, depending on computer performance.

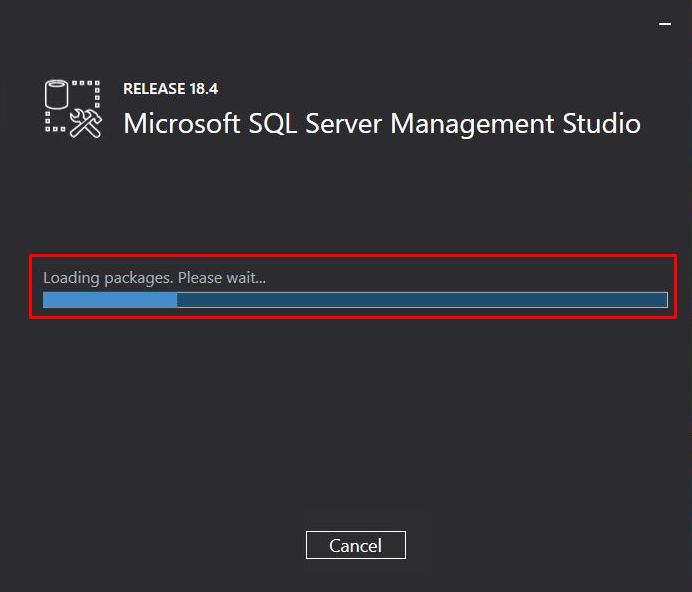
The installation has started and continued.
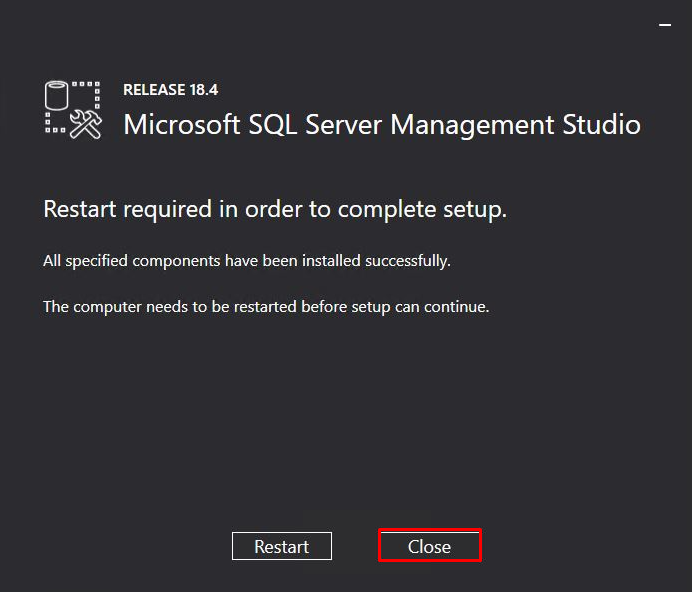
Our installation is complete. We can close our screen by clicking the “Close” button.
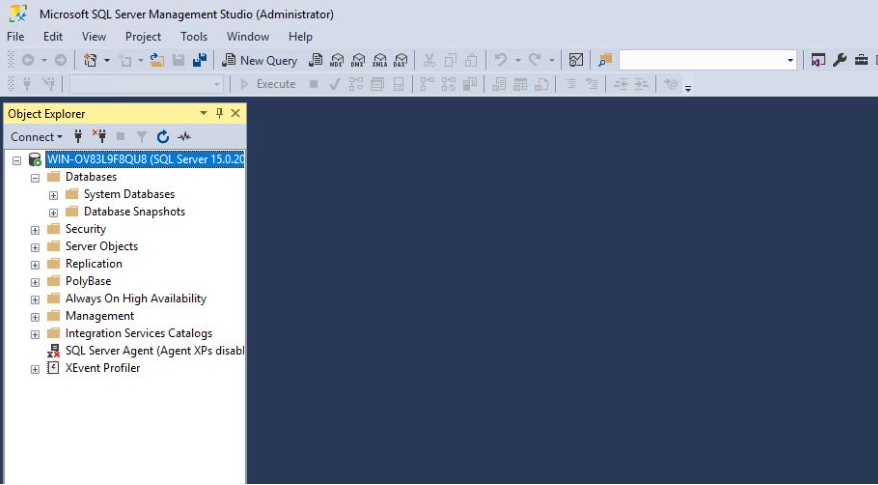
Let’s run the SQL Management Studio after installation. Our console is opened. Happy ending. 😀