by
by As of 24th of October 2019, Centos 8 was launched with many new features. We can call it a non-commercial clone with the same characteristics as RHEL 8.
What is CentOS?
CentOS (Community Enterprise Operating System) is a Linux distribution based on Red Hat Enterprise Linux (RHELL) source codes and compatible with this distribution. The CentOS operating system, which can run on X86 Pae and X86-64 architecture processors, is one of the most used and preferred Linux operating systems on the servers.
Known for being one of the most preferred operating systems on web servers, CentOS operating system is developed by a completely independent software developer group. Working seamlessly with X86 PAE and x86-64 type processors, CentOS is among the first choices of many web developers due to its high performance on servers.
Unlike RHELL, users do not need to join the paid subscription to use CentOS and support can be obtained from the community’s website on support-related issues. As with many popular Linux distributions, the CentOS Community mailing list stands up with the help of web forums, ads in chat rooms and donations by users.
Installing CentOS 8 on VMware
We do the installation on Vmware. For the Centos 8 installation, you can download your iso file from this link.
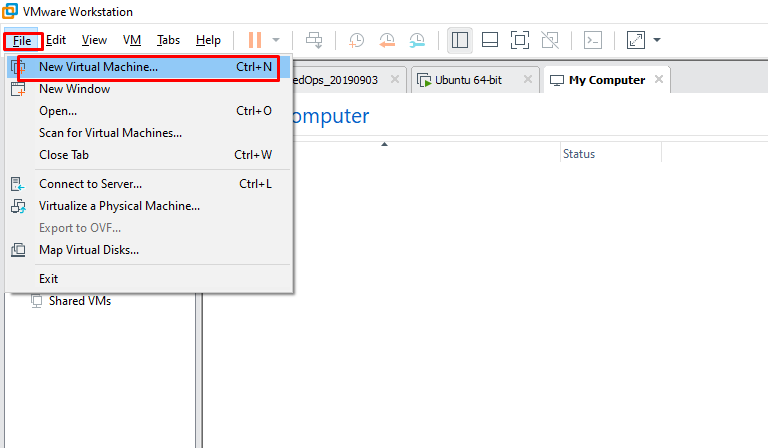
Let’s start the installation now. We follow the steps of “File> New Virtual Machine” in VMware Workstation application.
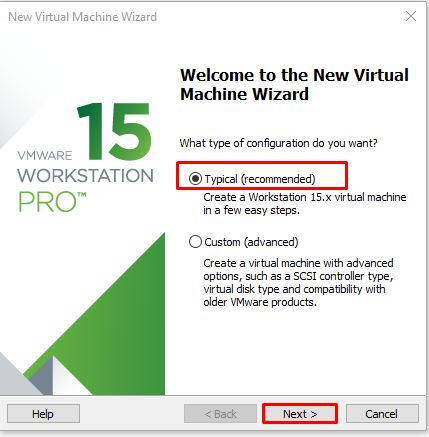
We come across “New Virtual Machine Wizard”. If you want to make the installation ready through the general editable settings, you can select “Typial (recommended)” option. If you want to make more detailed editing on the building you will build, you can proceed with “Custom (advanced)” option. We proceed with “Next” with Typical selected.
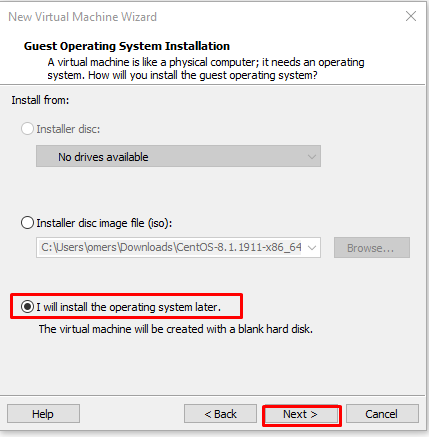
There are 3 options in the “Guest Operating System Installation” screen. In the “Installer disc” section, you can install it from a CD running on your physical machine. If you have an ISO file with the “Installer disc image file (iso)” option, you can show the path of the file with “Browse” and install it via the iso file. With “I will install the operating system later” option, you can specify that you will do the installation later. Since we will show the iso file later, we select “I will install the operating system later” and continue with “Next”.
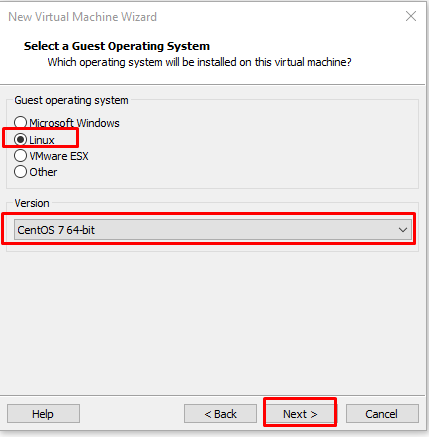
We need to specify the system we will install on the “Select a Guest Operating System” screen. We will install a Debian based operating system, select the Linux option, specify the “Version” section as Debian and continue with the “Next” button.
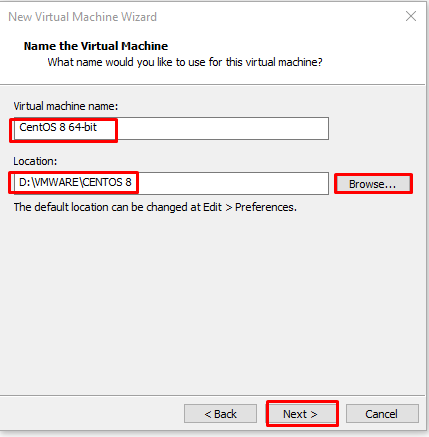
On the “Name the Virtual Machine” screen, we give the virtual machine a name and if you want your files to be stored in a different area, you can show the path with “Browse”. We proceed with Next.
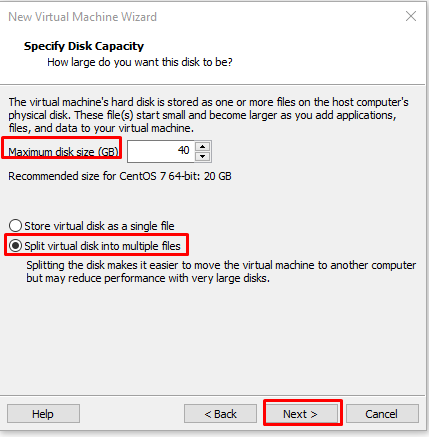
On the “Specify Disk Capacity” screen, we can make settings related to disk size. He tells us that 20 GB capacity will be enough for this system, and I give 40 GB for a little more.
Store virtual disk as a single file; With this option, the more capacity we determine the size of the disk, the larger the disk in our physical machine.
Split virtual disk into multiple files; We can say that this is the advantageous option for us, no matter how much we determine the capacity of the disk, it will see the ceiling as a dimension, create a disk as much as the size we occupy in the virtual machine on the physical machine, and the larger the size, the more it will expand. We determine the disk size and select the option “Split virtual disk into multiple files” and proceed with “Next”.
Here is a summary of the settings we made on the “Ready to Create Virtual Machine” screen. Let’s click the “Customize Hardware” button to make the settings such as “Ram”, “Network” which we do not adjust. We can do these operations in the machine settings after creating the machine.

Here we click on “New CD / DVD (IDE)” after making our related settings.
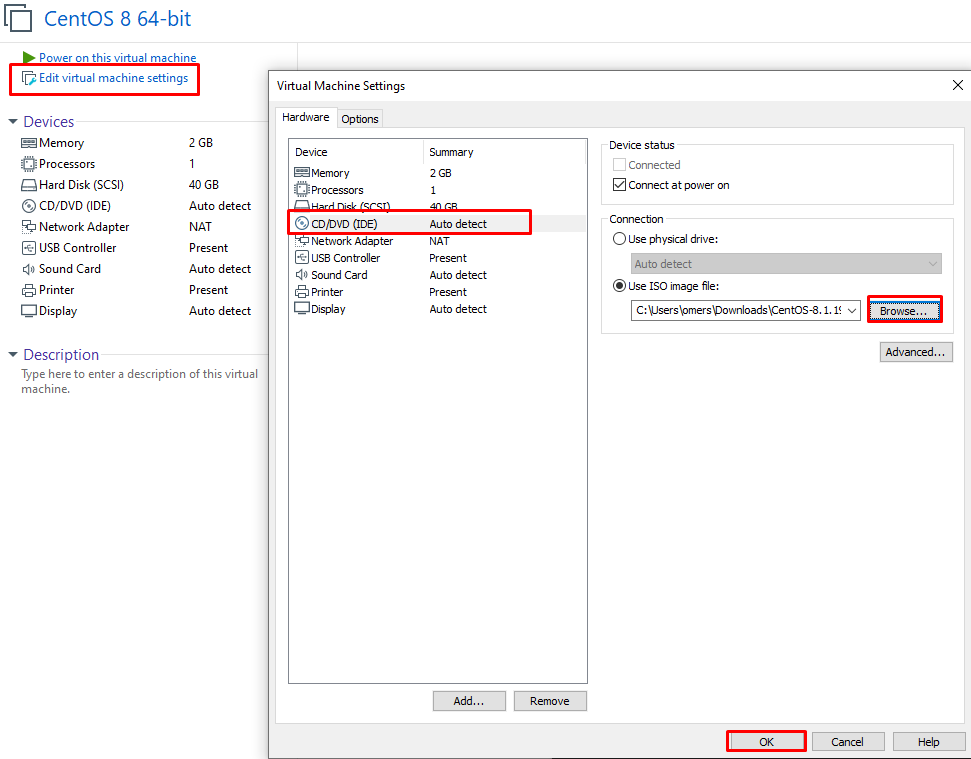
In the “Use ISO image file (iso)” option, select the “Browse” path and select the iso file. After selecting, we click the “OK” button. Let’s start the installation by clicking on the “Power on this virtual machine” option.

After mounting iso, our welcome screen will be the same. Here, let’s click the “enter” button by checking the Install CentOS Linux 8 option.
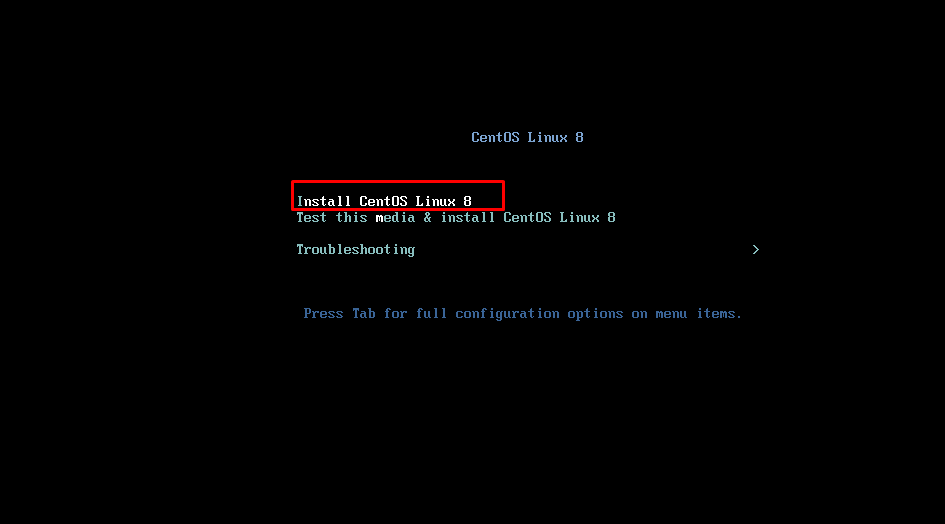
We continue the installation with the “Install CentOS Linux” option.

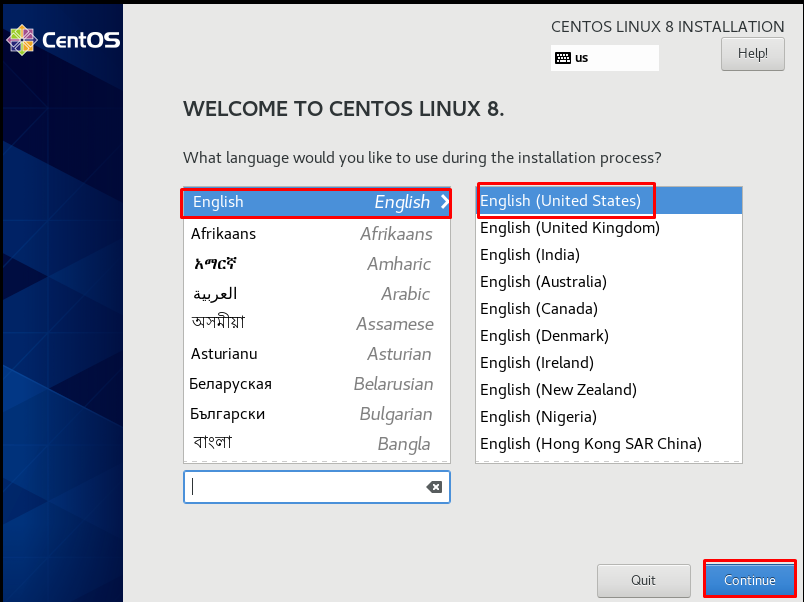
We choose the language and continue with “Continue”.
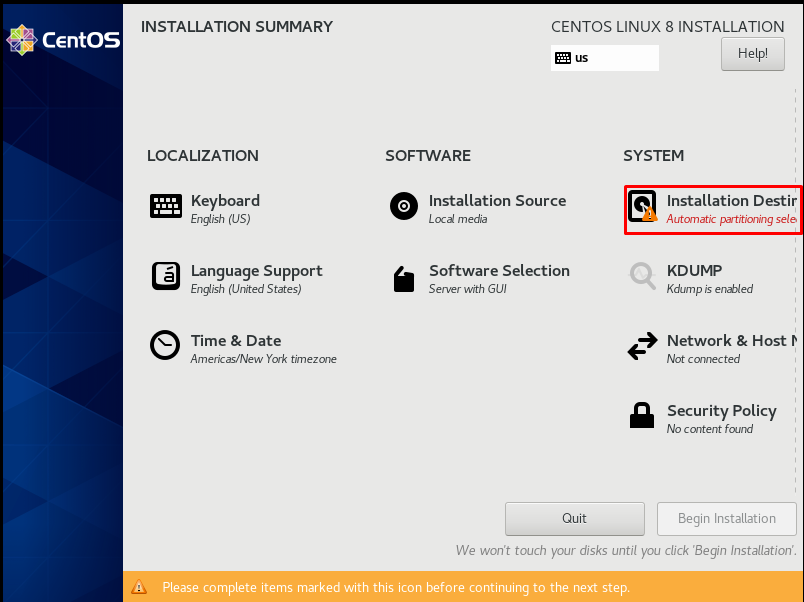
On the “INSTALLATION SUMMARY” page, the screen where we can make a disk, time, keyboard and network settings is opened. In addition, we activate it in the network host section, enter the hostname information at the bottom, and select the “Software Selection” section as “Server with GUI”.
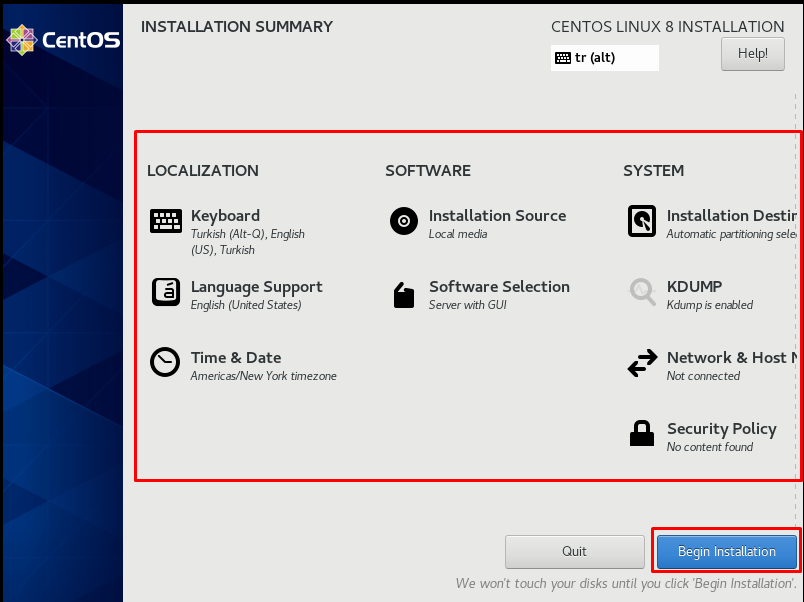
After completing the “installation summary” page, we continue by clicking the “begin installation” tab.
We wait a bit while switching to the user and password setting page.
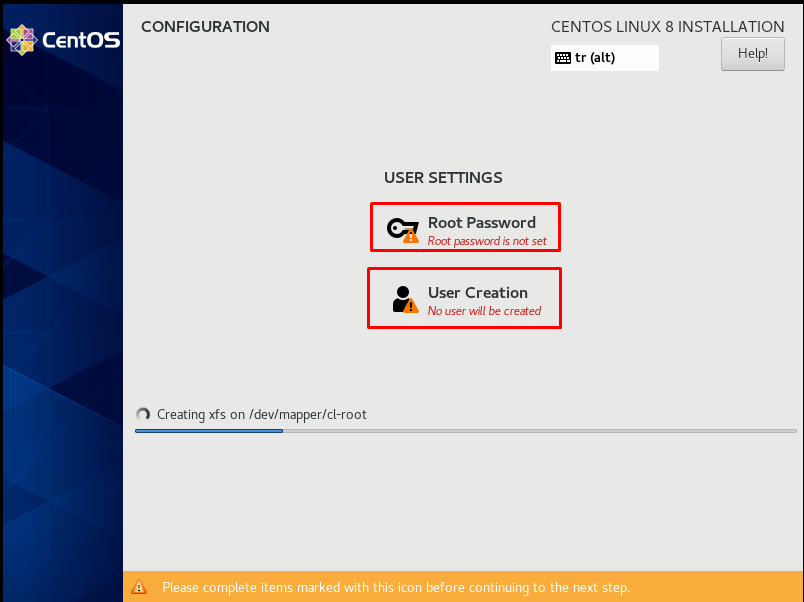
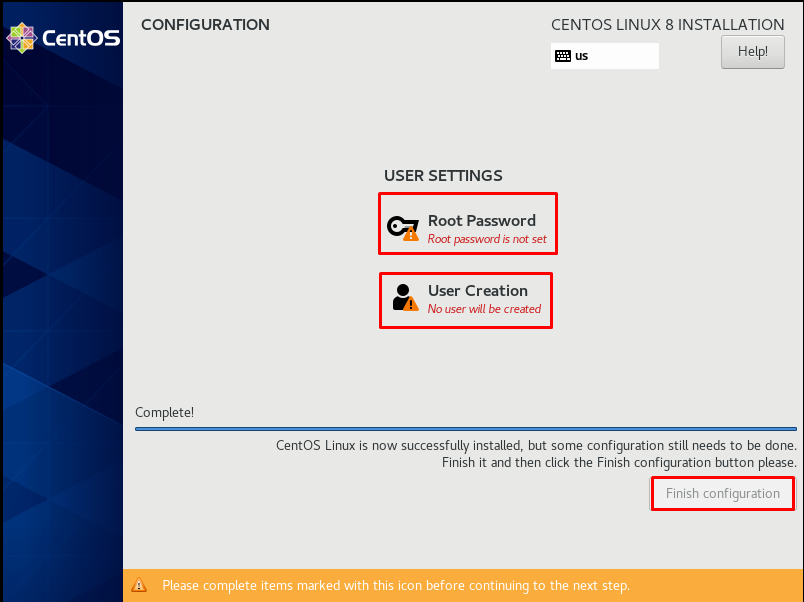
We set the user and password in the “Root Password” and “User Creation” tab on the “CONFIGURATION” page.
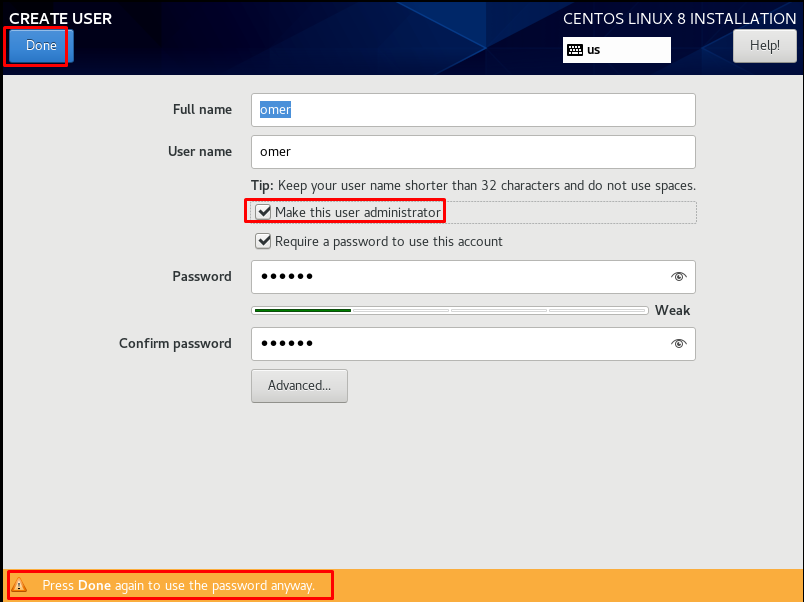
After determining the user and password on the “CREATE USER” page, we check the “Make this user administrator” tab. We continue by clicking the “Done” button. The reason we check the “Make this user administrator” tab is that the root password is the same password.
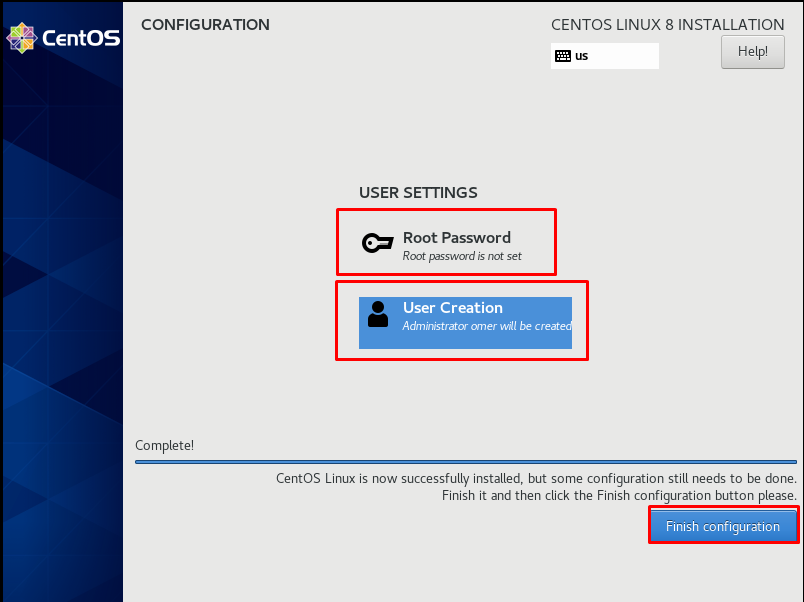
After setting the user and root password, we click the “Finish configuration” button.
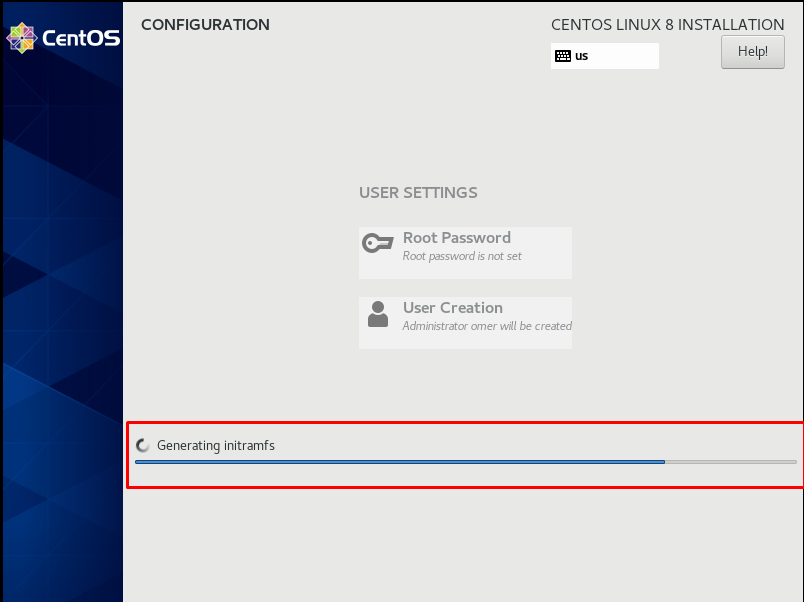
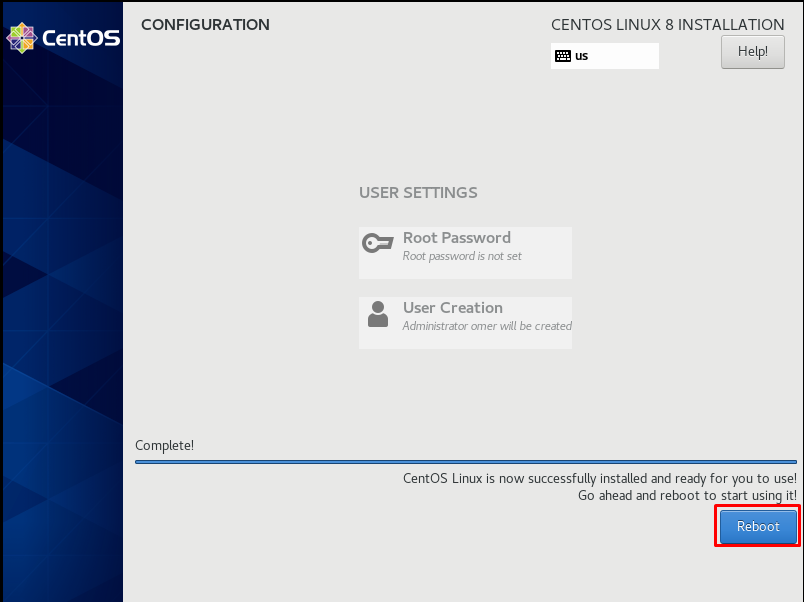
We are waiting for a little while making the general settings.
After configuring the general settings, we continue by clicking the “Reboot” button.
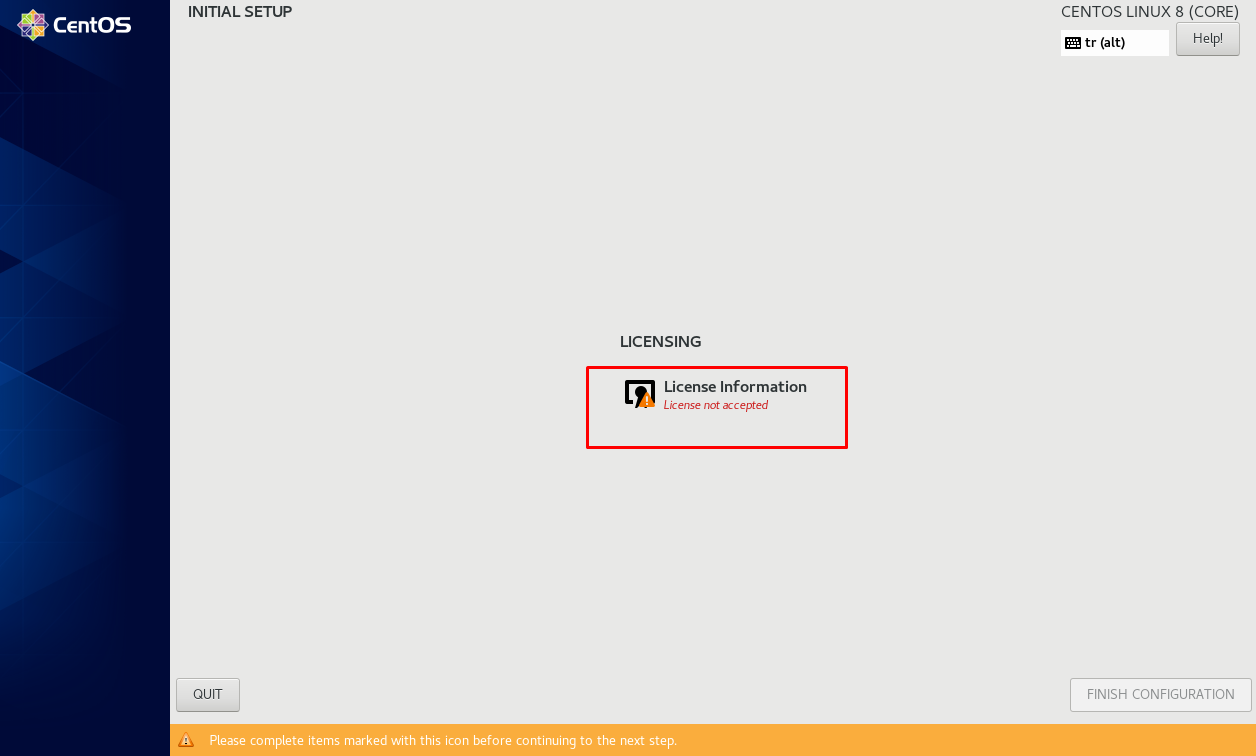
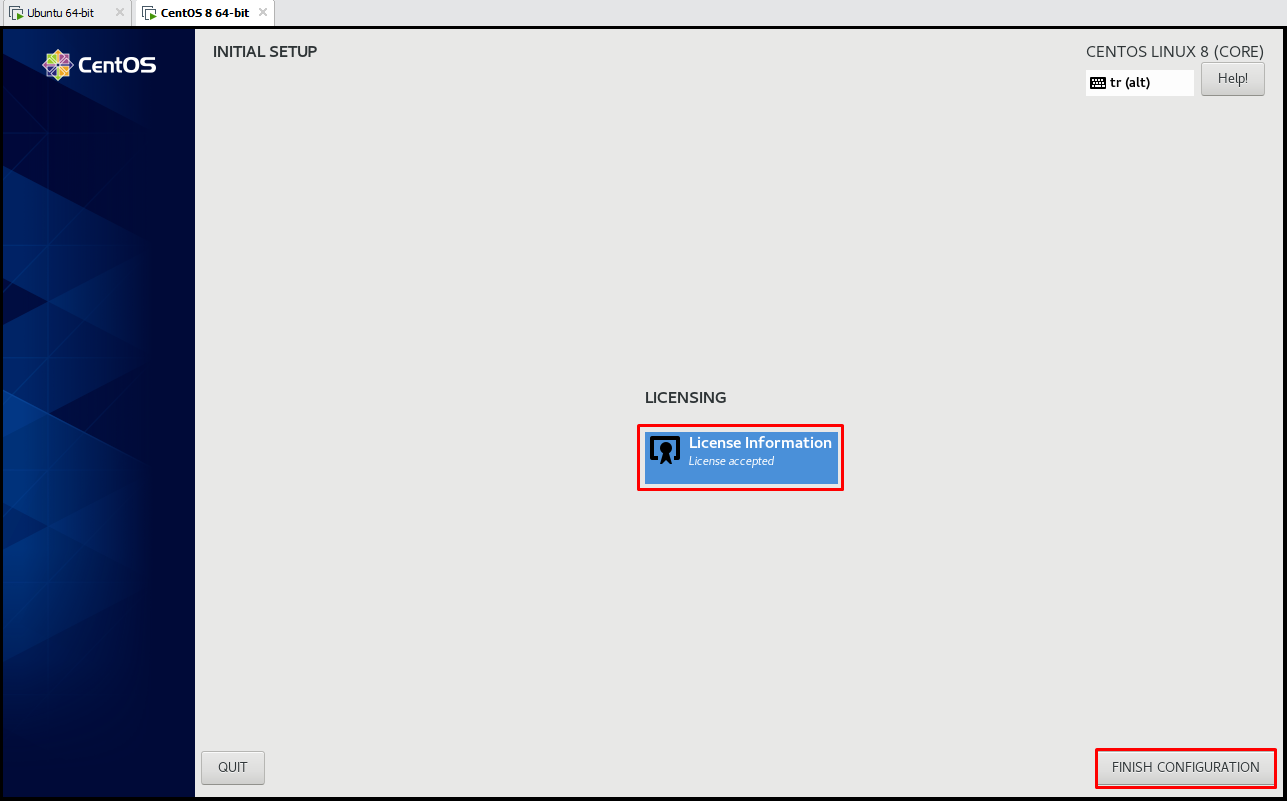
Let’s click the “License Information” button on the “INITIAL SETUP” page.
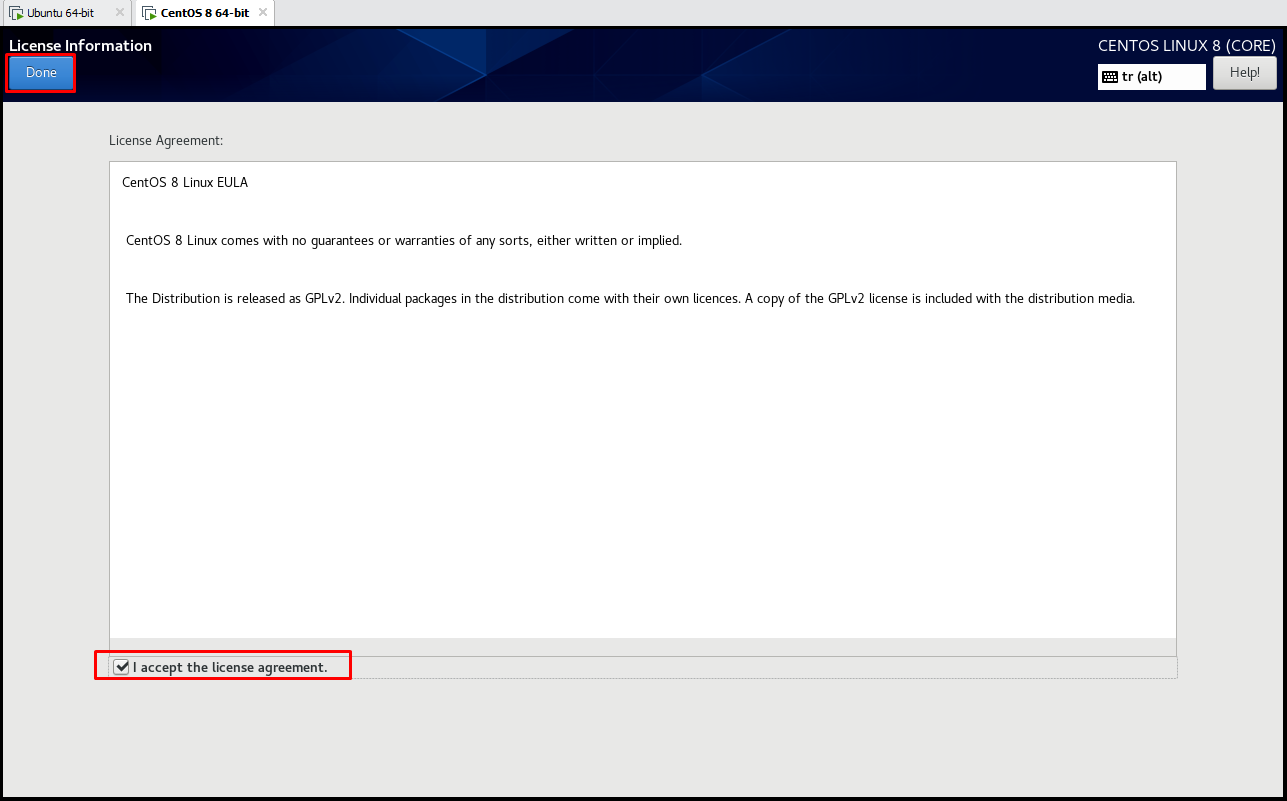
In the “License Information” page, let’s tick the “I accept the license agreement” button to accept the license, we continue by clicking the “Done” button.
After confirming the license, we click the “FINISH CONFIGURATION” button. After the installation is finished, we reboot our system.
After rebooting our system, it was successfully opened.
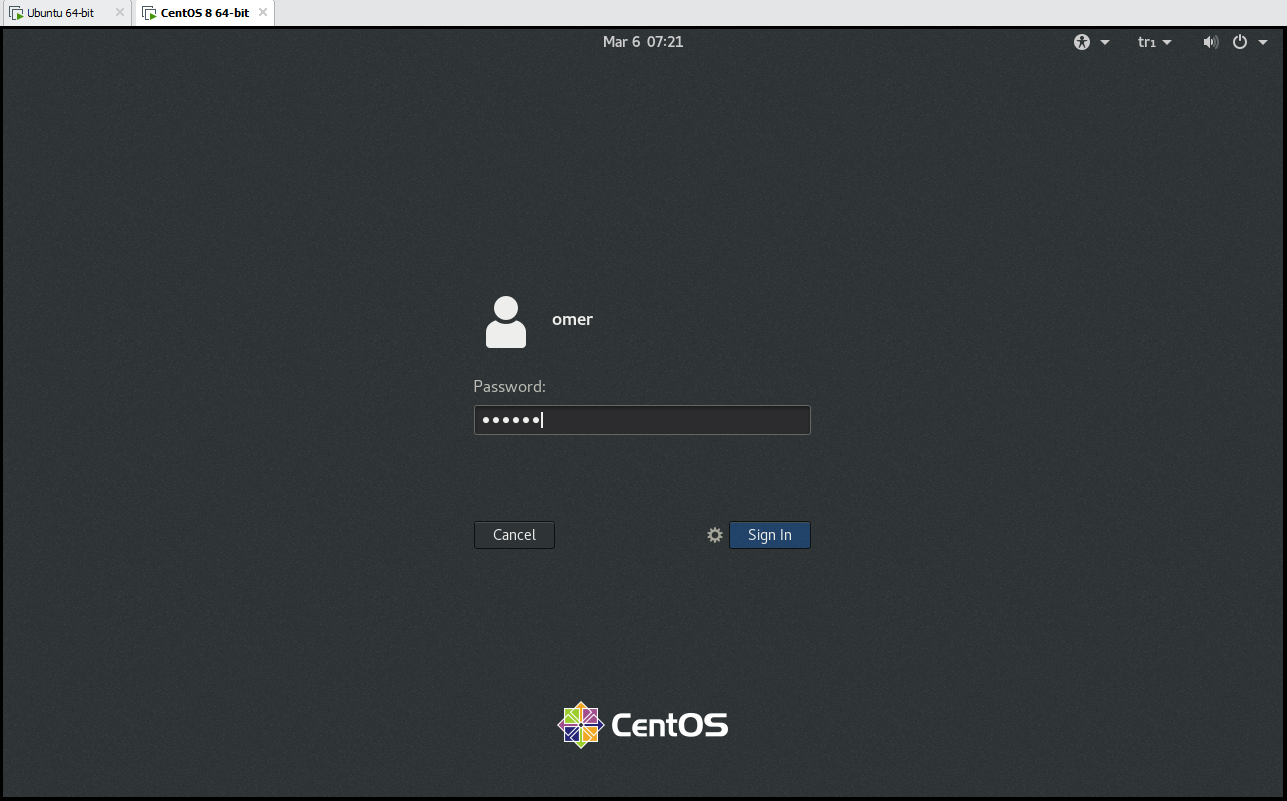
After entering the user and password, the interface of our system is in front of us successfully.