by
by The process of bringing back data that has become inaccessible, deleted, corrupted or lost in any way and cannot be reached by normal methods is expressed with the concept of “Data Recovery”. In other words, if the information stored on a carrier media is not available, it refers to the processes that enable us to access this information again. Data carriers today are hard drives, sd cards, USB sticks, CD-DVD etc. We have to comprehend.
Nowadays, when we can understand the importance of information sufficiently, it is extremely important that the information can be accessed again if it is stored, well stored, processed and lost in unexpected situations.
Using PhotoRec
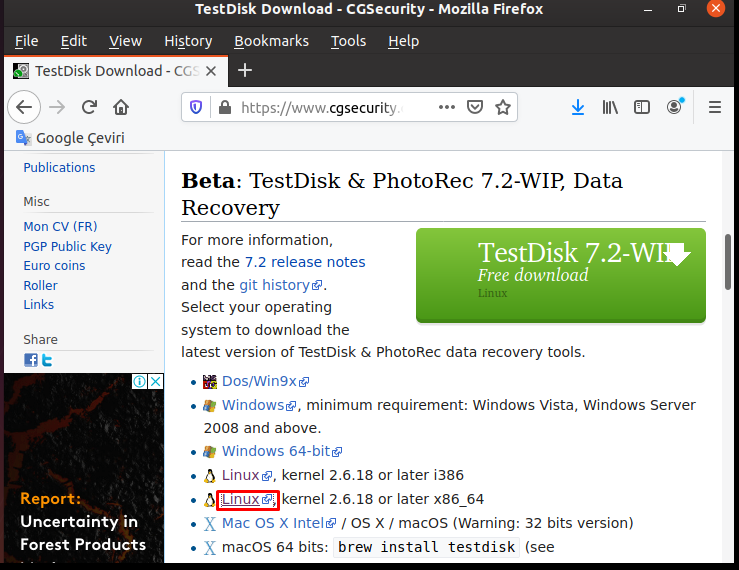
Free and open-source PhotoRec can be used for data recovery on digital media (memory cards, hard disk images, hard disks, CD / DVD etc.). You can find the latest version of the application at https://www.cgsecurity.org/wiki/PhotoRec.
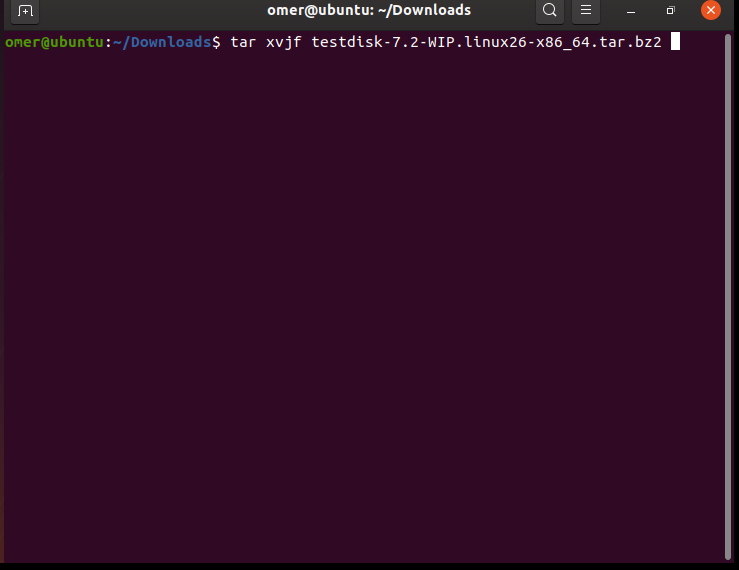
After downloading the PhotoRec from here, extract it from the tar.bz2 file with the “tar xvjf” command.
tar xvjf testdisk-7.2-WIP.linux26-x86_64.tar.bz2
Which Systems does PhotoRec work on?
PhotoRec application can work on the following systems
DOS, Microsoft Windows: NT4, 2000, XP, 2003, 2008, Vista, Windows 7, GNU / Linux, FreeBSD, NetBSD, OpenBSD, SunOS, Mac OS X. A list of the file types it can recover https://www.cgsecurity.org You can find it at / wiki / File_Formats_Recovered_By_PhotoRec.
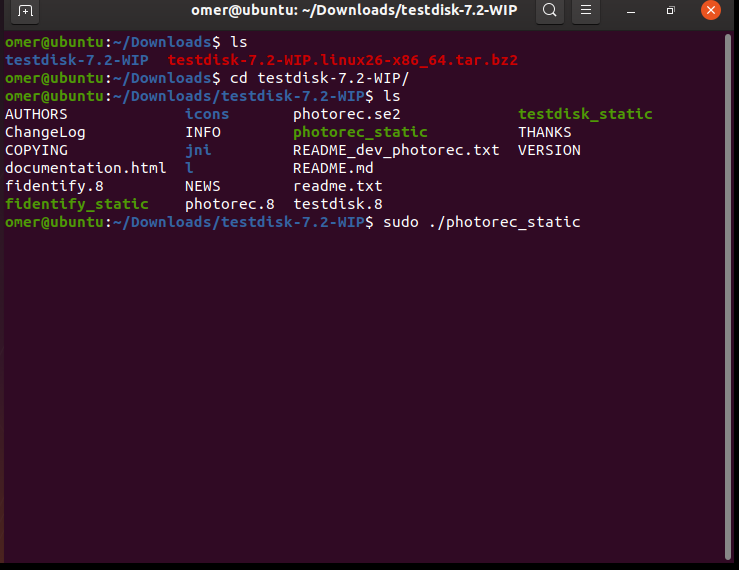
NOTE: Since PhotoRec does not have a graphic interface for Linux yet, it is used on the command line.
Step 1: Let’s start our program by writing ./photorec_static on the command line. Before writing the command, make sure that you are the authorized root user on the system or the removable storage units connected to the computer may not be visible.
./photorec_static
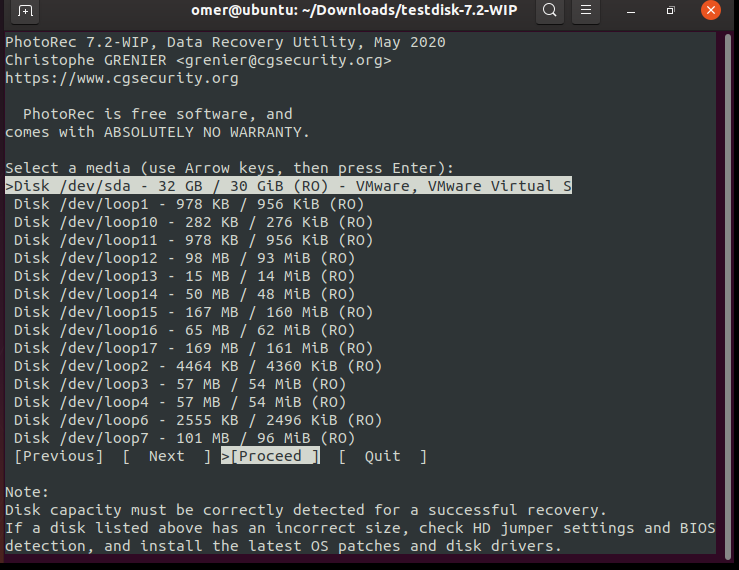
When you first start the program, disk partitions and removable storage units on your computer are listed. On the command line, use the up and down arrow keys to point to the partition you want to recover your data and continue with the Enter key.
Stage 2: You will then see a screen like the one below. Here the disk partitions in the disc we have selected will be listed. You can select a partition for scanning from this list, or you can scan the whole disk without selecting any partition by selecting the option that says “[Whole disk]” on the right.
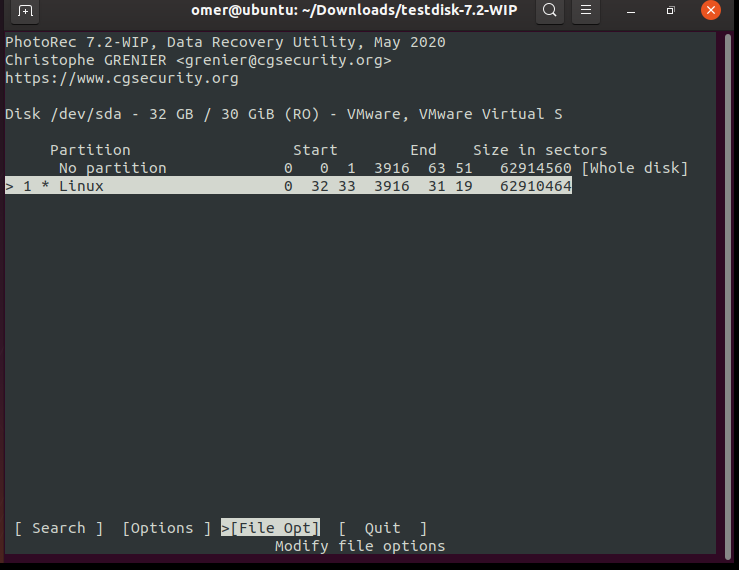
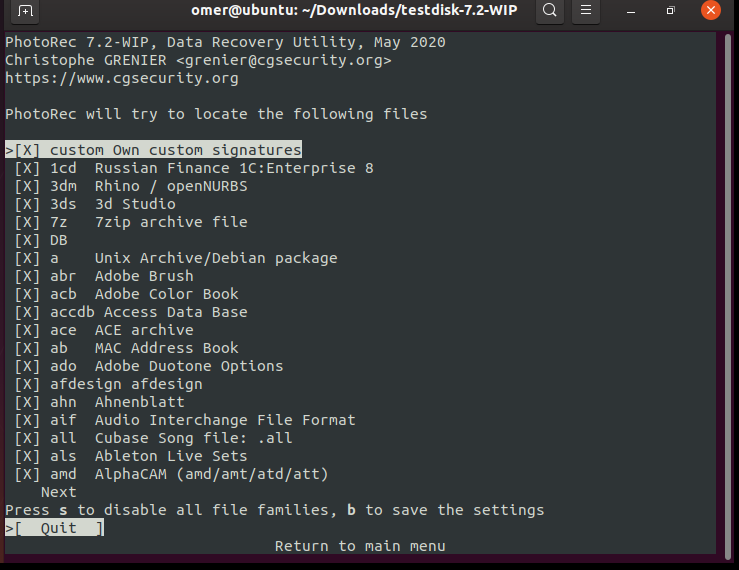
Also on this screen, you can specify which types of files to be scanned using the “[File Opt]” option. I recommend using this to get healthier results from scanning. To select file types, point to “[File Opt]” with the right-left arrow keys on the keyboard and continue with the “Enter” key. You will be presented with a large number of file types, press the s key on the keyboard to remove the cross mark to the left of all files. Then, for the file types you want to be recovered, simply scroll down with up-down direction keys and press x to select. After selecting the file types to be saved, press the b key and save these selections, and then we can go back to the previous screen with the q key and continue our operations.
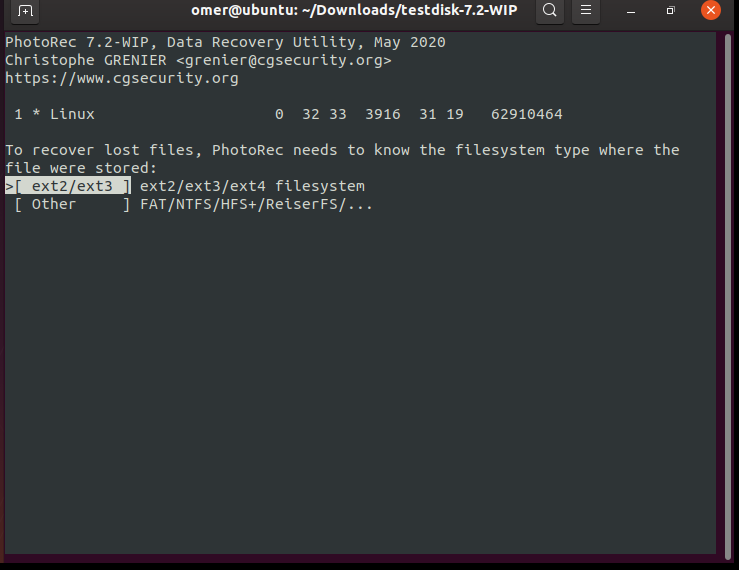
Step 3: On this screen, which comes next, the file system type to be scanned is selected. If the files you are going to scan are on a Linux file system, select ext2 / ext3 / ext4. If the files you are scanning are on a removable disk (USB memory stick, portable disk) or a Windows disk partition (NTFS), select Option 2 and continue.
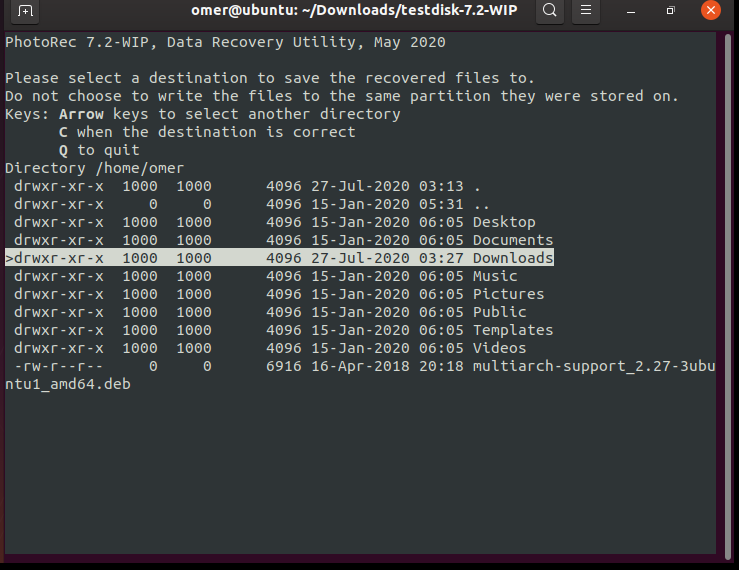
Step 4: Determine where the recovered files will be restored. You can browse higher directories with the left arrow key on the keyboard and select a folder of your choice.
NOTE: In data recovery processes, it is important to save the data to be recovered as a result of the scan to a different partition or disc rather than the partition you are scanning. If you choose to save the recovered data on the same partition on the same disk, you can damage many data to be recovered.
Here we choose the home folder. For the folder you want to select, simply hover over it and press the c key on the keyboard. Our scan has started.
Step 5: While scanning is in progress, how many files from which file type are recovered are listed below. Scanning may take several hours or more, depending on the size of the disc you choose and the variety of file types you choose to scan. We chose very few file types in order not to extend the scan so let’s take a look at the recovered files.
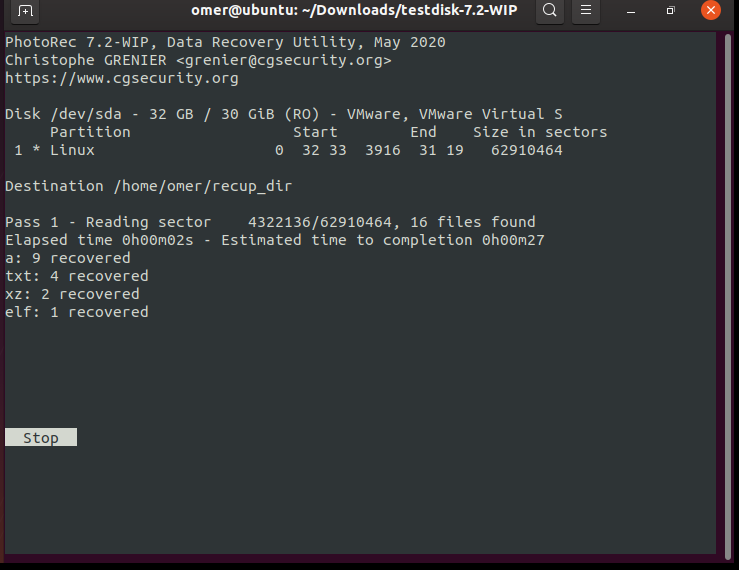
Recovered files are located in folders named recup_dir.
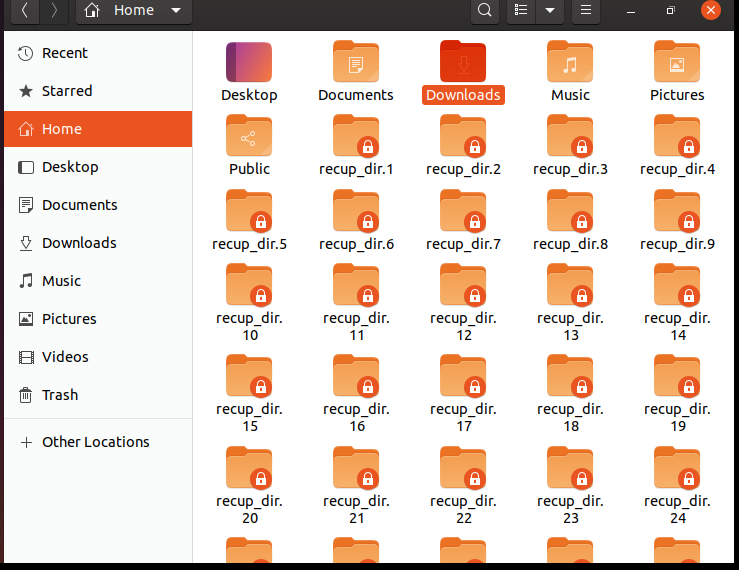
Our scan took too long, we selected all file types. As you can see here, you can see how some of the text files it has recovered look like. I can say that PhotoRec, a program I have used many times before, works very successfully based on my personal experience.