 by
by Windows Server 2016 is Microsoft’s latest and most modern server operating system developed on Windows Server 2012 R2. This new server operating system was officially released as of September 26, 2016, after two years of preview and is now ready to take part in real business scenarios.
For Windows Server 2016 installation, The corresponding ISO file is provided first. Windows Trial products can be used for this purpose.
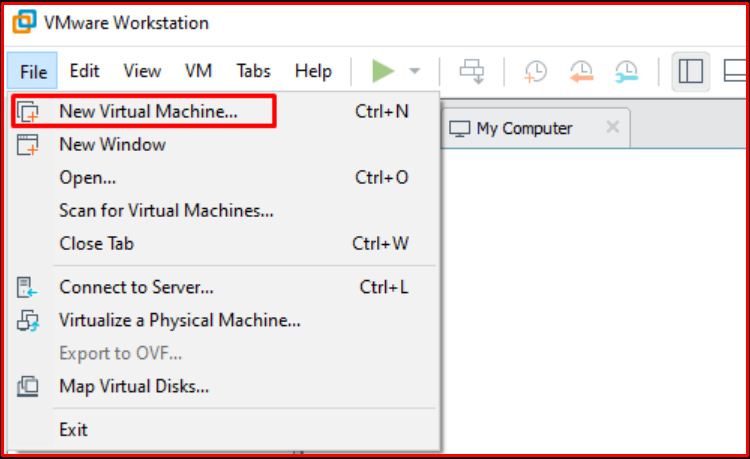
In VMware Workstation, click “File> New Virtual Machine”.
The creation of the new virtual machine wizard starts and continue by clicking the “Next” button.

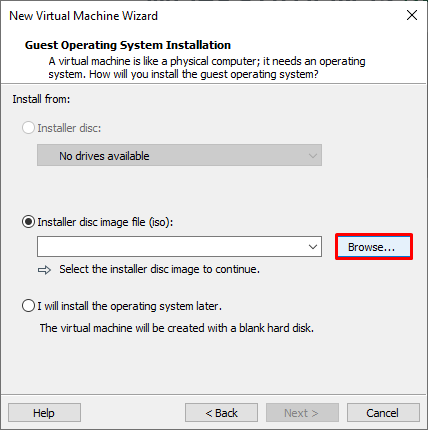
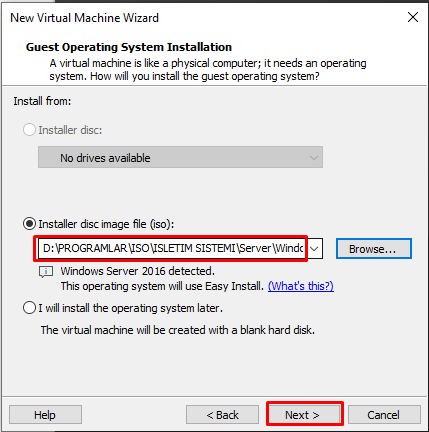
In the next screen, select “Installer disc image file (iso):” and click the “Browse” button.
Select the operating system ISO file you want to install.
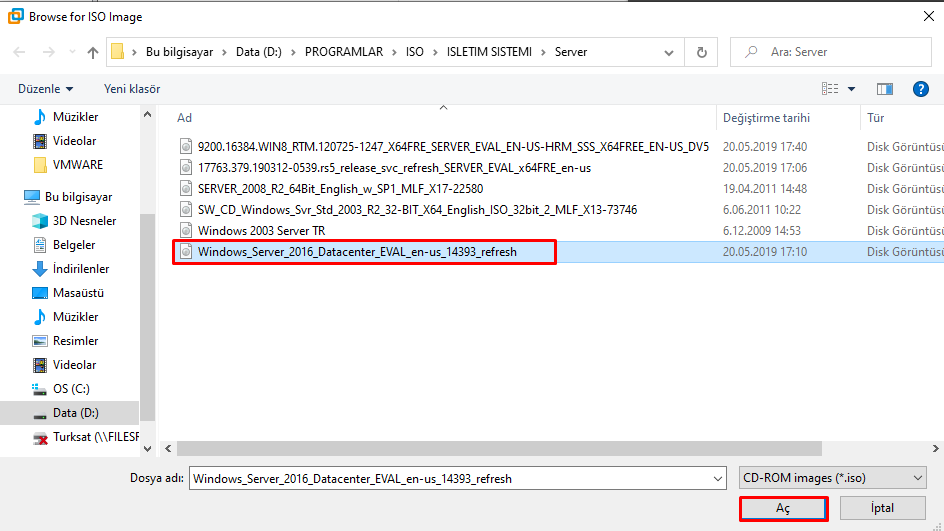
After selecting the downloaded ISO file continue by clicking the “Next” button.
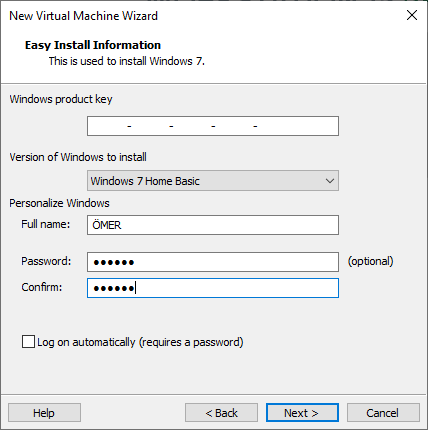
Set options such as license key, version, credentials. I would recommend filling out the credentials because they will be required to log on.
Name the virtual machine and locate the physical area where the files will be saved.

Set the disk capacity. Select one of the “Store virtual disks as a single file and Split virtual disk into multiple files” option. I checked the “Split virtual disk into multiple files” option.

You can change the setting or complete the configuration with the “Customize Hardware” option as required. After setting ıp your virtual computer, check the option “Power on this virtual machine after creation”.
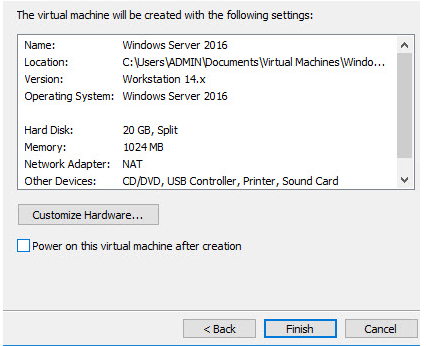
Note: The CPU and RAM values may be set higher for a faster setup. These values can be adjusted after installation. This completes the configuration process.
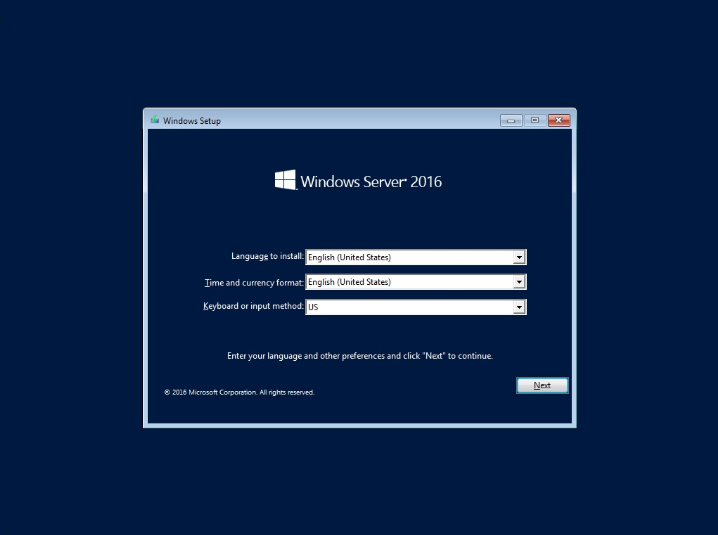
The first step of Windows installation is to customize the installation language, server region and keyboard language. After selecting the appropriate options on this screen, click the “Next” button to continue the installation.
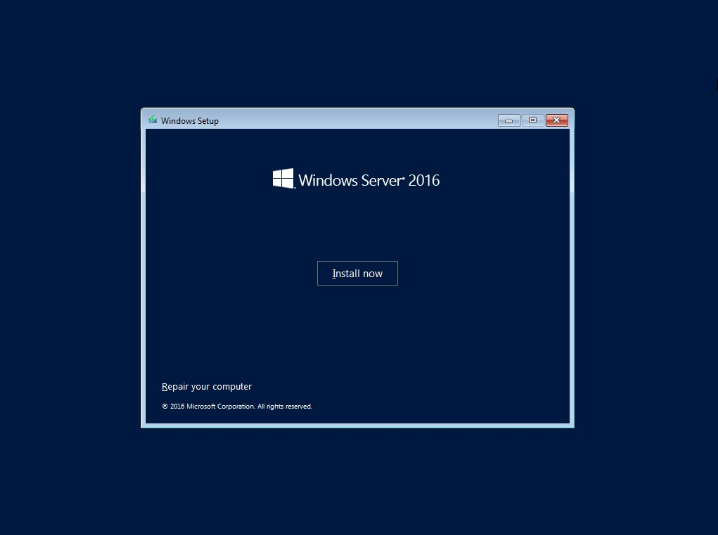
Click “Install Now” in the second step of the Windows installation wizard. You can also use the “Repair your computer” option to repair the operating system that does not open at the bottom left of this page. In this section, we choose the “Install Now” button as we will install a new Windows Server 2016.
After selecting the operating system version and user graphic interface type (Desktop Experience or Core) you want to install on this screen, click the “Next” button.
In this step, Windows Server 2016 is selected by default. In this article, I will be choosing the Windows Server 2016 (Desktop Experience) option.

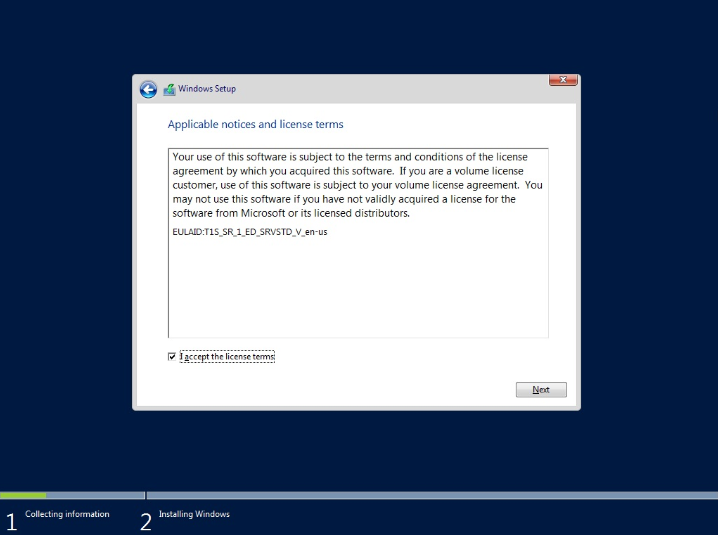
The license page includes the license terms in Microsoft’s end-user license agreement (EULA End User License Agreement). On this screen, to install the operating system and accept the license terms; Select the “I accept the license terms” box and click the “Next” button.
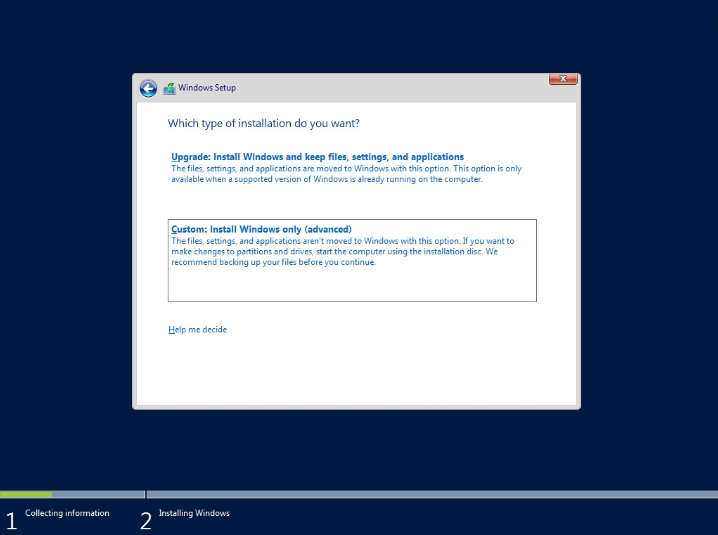
On the “Which Type Of Installation Do You Want” page, there is a screen of Windows Server 2016’s new (clean – install) or on-site upgrade (in-place). In this study, after selecting “Custom” from the installation types, select the “Next” button to continue the installation process.
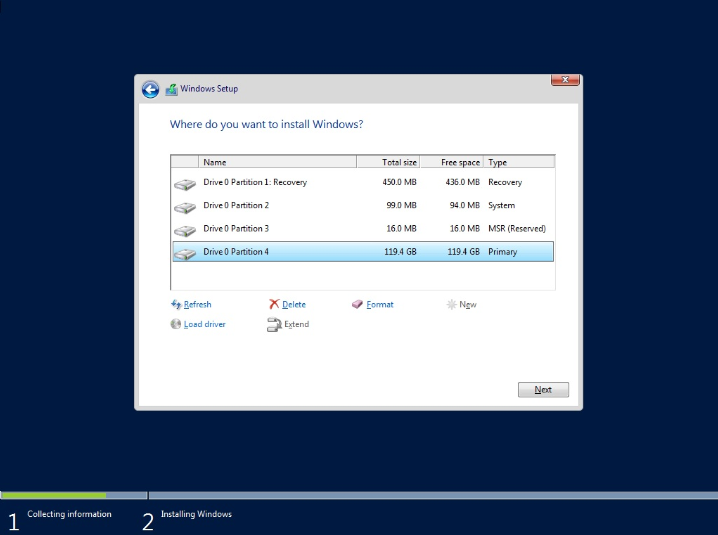
On this page, “Where do you want to install Windows?”, A blank disk is selected for Windows Server 2016 installation. You can also select, configure and format the disks on this screen. When you click “Next” after the disk selection and configuration process is completed, the installation process files are copied and your server will start several times from the installation process time.
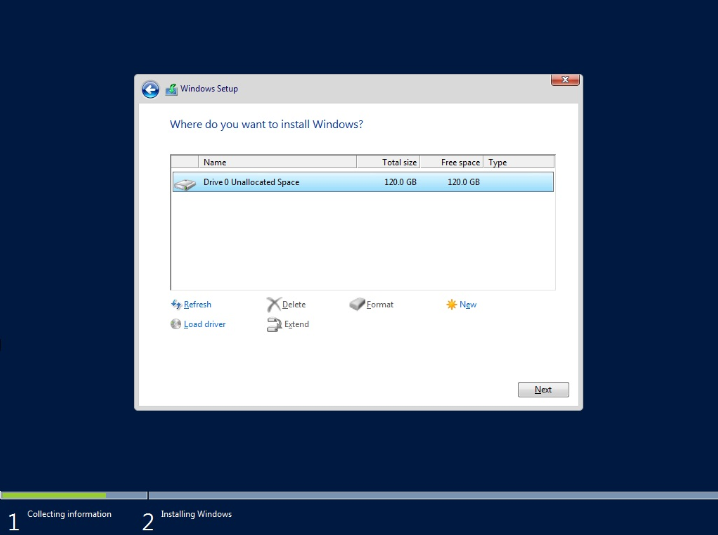
Note: If you want the entire area of your first disk to be located on the “C” drive, “Drive 0 Unallocated Space” is selected. Then, by clicking the “Next” button, your entire disk is reformatted and the operating system is installed on this unit. To divide your disk into different parts; Click “New” and you can split your disk into partitions with the “Size” option that will be active on this screen.

After the partitioning process is completed, “Drive 0 Partition 1: Recovery,” Drive 0 Partition 2: System, and “Drive 0 Partition 3: MSR (Reserved)” partitions will be created.
Recovery: In this section, Windows Recovery Environment (Windows RE) application for operating system boot errors is used.
System: This section; If you have more than one operating system, for example, Windows 8.1 and Windows 10. Your computer displays a list of operating systems prior to boot, and the user’s option allows the operating system to boot. Disk encryption applications such as Windows BitLocker use this section.
MSR (Microsoft Reserved Partition): This section is used in UEFI / GPT systems. Each GPT disk contains MSR. In the disk configuration process, the MSR field is created first and then the primary partition is created. MSR Reserves each drive for later use by the operating system. No meaningful data is stored in the MSR domain.
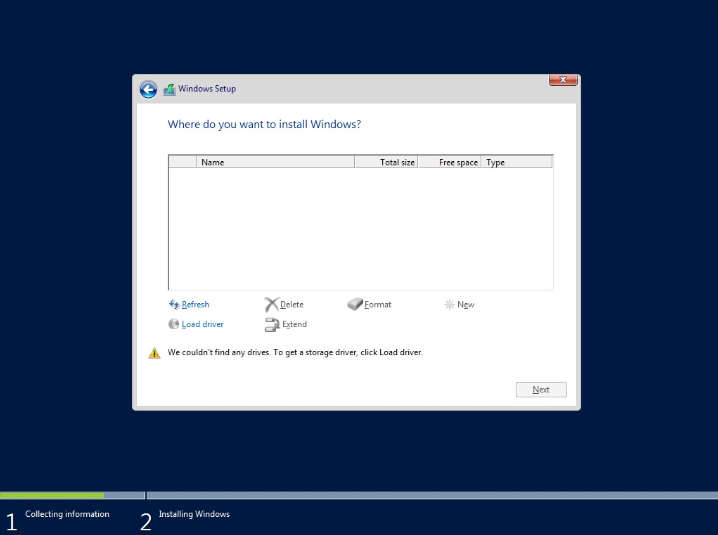
Note: If the setup wizard cannot find your disk in this step of the installation process, you may encounter the following error screen. There are two reasons why you may encounter this error;
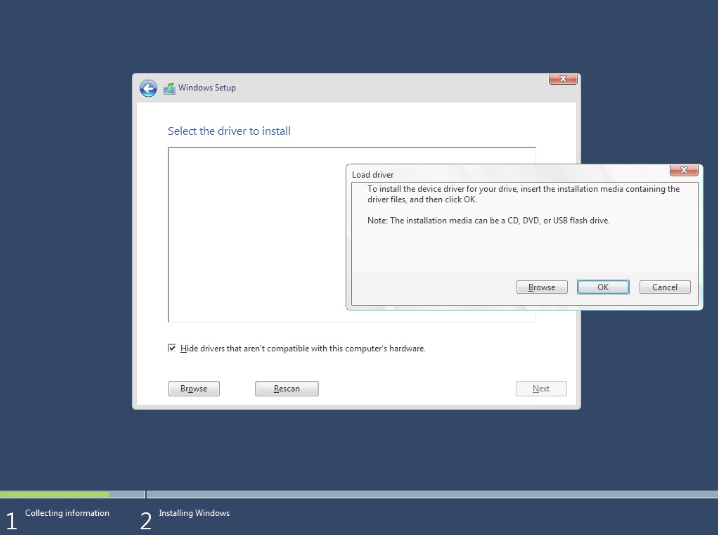
If your server or RAID card is a new product, the Windows installation wizard cannot access your disks because it cannot find the appropriate driver for the storage. In this case, copy this data to a CD / DVD or USB drive for storage or access to the required drives of your RAID card, then click the “Load Driver” and add the appropriate drive.
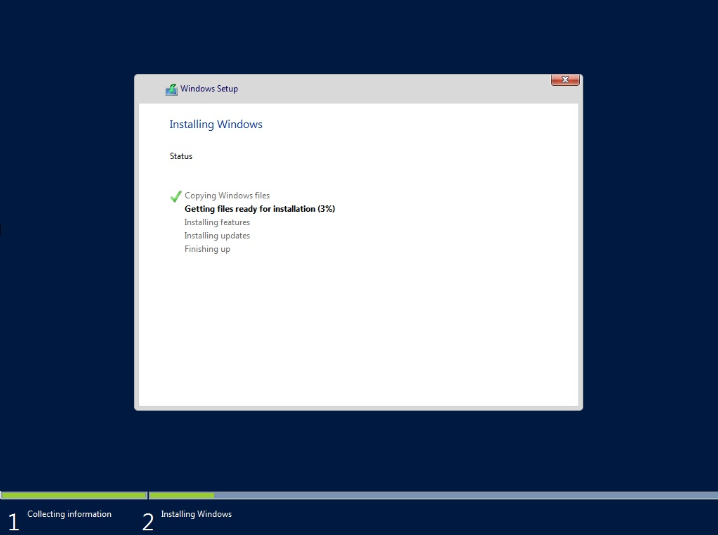
The “Installation Windows” section is the last step. Now the wizard starts the installation of Windows Server 2016. Depending on the type of installation media and the speed of the server, the installation process will take some time.
After the installation process is completed, Windows Server 2016 will ask for the password of the local administrator account to be set before logging on to the “Settings” page that will appear.


Note: For a strong Administrator password; uppercase, lowercase, numbers and special characters must be used together. If the Windows Server 2016 administrator account password does not comply with strong password policies, a dialogue describing the administrator password criteria will open, giving you the opportunity to change the password.
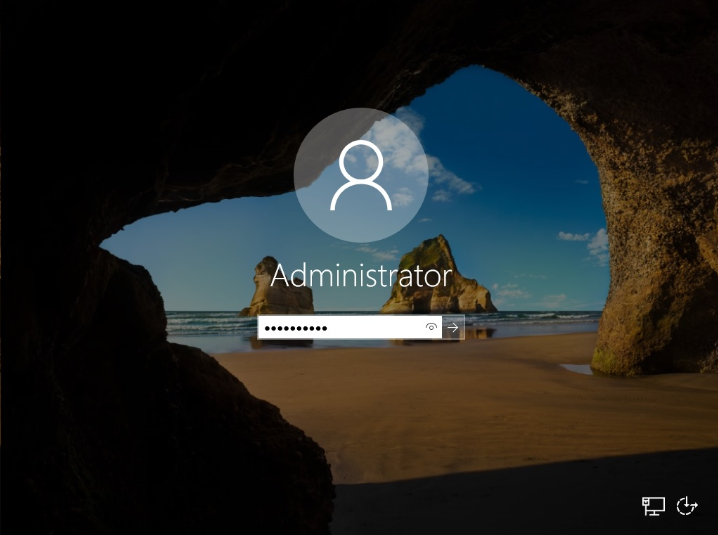
After installation, you can log in with the Administrator user using CTRL + ALT + DELETE keys combinations to log in.
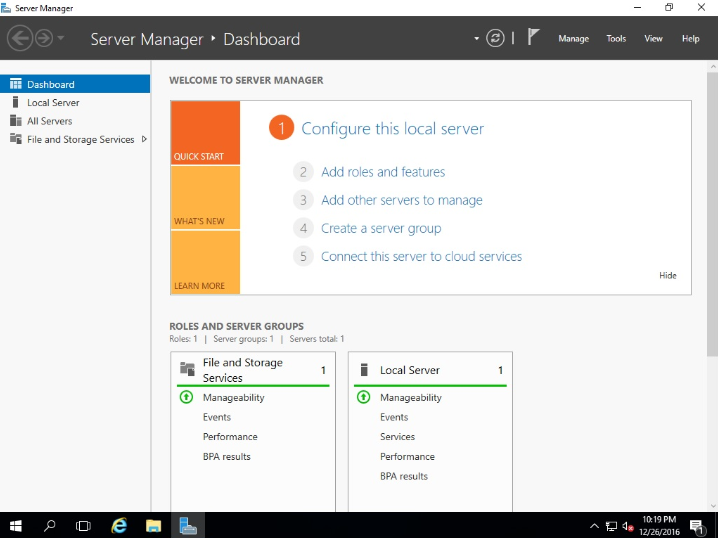
“Server Manager” will welcome you when you log in successfully with the Administrator user.