
 by
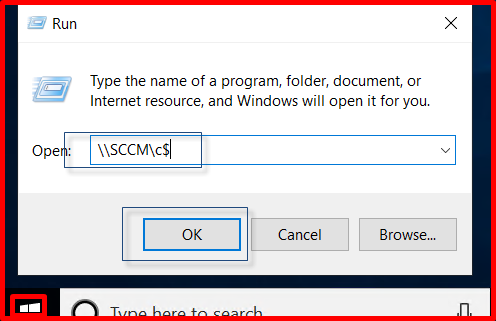
by In this article, we will explain how the System Center Configuration Manager Console tool is installed on your Windows 10 PC. In some cases, you can easily operate on the SCCM Console screen from your Windows 10 operating system computer without the need to connect to the SCCM server. Now we can start the installation process. We need to go to our client computer and copy the SCCM Console Setup file. For this, we right-click on the ”Windows” button of our Windows 10 computer and click on the ”Run“ option.

We need to connect to the “c$” of our server. We can connect as ”\\SCCM\c$”. Continue by clicking the “OK” button.
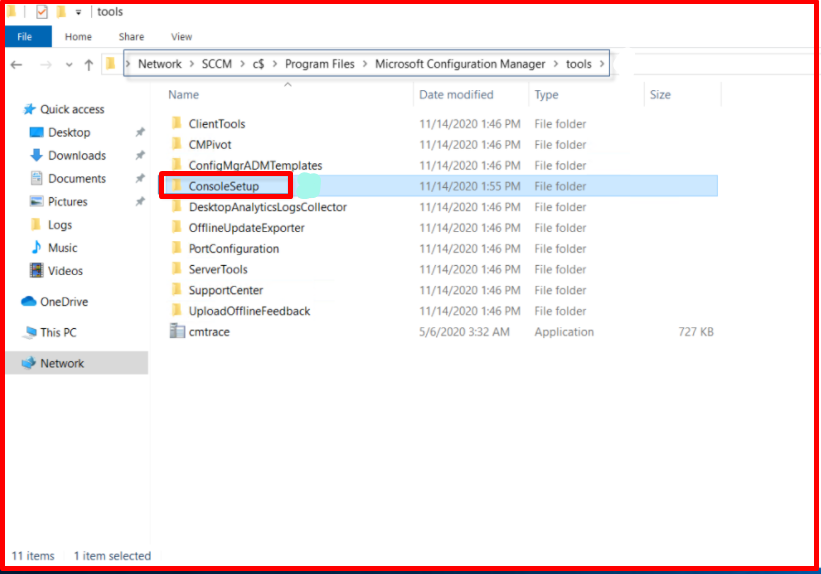
When we connect to the c$ screen of our SCCM Server, we can go to the Path we have specified below and copy the “SCCM Console Setup” file to our desktop.
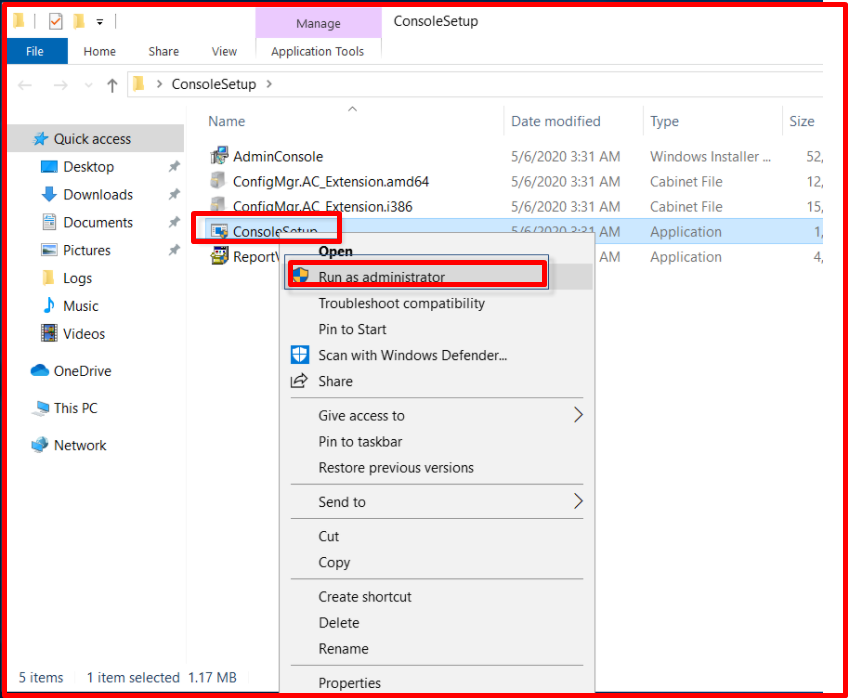
When we open the folder that we have moved to the desktop, we right-click the “ConsoleSetup” program and click the “Run as Administrator” option.
On the “Microsoft Endpoint Configuration Manager” page, click the “Next” button.

On the “Site Server” page, we write the “FQDN” of the server in the box to which “Site Console” screen you want to connect to. Then we click the “Next” button. Since there is only one site in our lab environment, we continue by typing the name of our server.

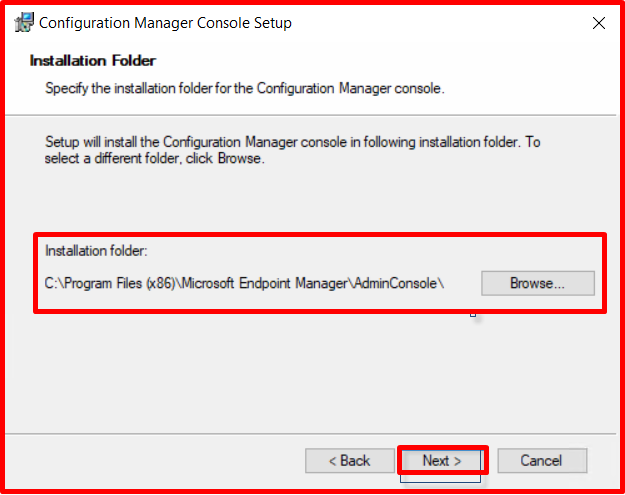
On the “Installation Folder” page, we select where the program will be installed. We leave it the same. Then we click the “Next” button.
On the “Ready to Install” page, we start the installation process by clicking the “Install” button.

On the “Please Wait” page, we wait a bit until the installation is finished.

On the last page, we will complete the installation process by clicking the “Finish” button.

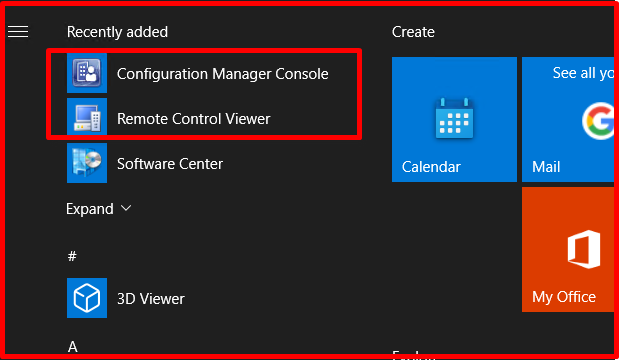
When you click on the start menu, you will see that the SCCM Console tool is installed.
When you type the name of your server by selecting the “Connect to site” option, the automatic name filling process will be performed. After the name filling process; By selecting the “Connect” option, the connection to the Console screen will be successfully established. In addition, the warning on the screen shows that the user we have become “Logon” does not have SCCM Console login authority.

For this; In order to give SCCM Console login authorization to the relevant user, we can authorize the relevant user or our own user by clicking the “Security” folder in the “Administration” section of our SCCM server and selecting the “Administrative Users” option. After the authorization is completed, we see that we have successfully accessed the SCCM Console screen.
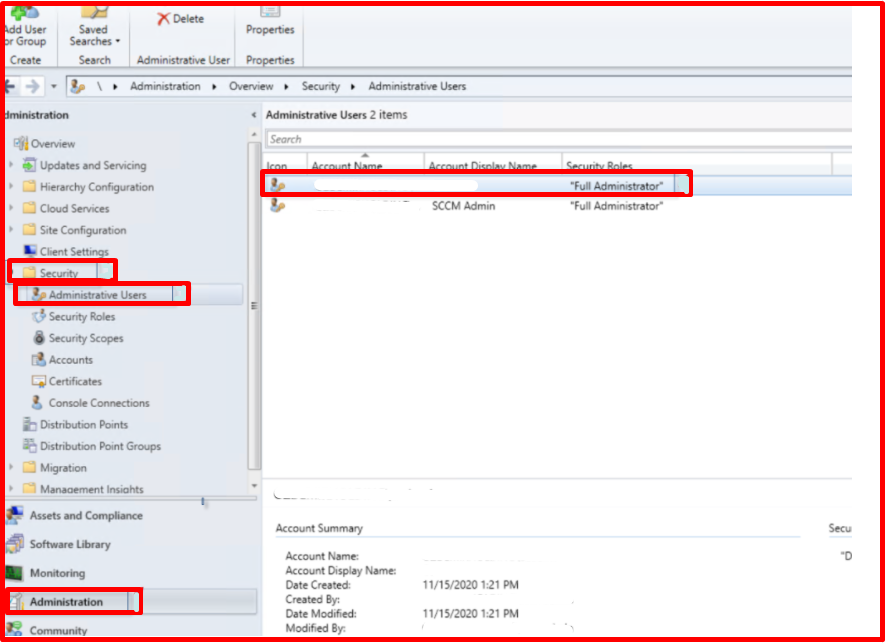
We have successfully accessed the SCCM Console screen.