by
by Avecto is a Privilege Management product. It allows users with standard rights to run the necessary tools with admin authority. Avecto product can run on Windows, Linux and Macs. If there is McAfee ePO in the structure, it works integrated. If there is no ePO in the structure, it works over Group Policy. For a Linux environment, it needs to be installed on a separate server and there is a separate management console.
When we examine Avecto Defendpoint, we see that it protects us from 5 basic critical attacks. These are Ransomware, Phishing Attacks, Zero-Day Attacks, Pass the hash attacks and APTs.

Avecto Defendpoint product has Workstyle and Application group logic. We will briefly look at what they are on Mcafee ePO.
What is Workstyle?
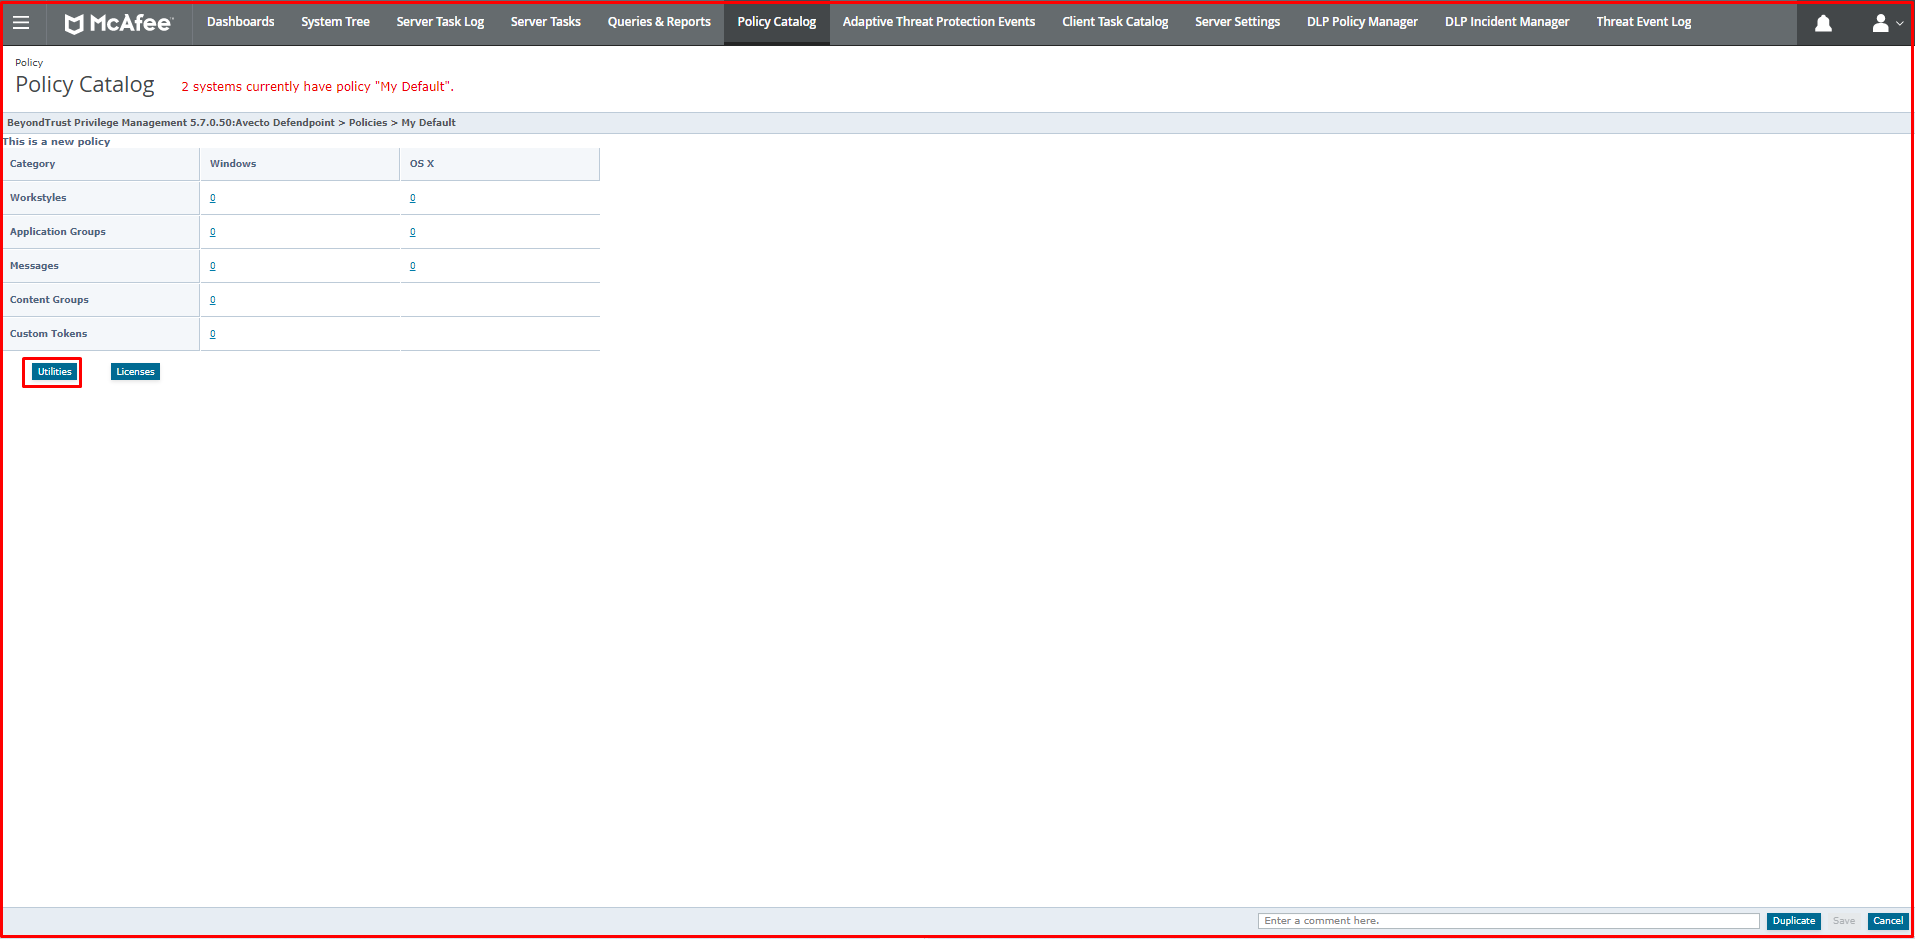
It is where we define our users or computer accounts, application rules, configurations such as timers if we need to give time intervals for the rule. To enter Workstyle, we click on the “Policy Catalog” tab on Mcafee ePO. We click on “BeyondTrust Privilege Management 5.7.0.50” on the screen that appears. We are editing the “My Default” policy.
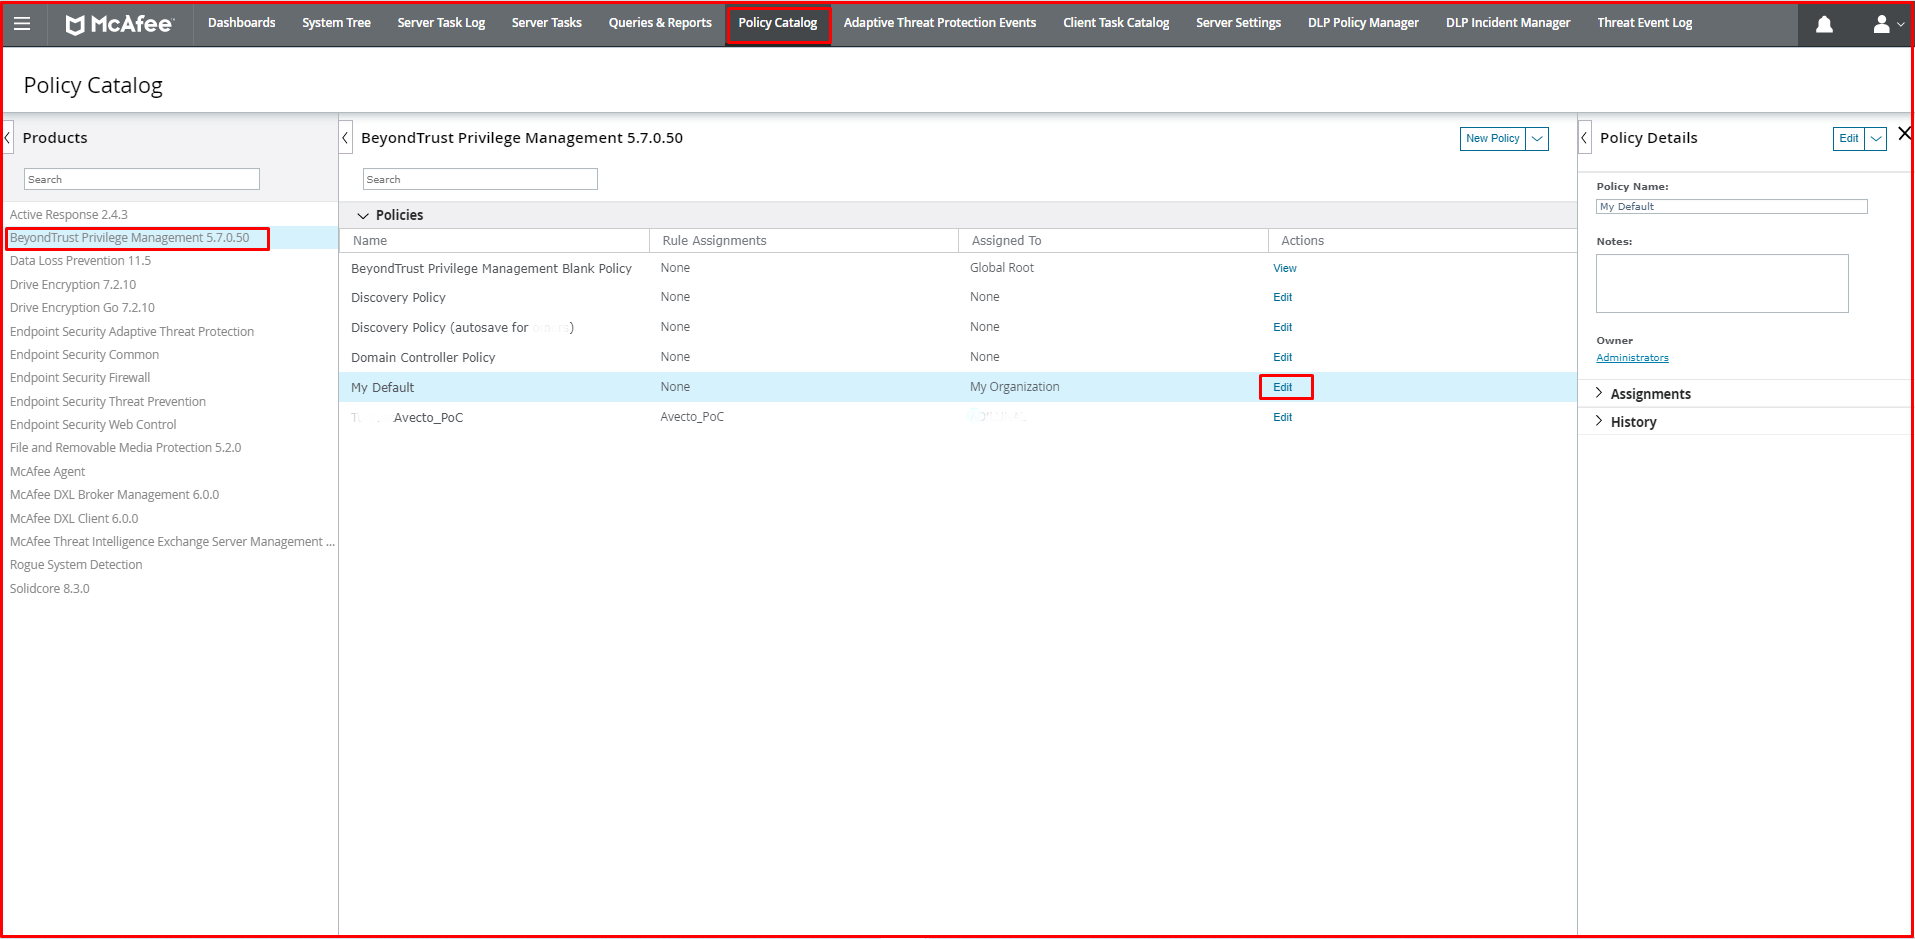
We click on the “Utilities” button on the screen that appears.
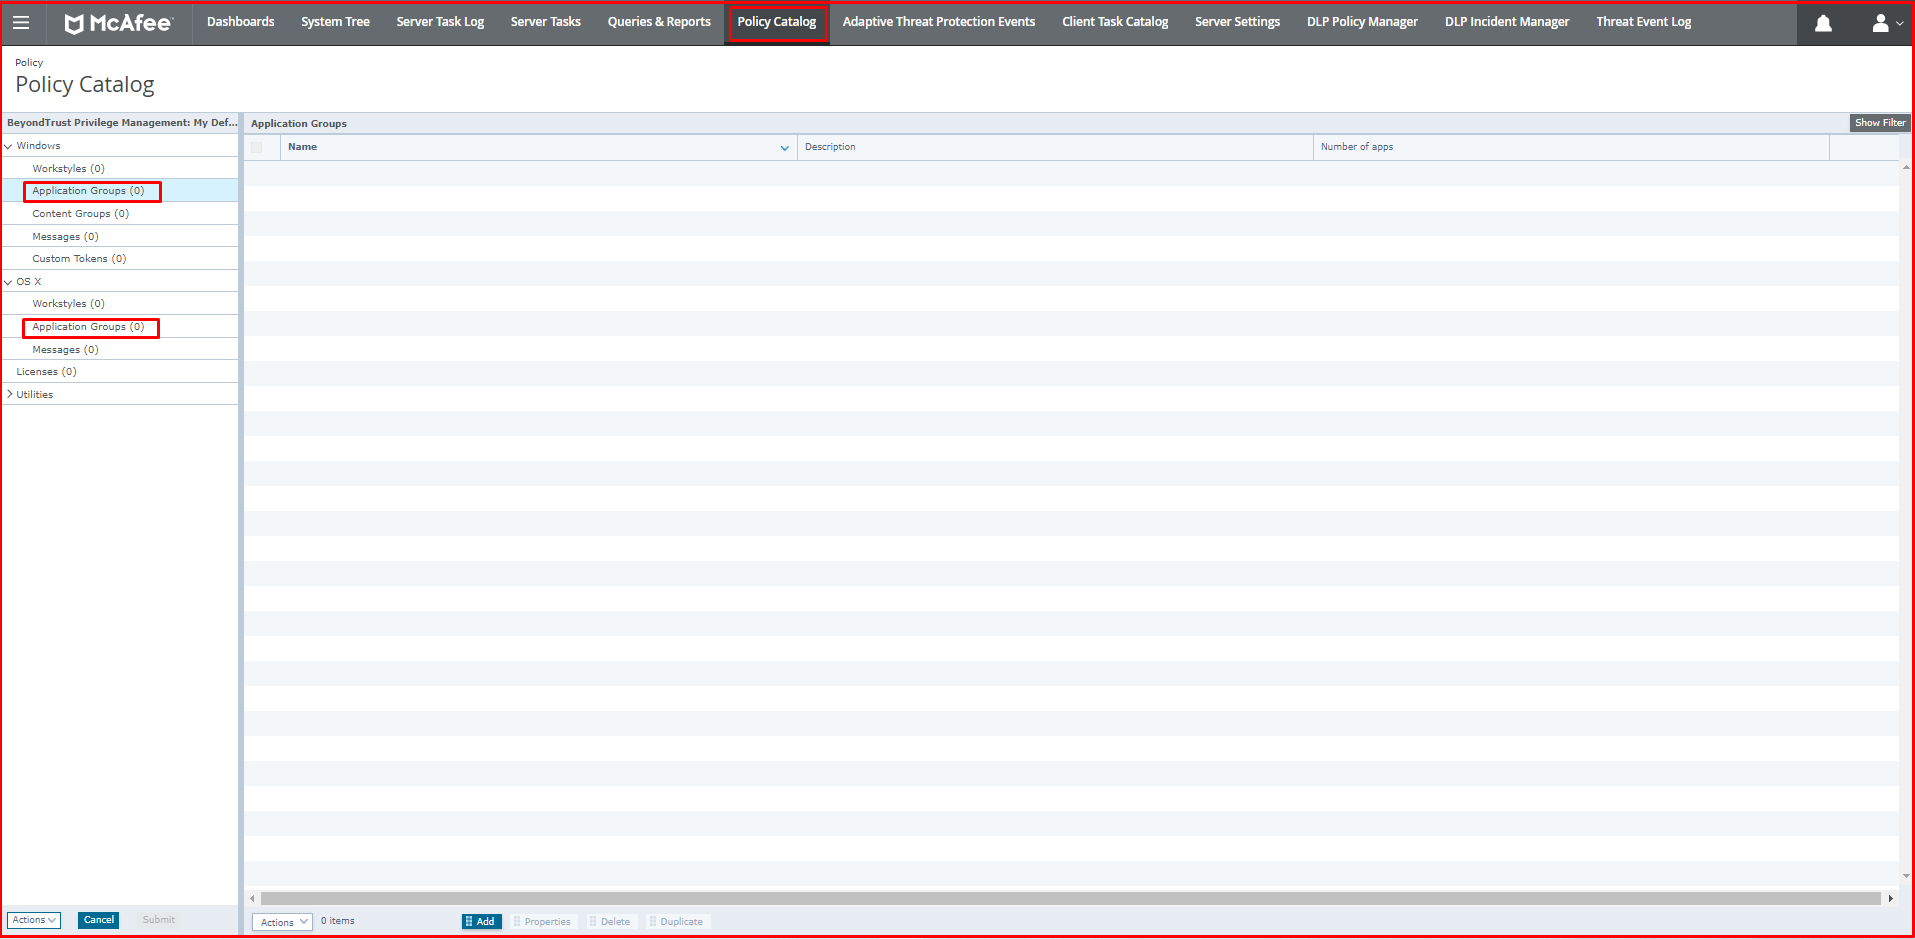
The “Workstyles” tab is located under the “Windows” and “OS X” tabs in the “Policy” screen.

What are Application Groups?
Application Groups is where we interpret the event logs we collect from the agents, work with admin right, request UAC or run in Passive mode. For Application Groups tab, click “Policy Catalog –> BeyondTrust Privilege Management 5.7.0.50 –> My Default –> Utilities” via Mcafee ePO. It is available under the “Windows” and “OS X” tabs on the “Policy” screen.
Writing Rules with Workstyle
Here is the Workstyle we created earlier. These are permitted applications, applications that we are subject to approval, and finally, we have created rules for sending messages to the user for applications that we do not take any action. Now we will see how to create a new workstyle. We create a new workstyle by right-clicking the Workstyle under the “Windows” tab on the “Policy” screen. On this screen, we click “Create using Wizard” in the “Action” button at the bottom.
Note: Workstyle also handles firewall logic, so the rule above crushes the one below. Considering this situation, we need to define the rule in the correct order.

In the “Choose a Workstyle” tab, we click the “Controlling workstyle” “Next” button.

We select the user or users to add to this group from the Filters tab. Groups in AD can also be added as groups if they are set properly.

In the “Capabilities” screen, it is selected what capacity will be applied. We choose both.

At the last “Finish” tab, we name the Workstyle. You can write in the description if you want. You can activate the rule later.

Application Groups Definition
In the Applications group, in general, we will enter the data we want to ban in the whole structure with Blacklist. You can determine which vehicle we will give the user the admin rights from the domain as admin. In Passive Mode, some tools run in Passive Mode instead of the run as right, you can create an application group for the relevant definition.
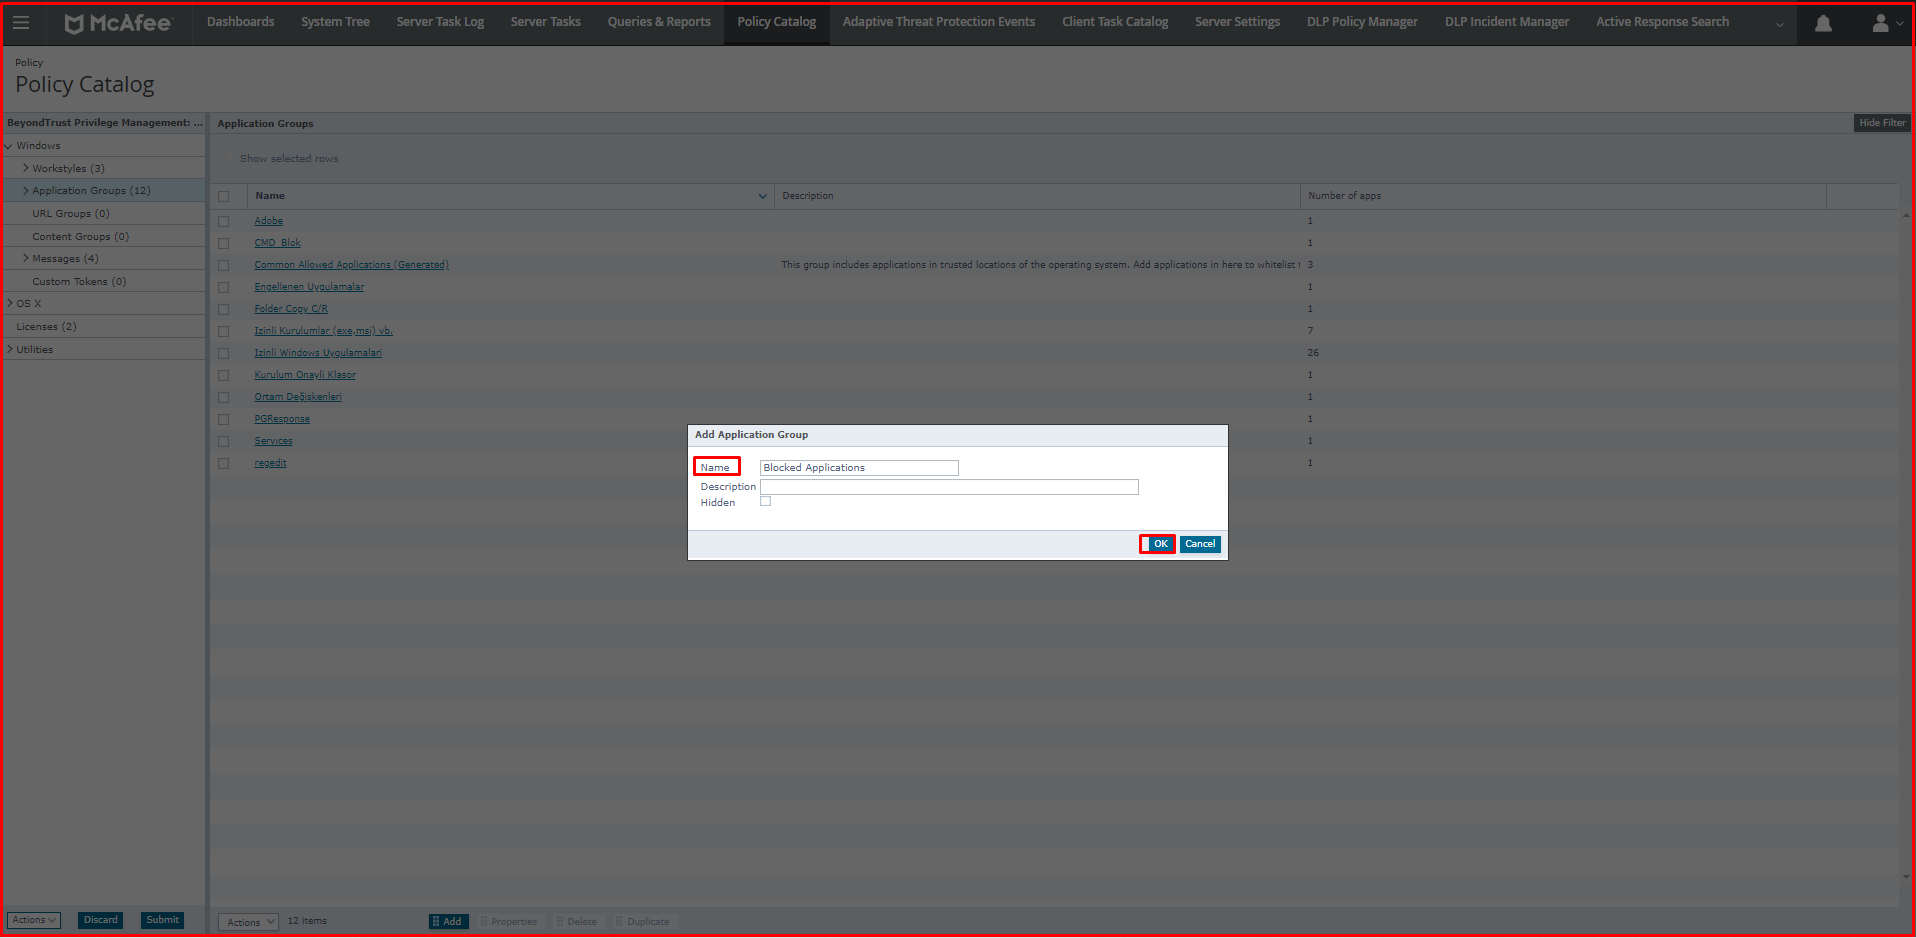
We click on Application Groups. We create our group by saying “Action> Add Application Group” at the bottom.

We name it when we create it. We named Application Group “Blocked Applications“.
Anydesk (Remote Desktop Application) Program Blocking
Until now, we have created Workstyle, we have created an application group, but we have not written any ban rules etc.
Let’s start writing our rule. We will now ban the Anydesk (Remote Desktop Application) program. If you remember our rule, we created it in three stages. The top will be our allowed rule. Our second rule is our approved allowed rule and the third is our banned-message notification rule. We will send a message to the end-user in our prohibited rule.
We click on “Blocked Applications“, which is the Application Group we created. At the bottom, we click on “Actions> Add Application> Executable …” respectively.

In the “Executable” screen, we write *Anydesk.exe* instead of “File or Folder Name“. You can give other values if you want.
Note: Generally it is recommended to give a program from “File Hash” to block or allow. Because the content of a program can change.
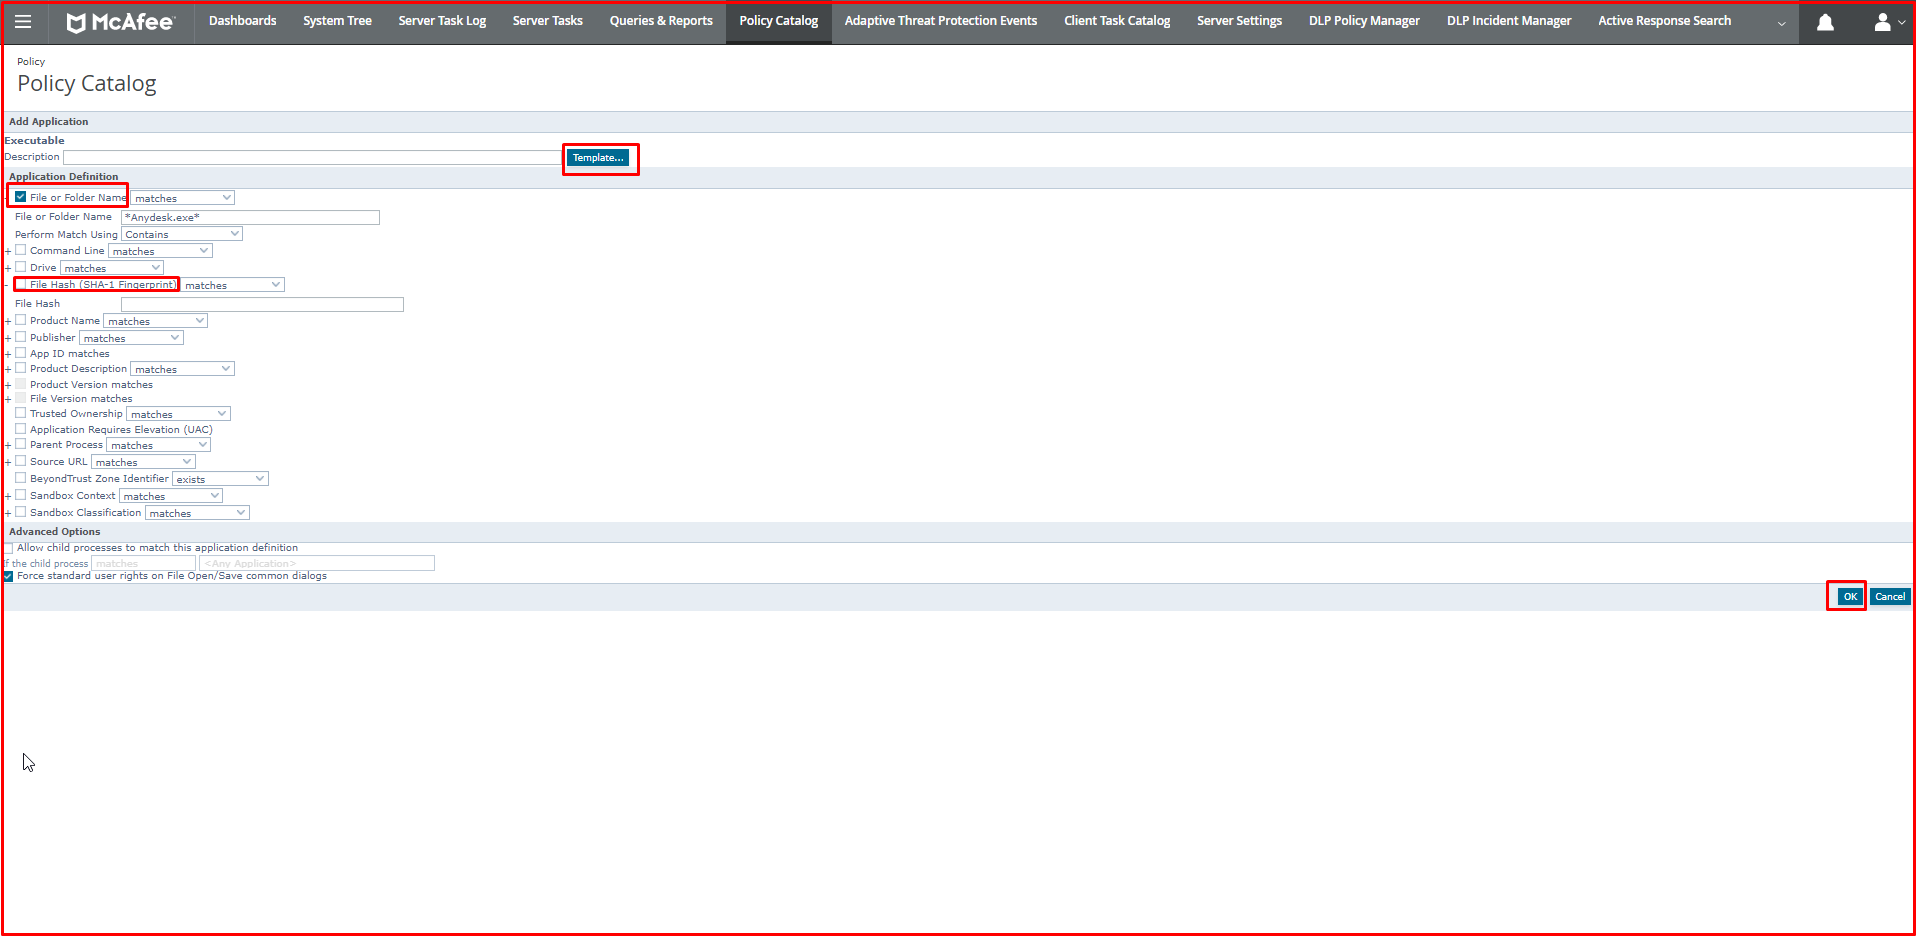
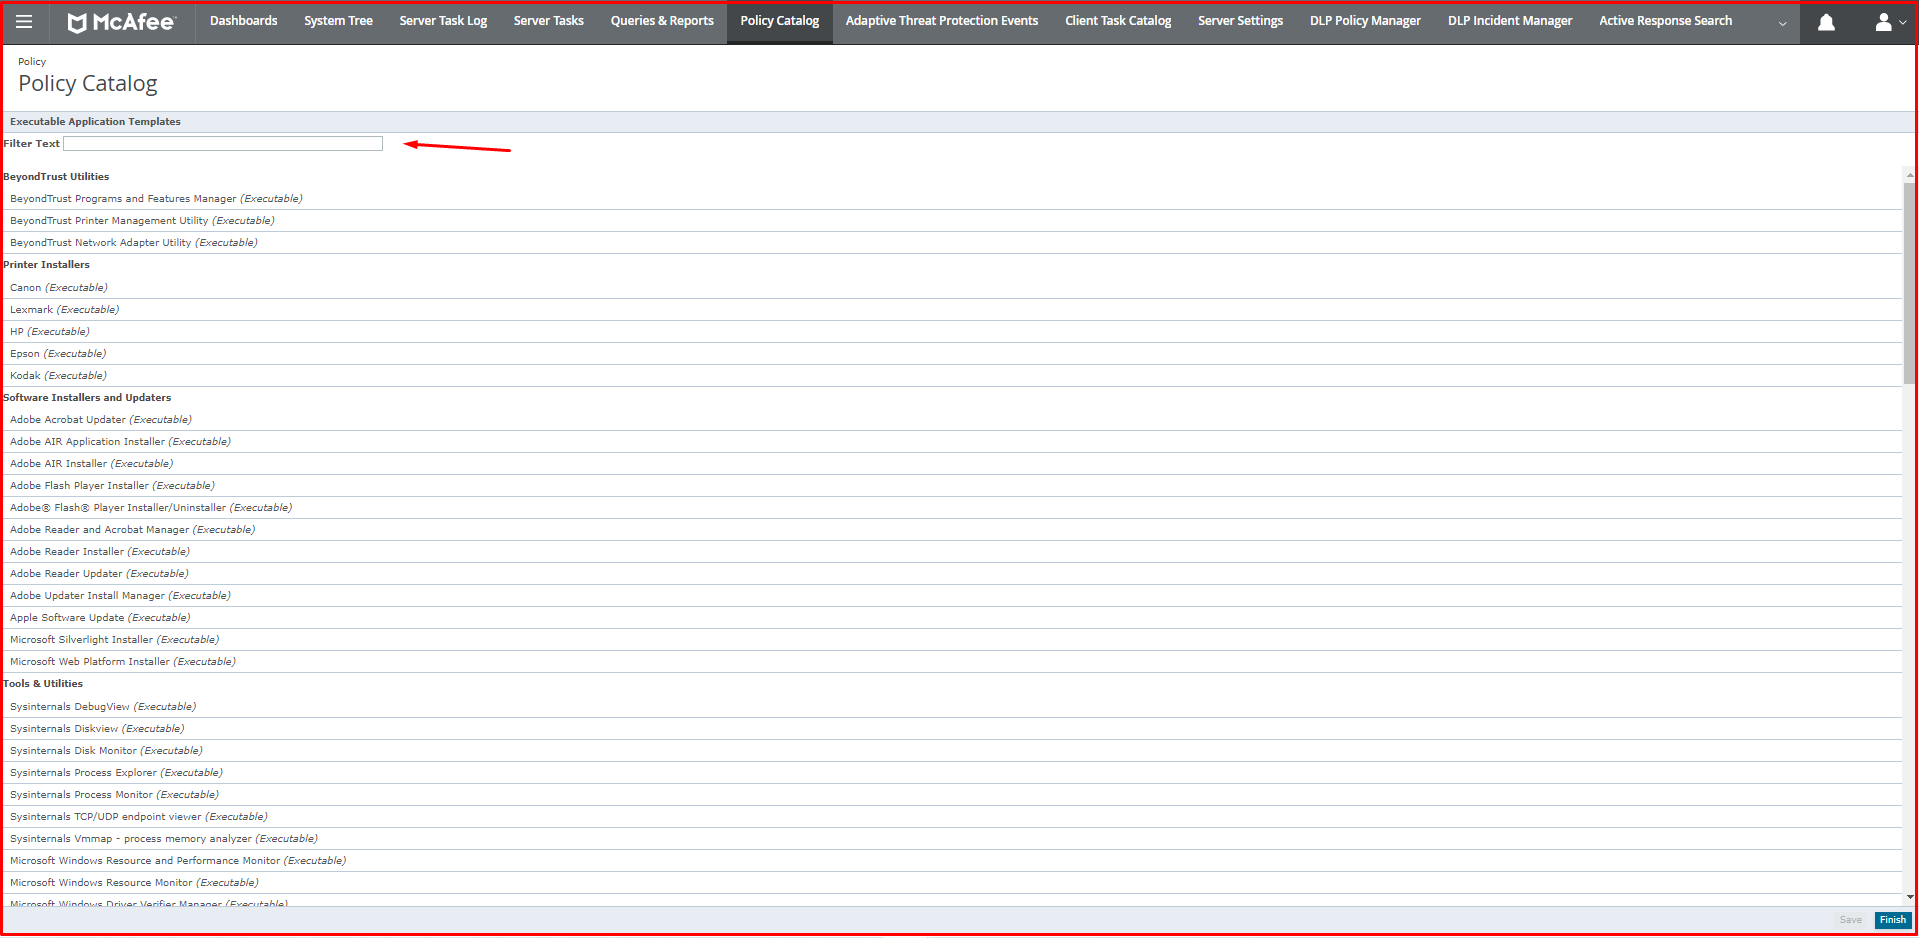
In the “Template …” option, the “Executable Application Templates” come ready. You can add the application you want here.
We have added the “Anydesk” program that we will block under “Application Groups> Blocked Applications“.

Finally, we click the “Workstyles> Blocking Message” tab under the Windows we added at first. Here you can see Workstyle name, Workstyle State and rule. We click on the “There are 3 Application Rules” button. We have prepared three “Application Rules” before.

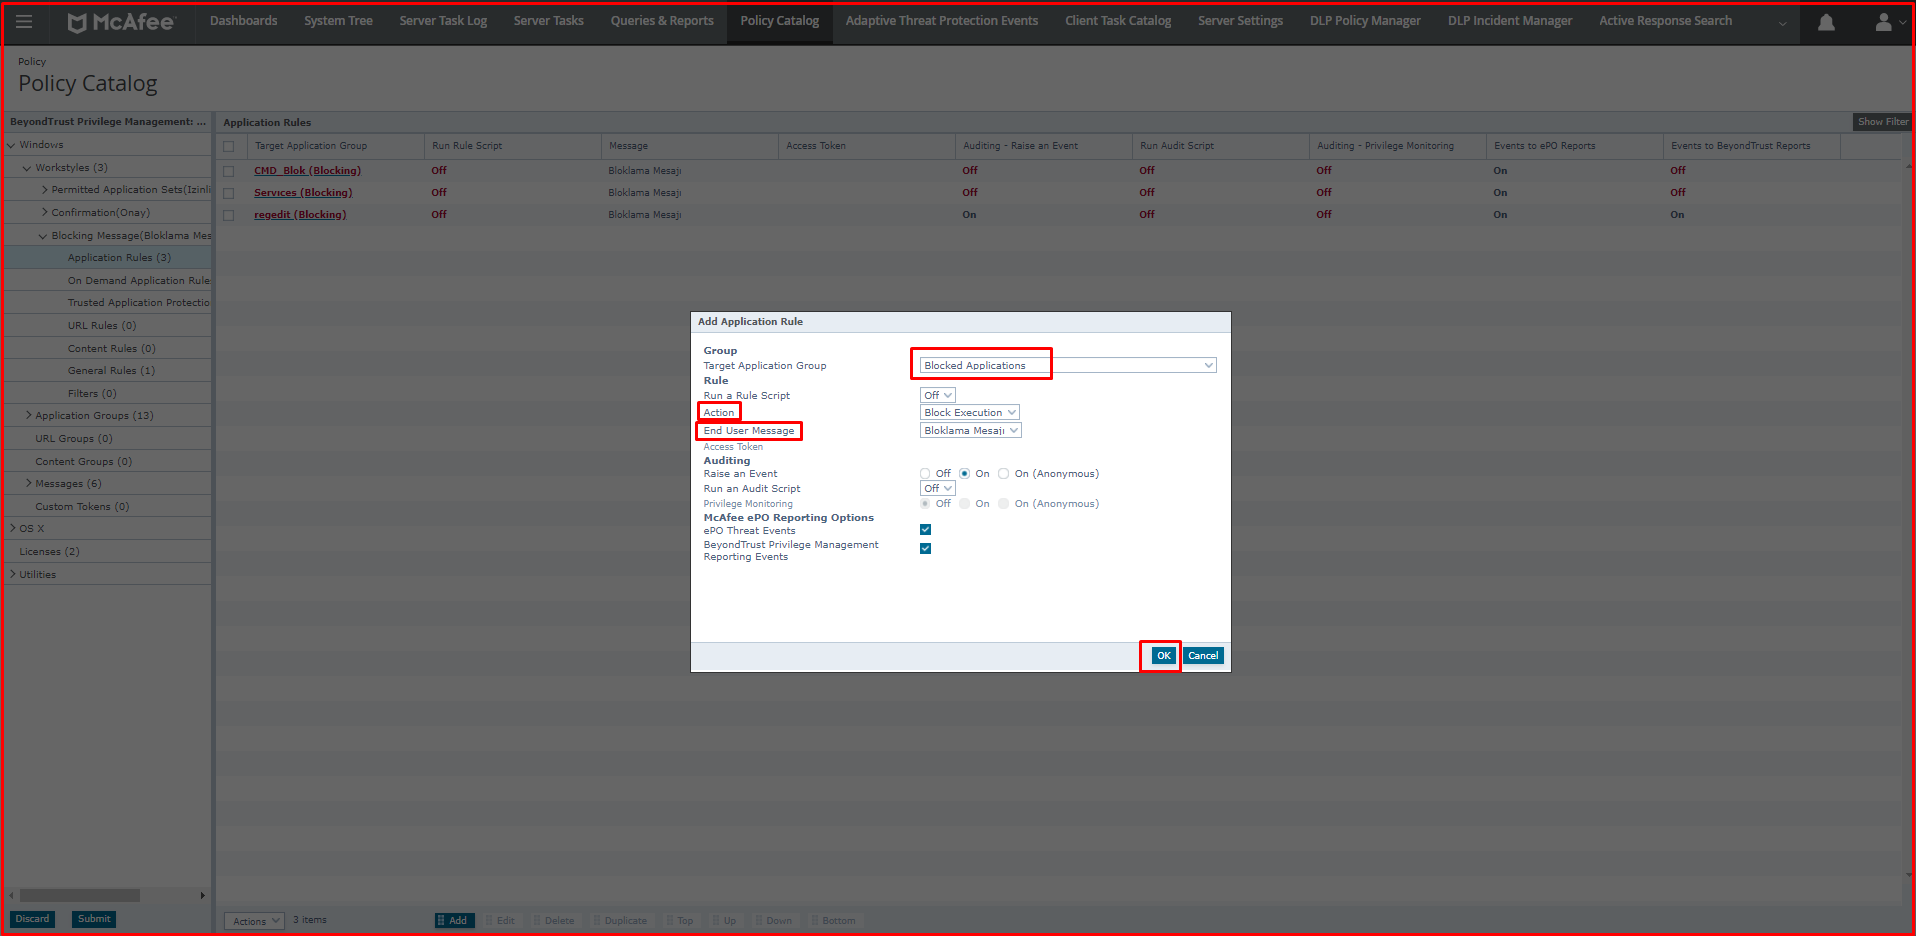
We will add the “Application Groups> Blocked Applications> Anydesk” rule that we created on the “Application Rules” page to block it here. We click the “Action> Add” button at the bottom.

In the “Add Application Rule” screen, we select the Application Group that we created in the “Target Application Group” section. We choose the “Action” state “Block Execution“. We also choose to message. When we click the “Ok” button, our “Application Rule” rule is added.
The “Application Group” we have added looks like the following.

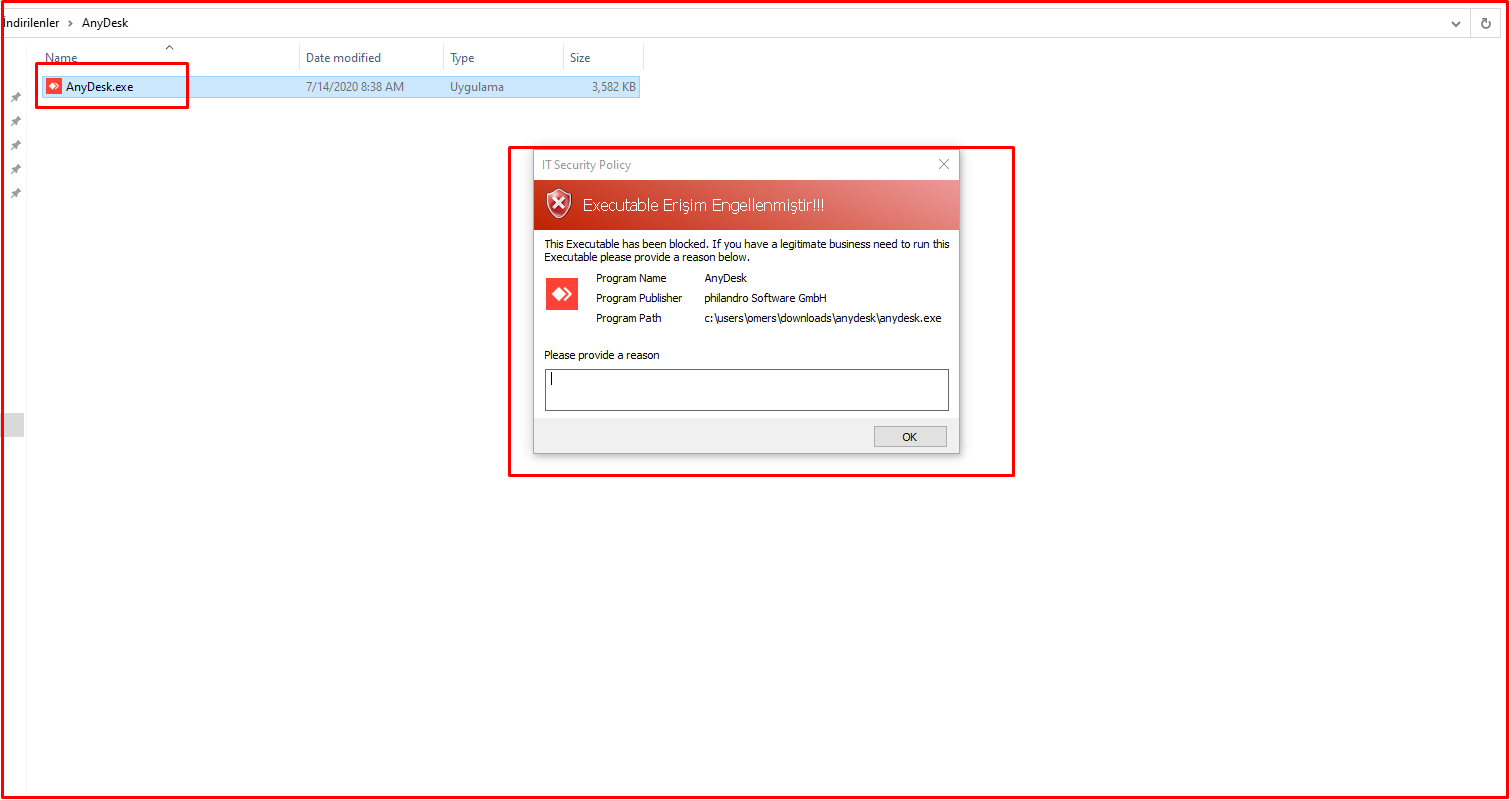
Now we will test the policy we prepared on the computer we want to block. Let’s see that the AnyDesk program works without sending our rule to the test computer at first.

We will send our Blocking Rule to the OMER computer. We will send the rule we created via the tag. First, let’s create a tag from the Tag Catalog.

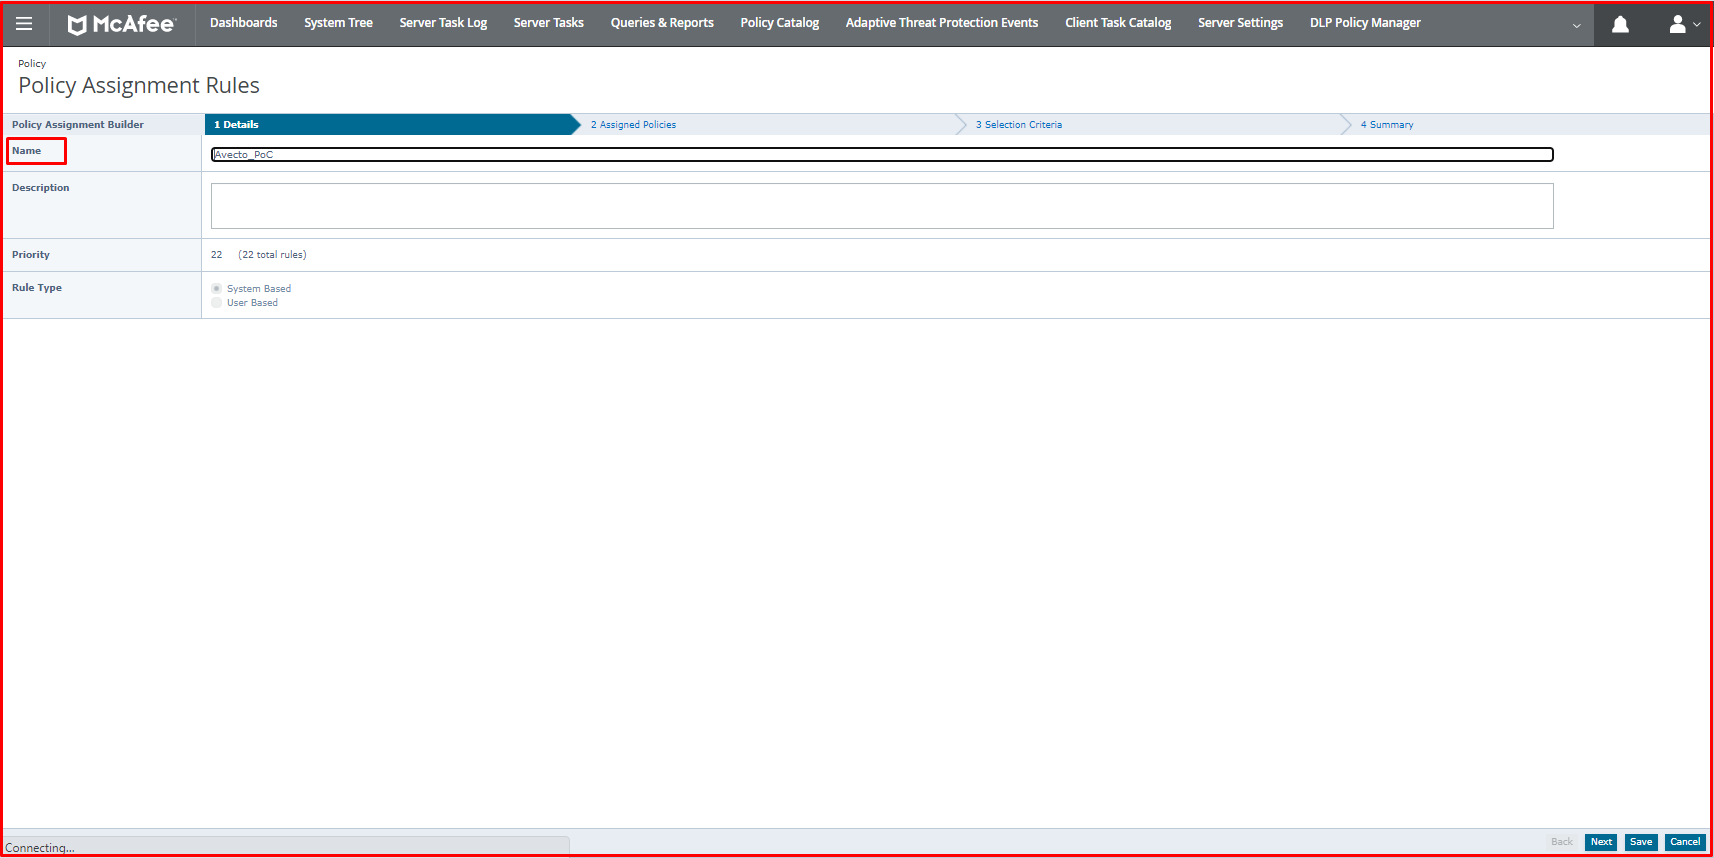
Second, we will create a New Assignment Rule for Avecto from Policy Assignment Rules. On this page, we give a new name to the assignment rule.
On the “Assigned Policies” page, we select “BeyondTrust Privilege Management 5.7.0.50” on the Product tab. We select “Policies (Multi-slot)” in the Category tab. We select the Avecto policy on the Policy tab.

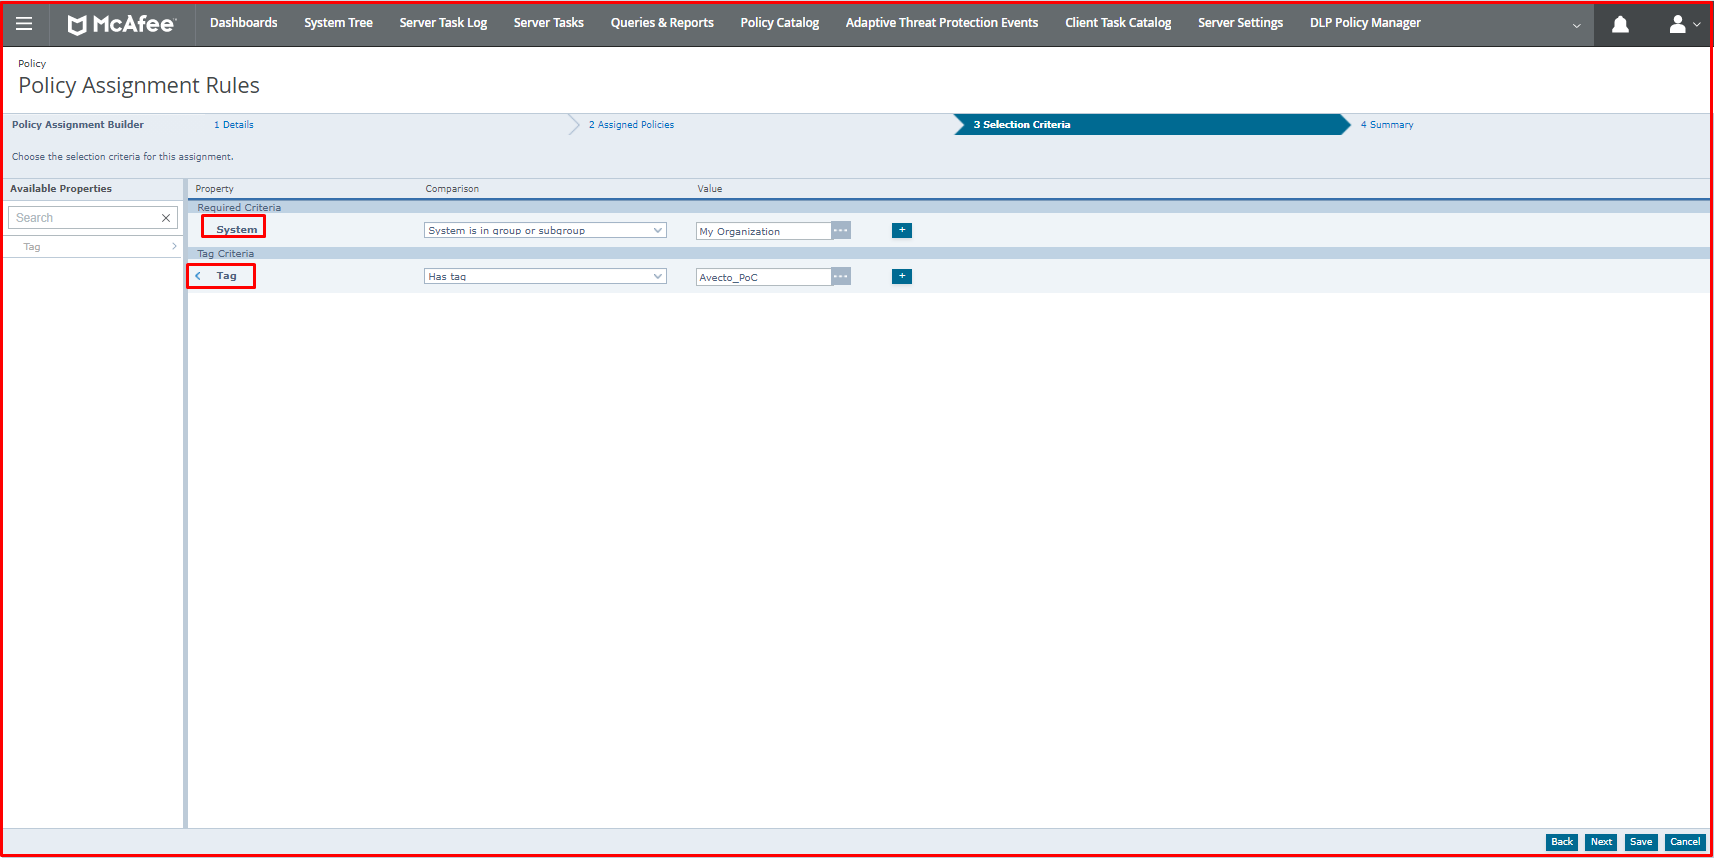
By selecting the Required Criteria and Tag tabs on the “Selection Criteria” page, we select the Comparison and Value values as shown in the picture below.
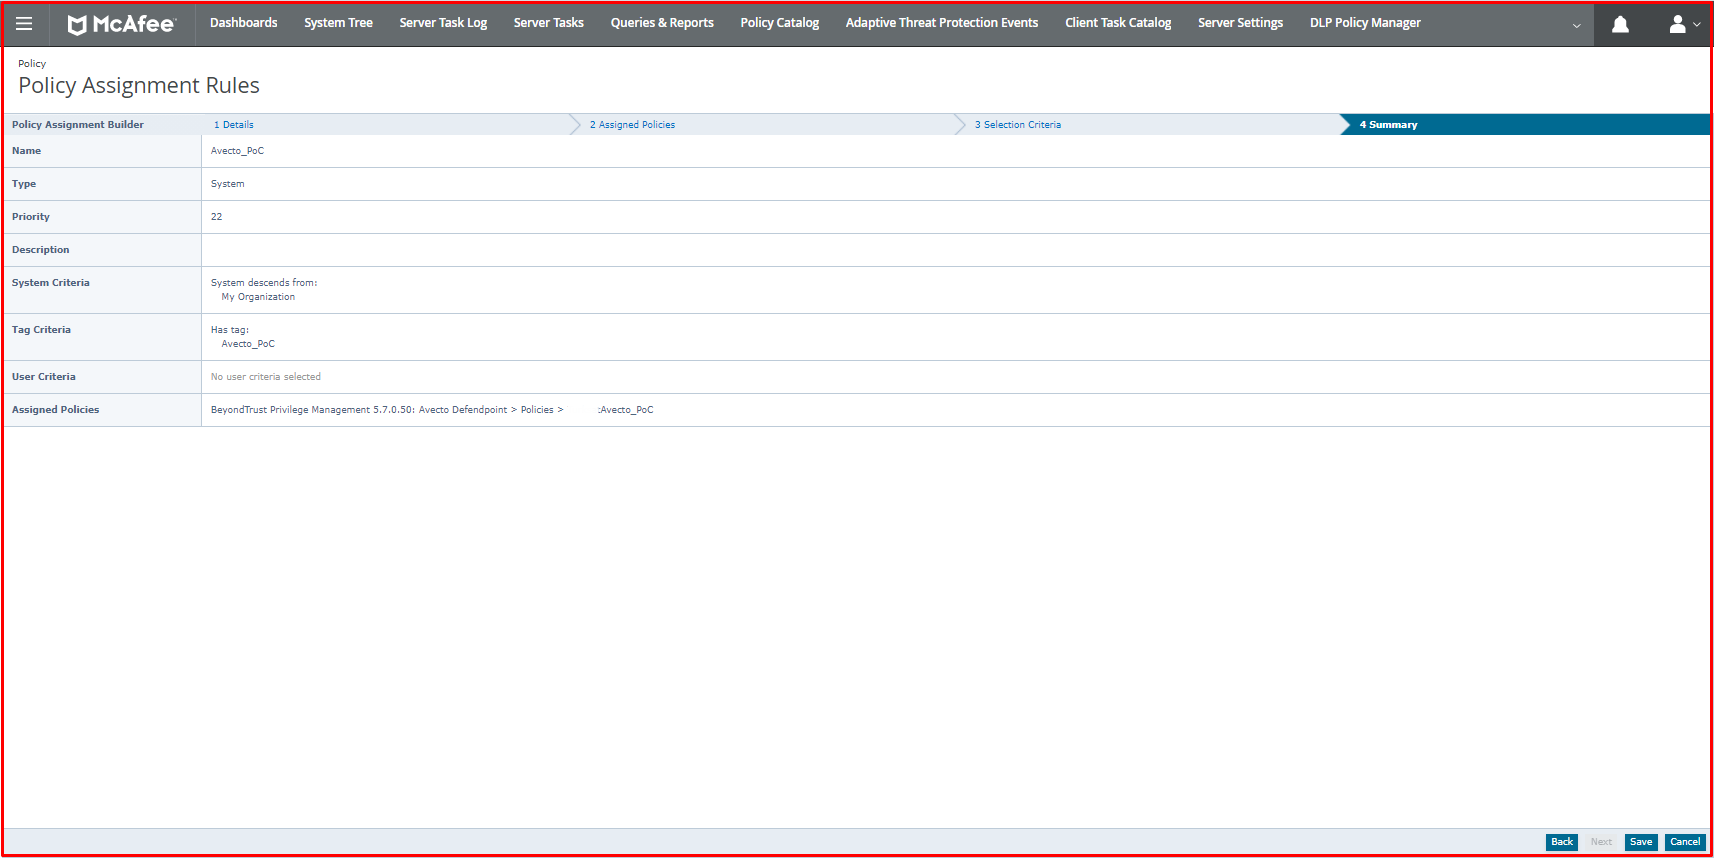
On the “Summary” page, there is a general summary of the assignment rule we made.
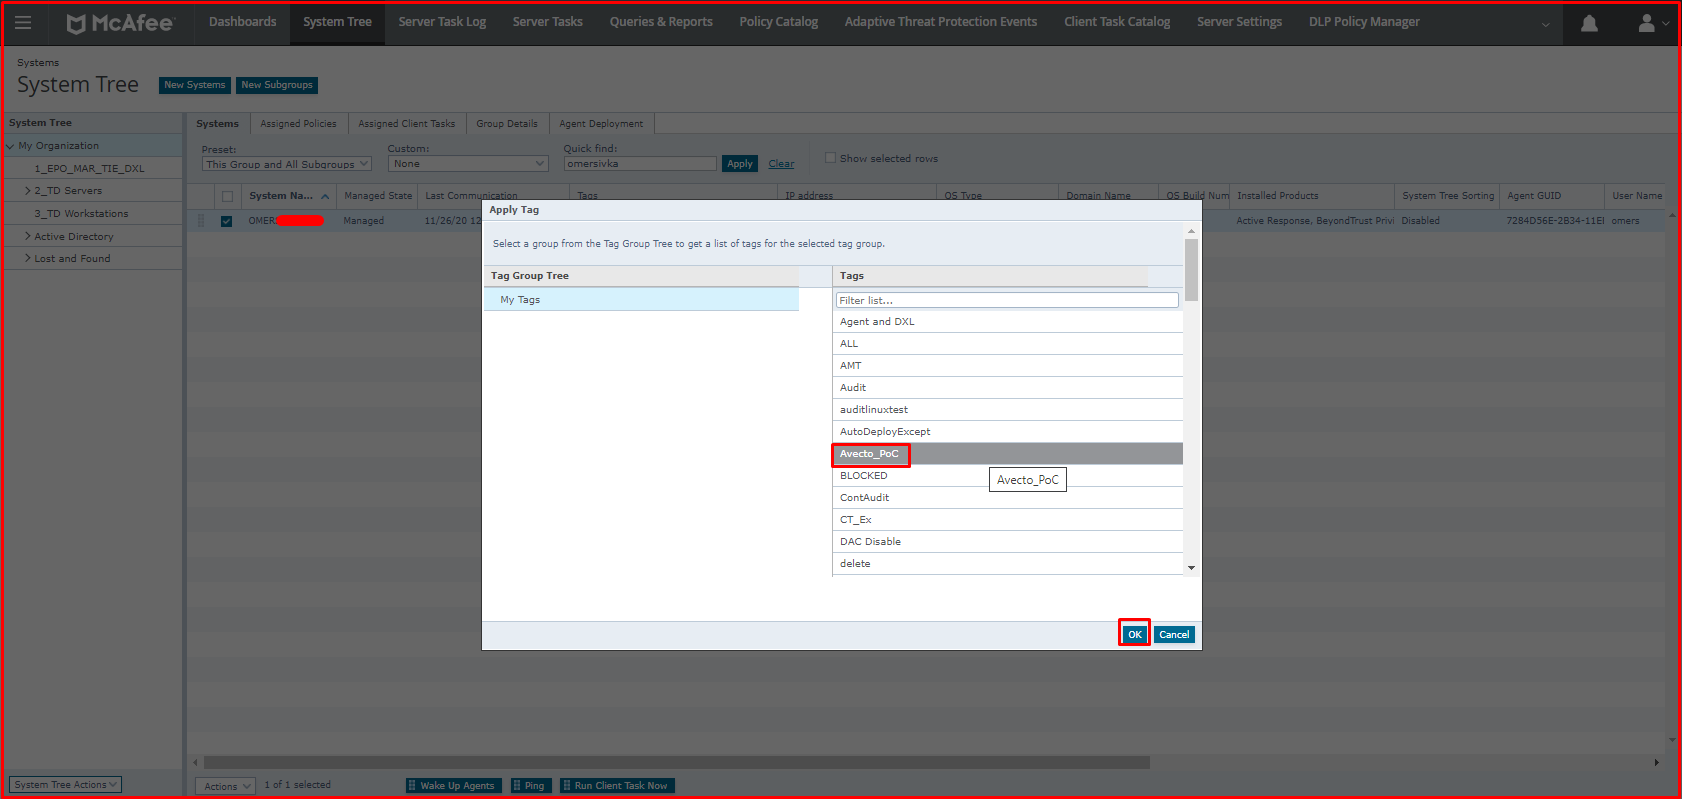
After preparing the tag, we select the computer to send the policy on System Tree. Below, we click the “Action> Tag> Apply Tag” button.

We select the “Avecto_PoC” tag on the “Apply Tag” page. We click the “OK” button. In order for the computer to get an instant policy, you can get a policy by clicking “Wake Up Agents” below.
Finally, you can see in the picture below that it will not open when a normal user runs the AnyDesk application again. You can see that a message is given by Avecto when AnyDesk is not opened.