
 by
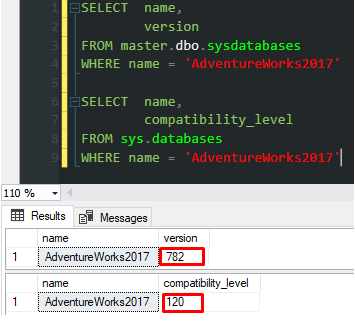
by In our first image, we see compatibility_level as 140, which came in 2017. This can be confusing for “downgrade” operation. Changing this from 120 “compatibility_level” to 120 doesn’t mean you can move your database to a 2014 SQL Server.
As you can see in the first query, we see that our database is also in the 904 version, which is kept as “Internal Database Version”. This informs us that our database is on SQL Server 2019.

You cannot restore a SQL Server with a lower version than the current version. We can understand from this information that you need SQL Server Internal Database Version 904 (SQL Server 2019) and above.
With the Export Data-Tier Application feature, we can move on to how we can do this.
Situations we should be aware of
You have to be very careful with the words Extract and Export. Extract process gives you a Schema-based “.dacpac” file. Our transaction is “Export”. Here we take Data and Schema together. The extension is “.bacpac”.
You can comfortably process SQL Server 2014 and above. You have the possibility to experience different problems depending on the data types related to older versions.
This process does not carry the data of objects such as index, even if it carries your data held in the tables. After writing the scripts of the indexes, he wants to enable “Rebuild” and enable it. This creates the possibility of a long downtime in the Import phase.
Some situations I need to touch on
It is useful to get Full Backup before applying.
If you remove the users you defined under the database before exporting, it will reduce the error rate.
If you are using too many “Stored Procedure”, “Function”, “View” and in “Cross-Database Queryler Import” phase in which we access our other databases, it will fail.
Commands containing xp_cmdshell, sp_start_job processes will give an error during the Import Phase.
Let’s take a look at export and import transactions.
Our main goal is to carry the data in a practical way. With “Generate Script” feature, Stored Procedure etc. If we remove these objects from the database before we start the Export process after we receive the CREATE scripts of our objects, we will not have any problems related to them. After our import operations are completed successfully, we can quickly create these objects again on our new database by running this CREATE script file we created.
Let’s start our Export transactions. We will do it on the “AdventureWorks2017 OLPT” version that everyone can access. As you can see in the “Internal Database Version” picture, we will move this database from a server in SQL Server 2019 version to a server with version 782 (SQL Server 2014).
As the first transaction, we enter the “Tasks> Export Data-tier Application” transaction via the database.

On the “Export Settings” page, we are asked to specify a disk space to extract our “.bacpac” file. Let’s select the desired location from the “Browse” option.

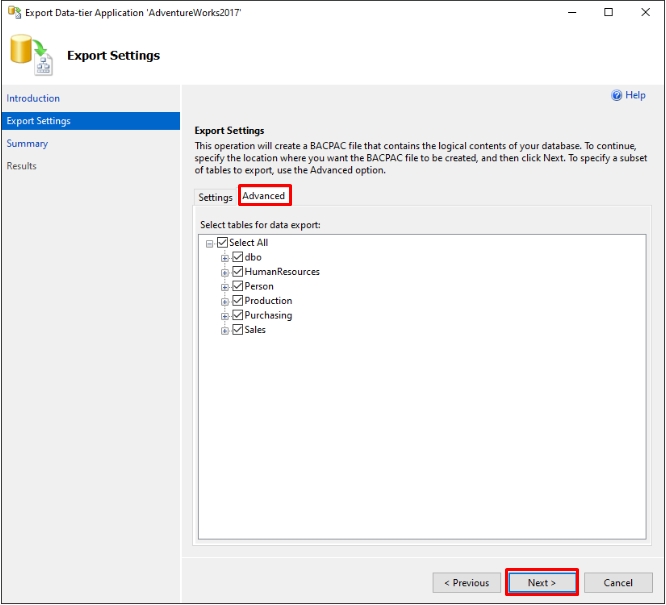
“Select All” option is selected by default in the “Advanced” tab and we can select or remove the desired scheme from here. We leave it all selected here. Then click the “Next” button.
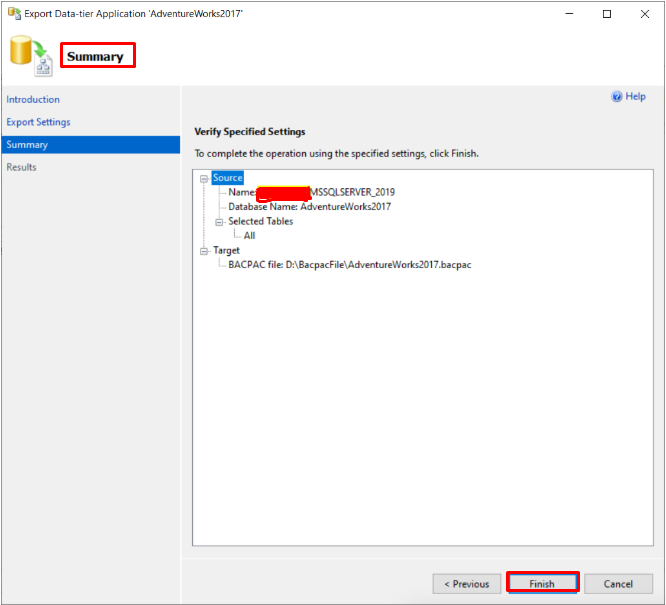
Finally, we can see all our settings on our summary screen. Let’s go to the next step by clicking the “Finish” button.
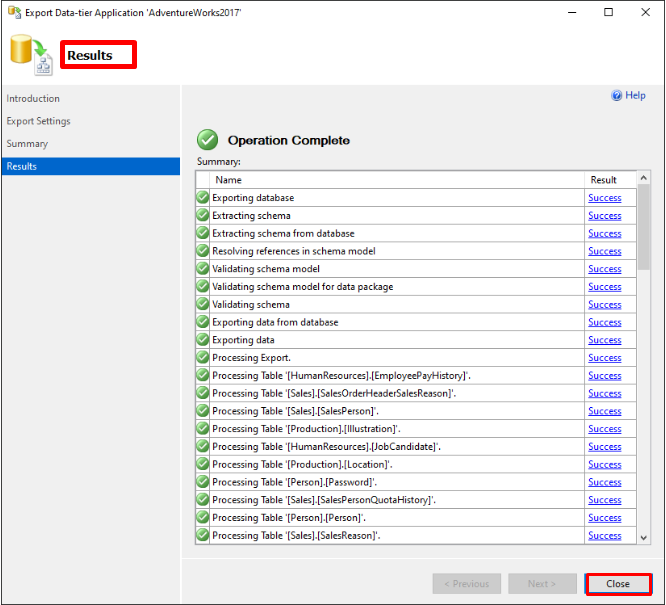
We successfully export our database as seen on the “Results” page. Generally, there is not much problem at this stage. The part where the main events will develop begins on the Import side. Let’s close our page by clicking the “Close” button.
The .bacpac file we extracted is 17MB, the size of our database is 336MB.
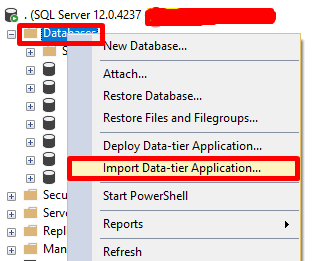
Now going to our other server where MS SQL Server 2014 is installed. We select our “Databases> Import Data-tier Application” option.
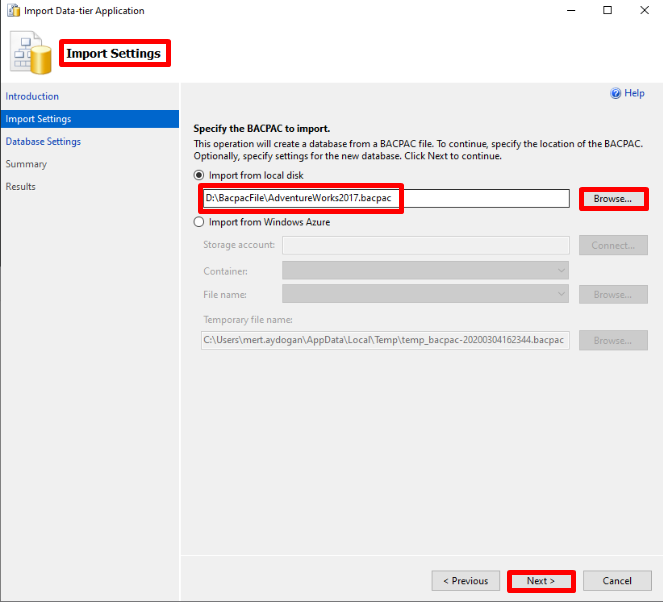
On the “Import Settings” page, we show our .bacpac file that we export from the “Browse” button. Then click the “Next” button.
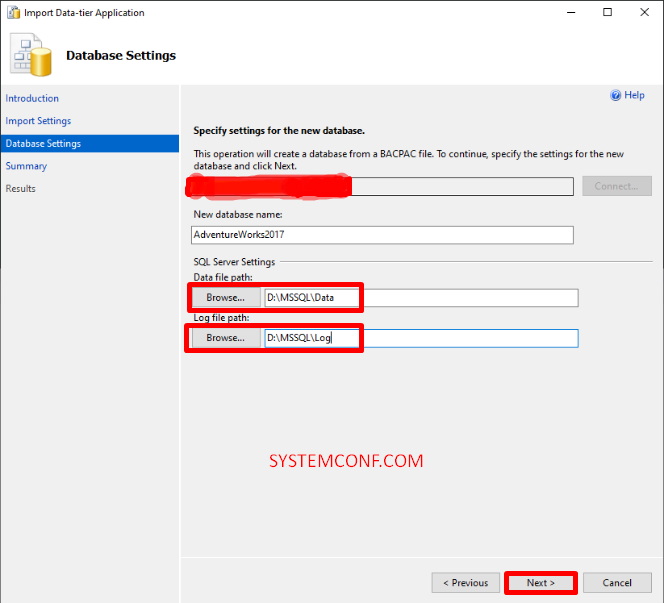
On the “Database Settings” page, he asks where to keep the .mdf and .ldf files for the newly created database and with which name we want to create our database.
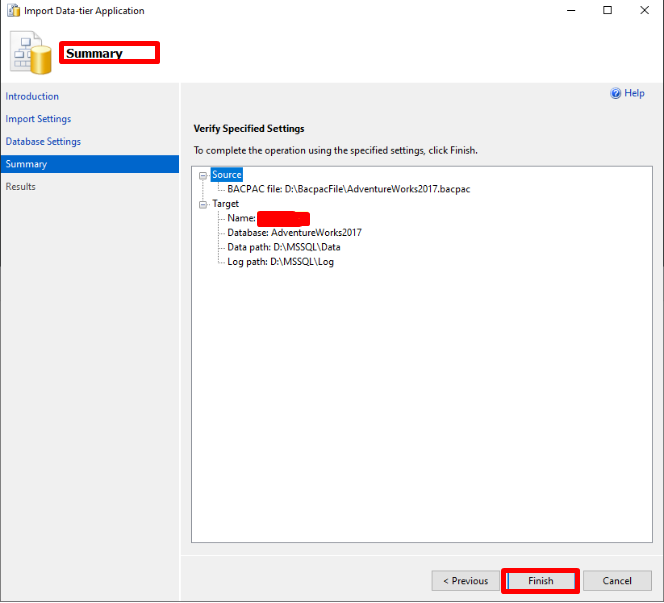
We expect the transfer to be completed by pressing the “Finish” button after checking our latest information before importing in the “Summary” page.
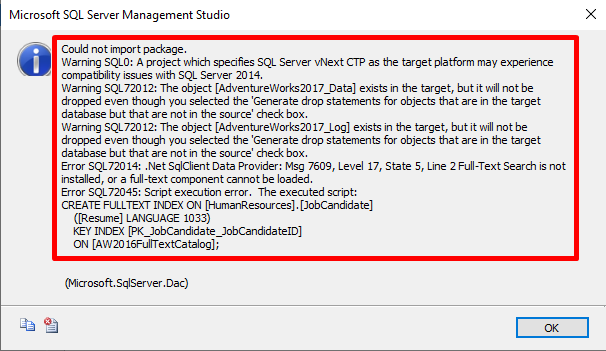
The “FULLTEXT INDEX” property failed because it is not active in the database. The procedure to be performed here will repeat the process by trying to detect and remove how many tables belonging to this feature in the existing database from the system tables, and then try to import first, then Export.
When I repeat the process, as you can see on the “Results” page, Data and indexes were created. Immediately after, Enable indexes to end the process.

When we check our new database, we can see that it works in 782 (SQL Server 2014) and 120 (SQL Server 2014) compatibility mode.
Finally, do not forget to take your backups and make sure your backups work while doing the operations here.


