by
by We talked about Freedos in our previous article. You can look from here. Now we will show you how to install Windows 10 on a computer with Freedos. If the following screen appears when you turn on the computer, it means that the Freedos operating system has been installed on your computer. Freedos is actually an operating system. It is an operating system published by some developers as a continuation of the DOS operating system that Windows used to be no longer developed. It is not considered an operating system that can be used on today’s computers.

Installing Windows 10 on a Freedos Computer
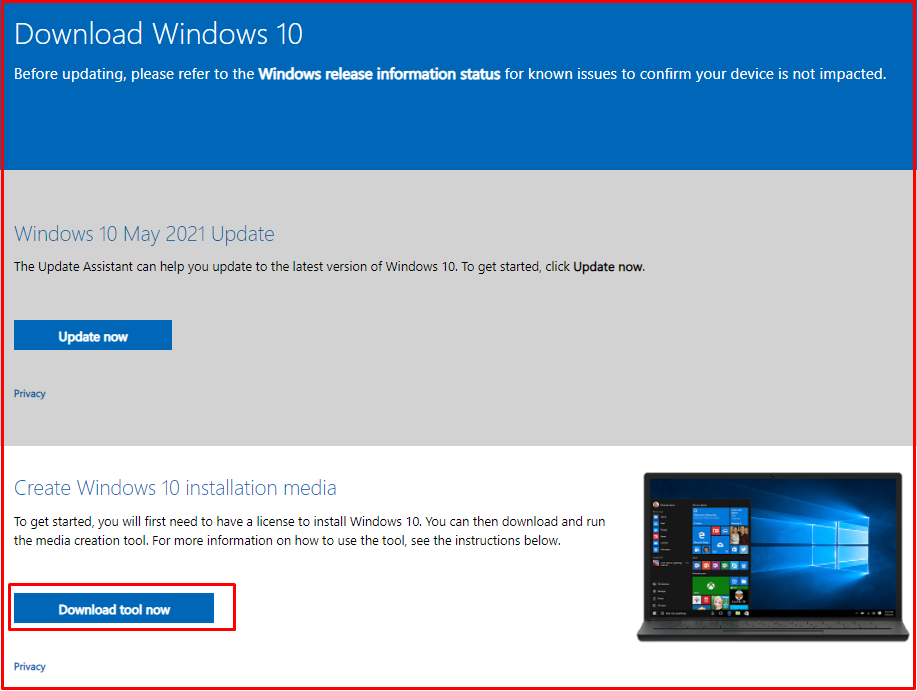
We recommend that you first download the Windows 10 operating system from a reliable source before proceeding to install Windows 10 on a FreeDOS computer. The most reliable source for this is Microsoft’s own site. Click on the link HERE to go to the required download page. Then you can download the Windows 10 download tool to your computer by clicking the blue button we showed above.
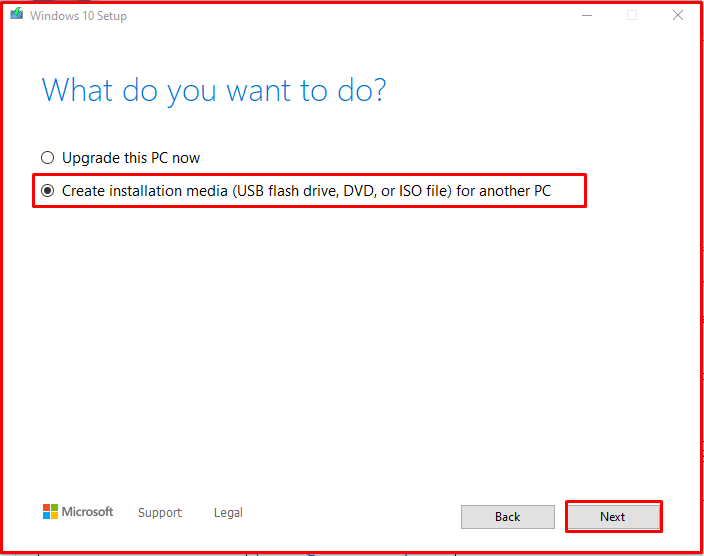
Then open this program you downloaded, when you click the “Accept” button, a page like the one below will open. Select the section we have shown as selected below and click the “Next” button.
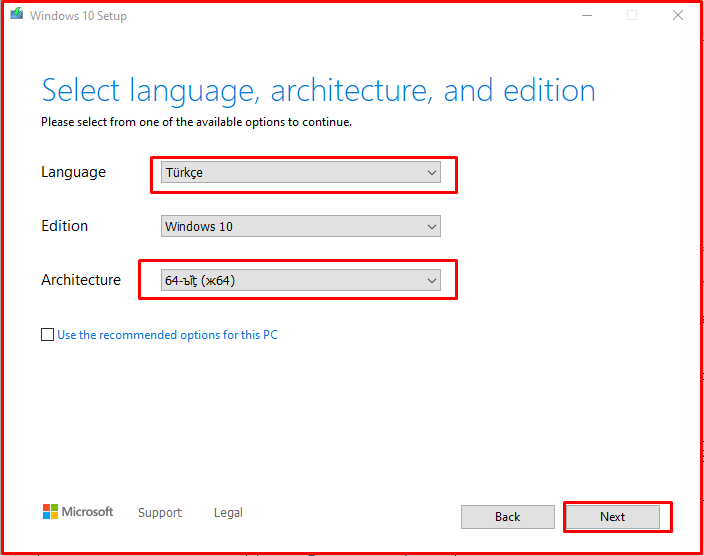
After clicking Next, you will see a screen like the one below. From here, choose the language and architecture that suits you. 64 bit is used for current computers. Then click the “Next” button.
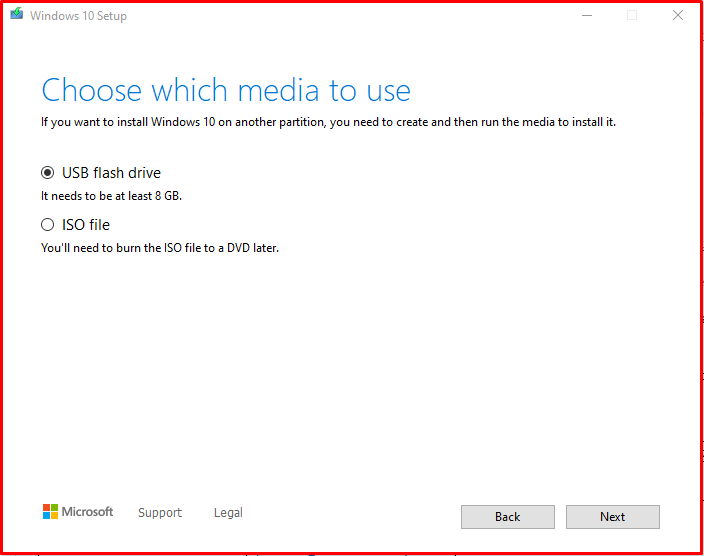
You will then see a screen like the one below. If you use the first option, Windows 10 will be automatically downloaded and written to a USB stick plugged into your computer. In the second option, only one ISO file is downloaded and you have to burn it to your USB stick with software like Rufus. In our previous article, we explained how to install Windows 10 from the Rufus program to USB. You can read the article by clicking the link HERE. You can use the first option if you want. Just remember that there must be at least 8 GB capacity and as a result of this process, the data in your flash memory will be deleted. The duration of this process may vary depending on the speed of your internet and flash memory.
After printing Windows 10 to USB, start your Freedos computer and enter the BIOS screen. (To go to the BIOS, press f2 or delete while the computer is booting.)
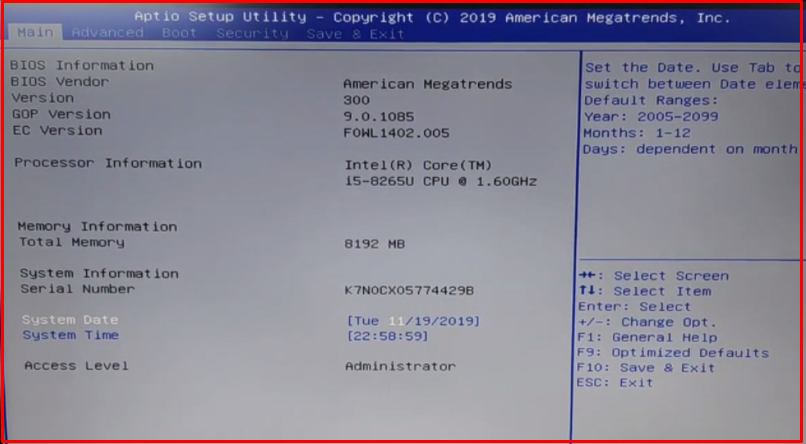
Under the “Boot” menu, set the “Fast Boot” option to “Enabled“.

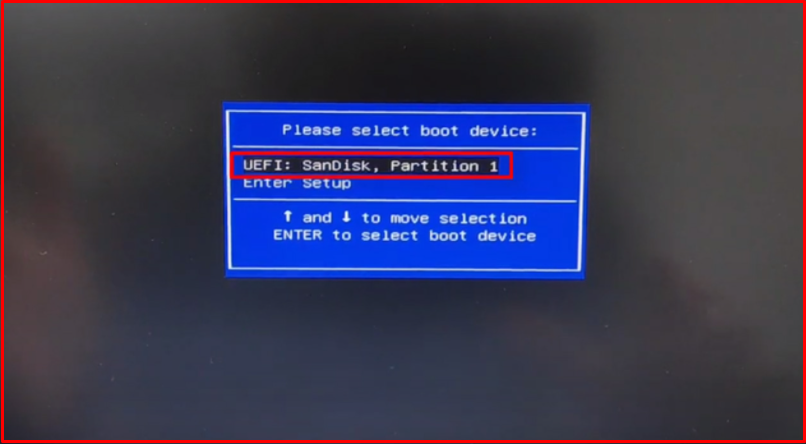
We save the changes we have made and exit the “BIOS” screen. Plug your USB memory into your Freedos computer and restart the system. While the computer is booting, press the “Boot” menu button repeatedly depending on your model. (The boot menu key is usually F12). In the Boot menu that opens, select your USB memory and the Windows installation will begin. The important point you should pay attention to in this menu is that there is the phrase “UEFI” next to the USB memory. If you have a computer manufactured around 2013 or newer, the “UEFI” option will be activated directly. If this phrase still does not appear, you can go back to the BIOS screen and change the “Boot Mode” to “UEFI” from the “Boot” menu.
After following all the steps, you will be able to complete the Windows installation on your Freedos computer without any problems. You can follow these steps in our previous article about installing Windows from USB. You can read the article by clicking the link HERE.