by
by After the Active Directory domain structure is established, we will explain how to make client computers a member of the domain environment. The right of client computers to join the domain is normally only the members of the Domain Admins group. In addition, ordinary users can be given the right to add their computers to the domain with the Add Workstations to domain setting from the GPO settings in the active directory.
The information that needs to be known for the client computer to join the domain is given below.
If DHCP is not configured in the structure, we need to manually give an IP address to the client computer that we will add to the domain. Below you can see the IP configuration of the client computer in our structure.
IP Address: 192.168.254.33
Subnet Mask: 255.255.255.0
Gateway: 192.168.254.2
DNS address: 192.168.254.10
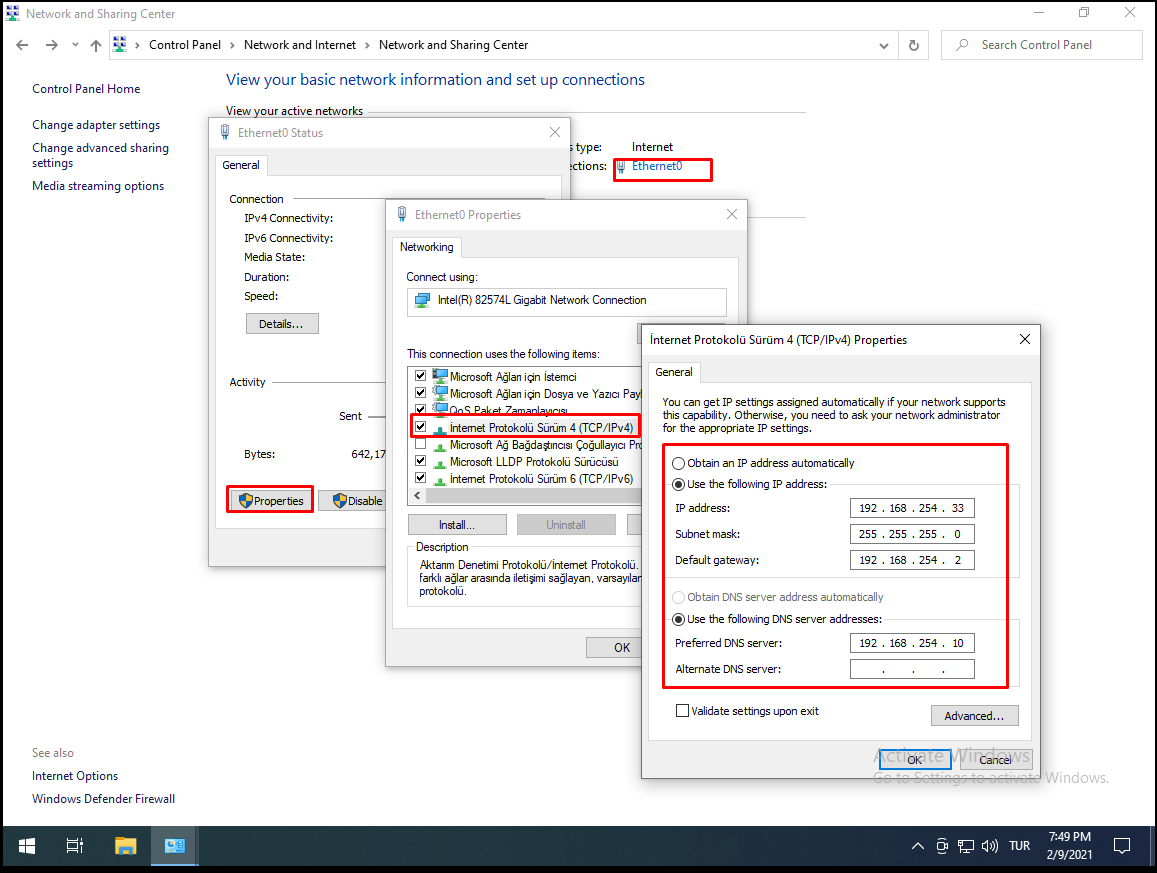
The client computer we want to specify here must be on the same network. Or, the necessary nat operations must be done. Also, if there is no different DNS server in the DNS address structure, the machine with Active Directory must have the IP address. Again, we need to know the domain name and the authorized user name and password for the computer we will add to the domain. This is usually done with an administrator user. Of course, user names change depending on the authorizations within the structure.
If we talk about our own structure, there is an active directory machine installed on Windows Server 2019 and the computer we will include in the domain is Windows 10.
Note: The computer we want to include in the domain includes the same steps to include a computer running Windows 8, Windows 7 and a computer running Windows Server 2012 into the domain.
Inclusion of Client Computer in Domain
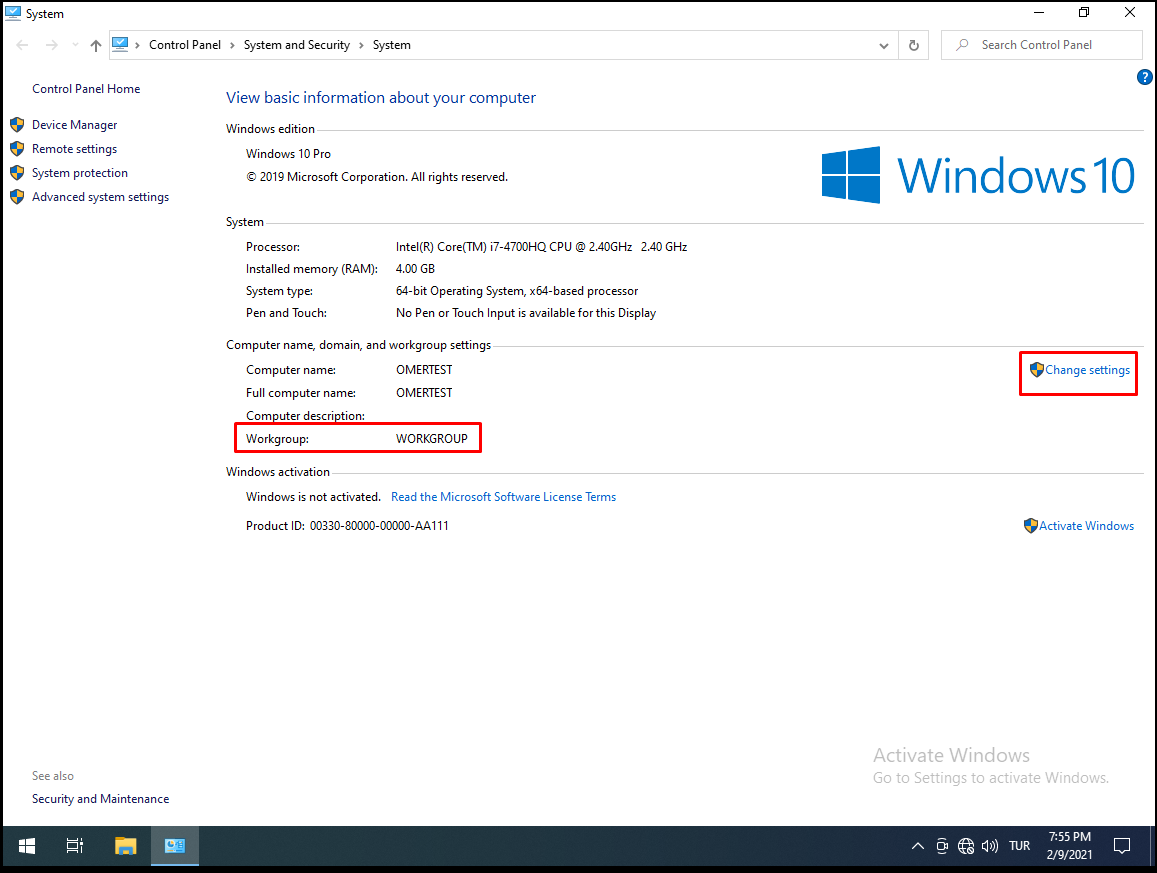
Now we can begin to include the client computer in the domain. Right-click on my computer and select “Properties“. This client computer appears as “WORKGROUP” since it is not in any domain until now. We click on the “Change Settings” tab.
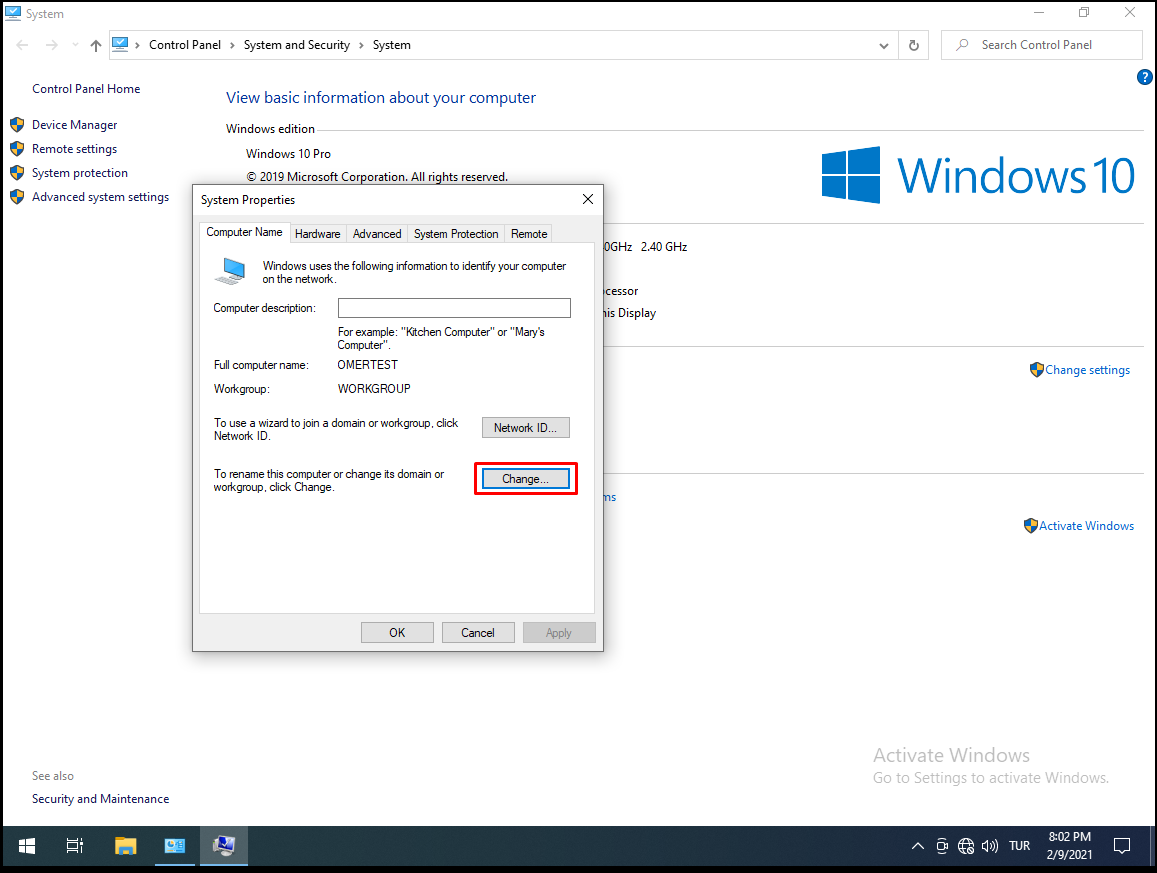
We click the “Change” button on the System properties screen.
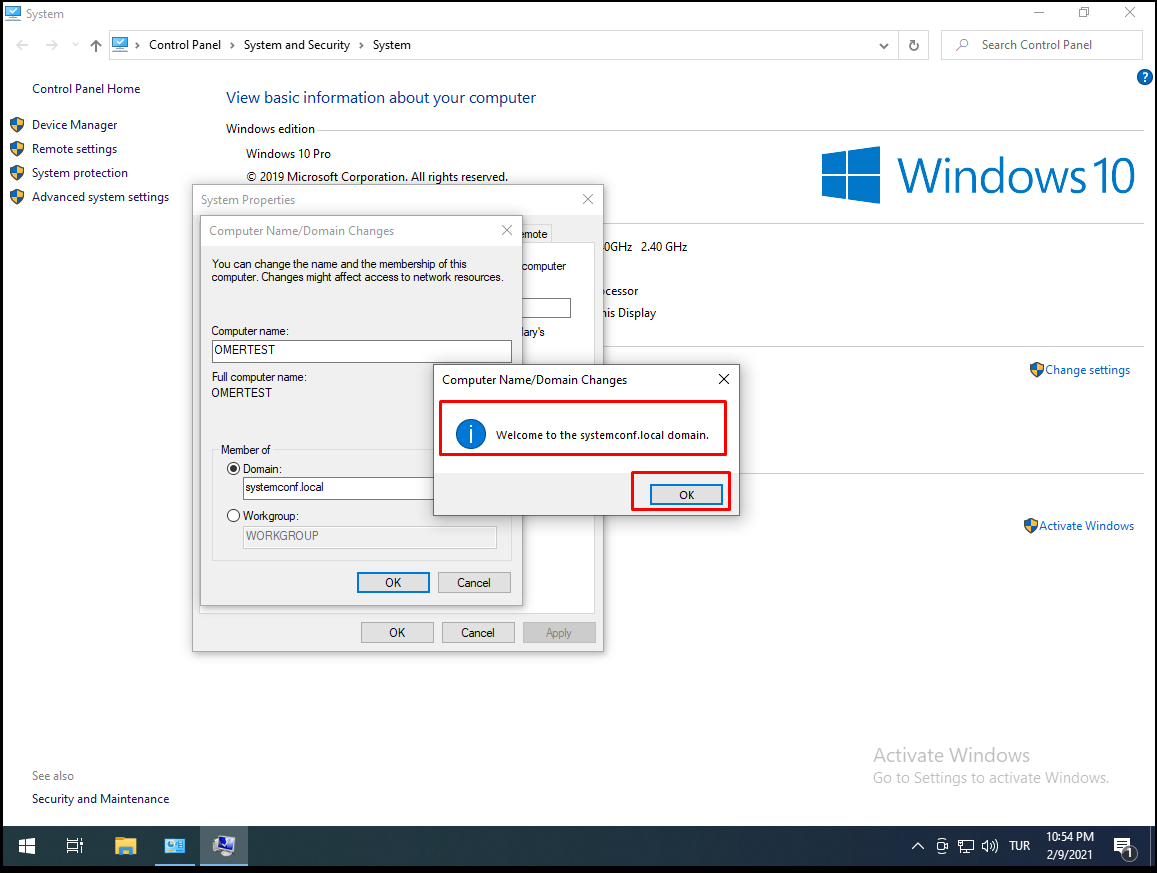
On the “Computer Name/Domain Changes” screen, we will add our client computer to the domain, so we select “Domain” from the “Member of” tab. After choosing a domain, we write our domain name. We click the “OK” button. If you want, you can change the computer name from the “Computer name” section.

He asks for an authorized username from us. Our authorized user in our structure is the administrator. We are writing the user “administrator“. After entering our password, we press the “OK” button.

After clicking the “OK” button, the following screen appears. If there is any error screen, it is useful to check your IP configuration, DNS configuration, domain name and finally authorized user information. We click the “OK” button on this screen.
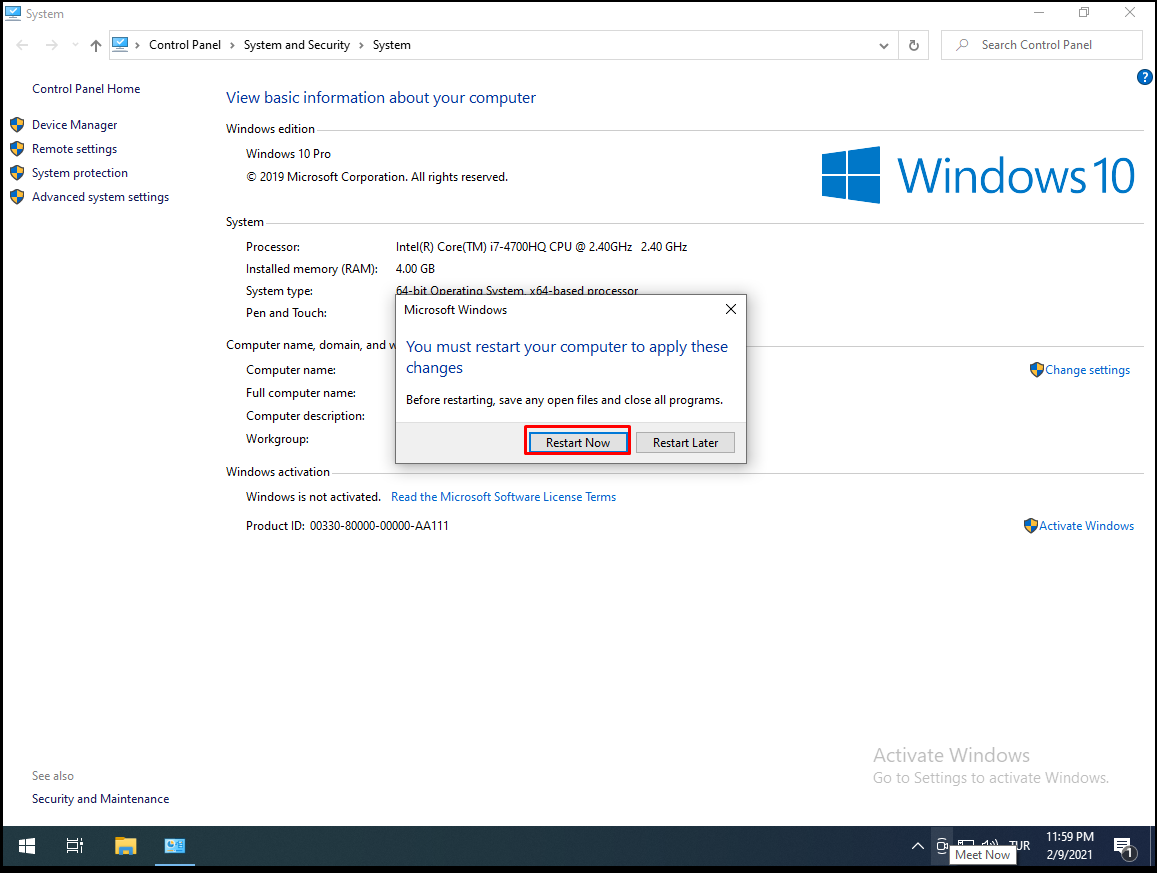
On this screen, it asks us to restart our client computer. On this screen, we click the “OK” button.

On this screen, we click the “Restart Now” button to restart the client computer.
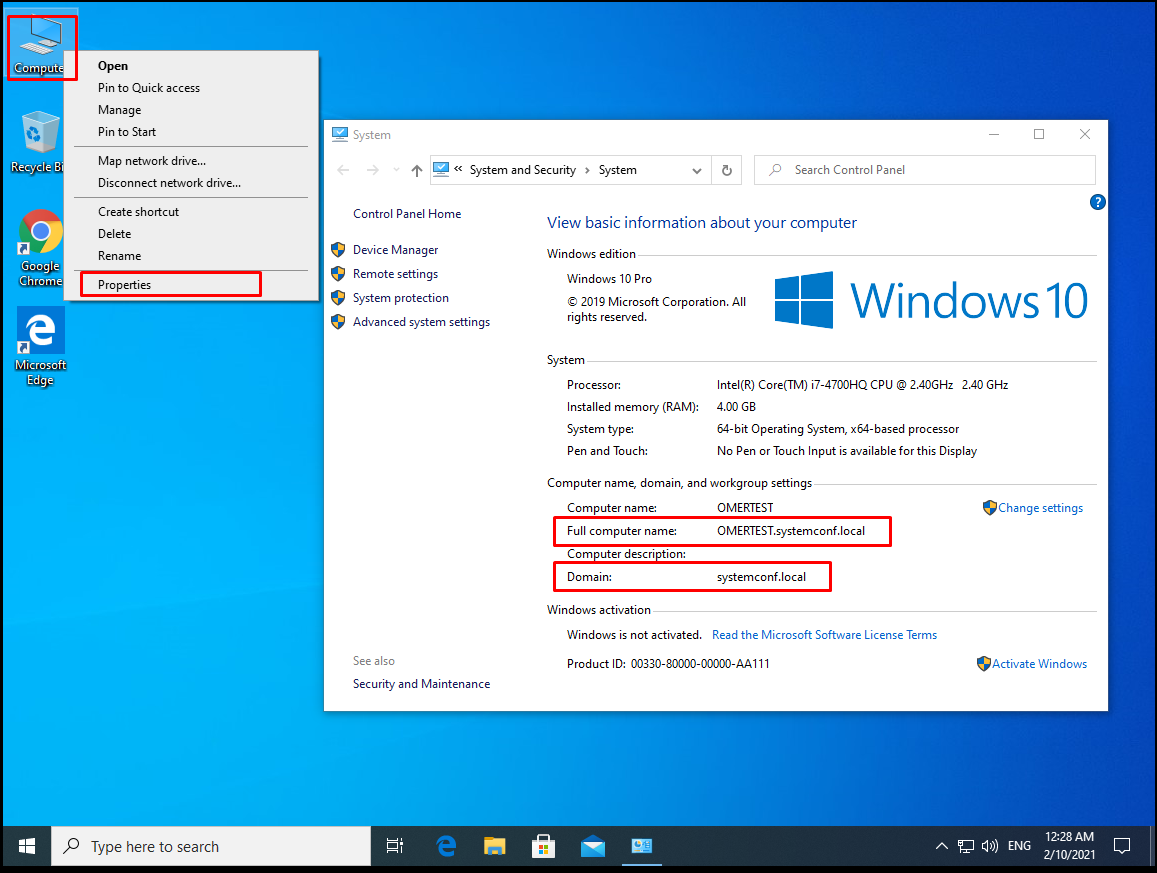
Finally, after our computer restarts, we right-click “Computer” to make sure that the process is done correctly. Then we choose “Properties“. In front of us, the system screen is opened. When we look at the area underlined in red, we can see that our Domain name is “systemconf.local” and when we look at the Full computer name, it is “OMERTEST.systemconf.local“.